Archive for the ‘Ingredients’ Category

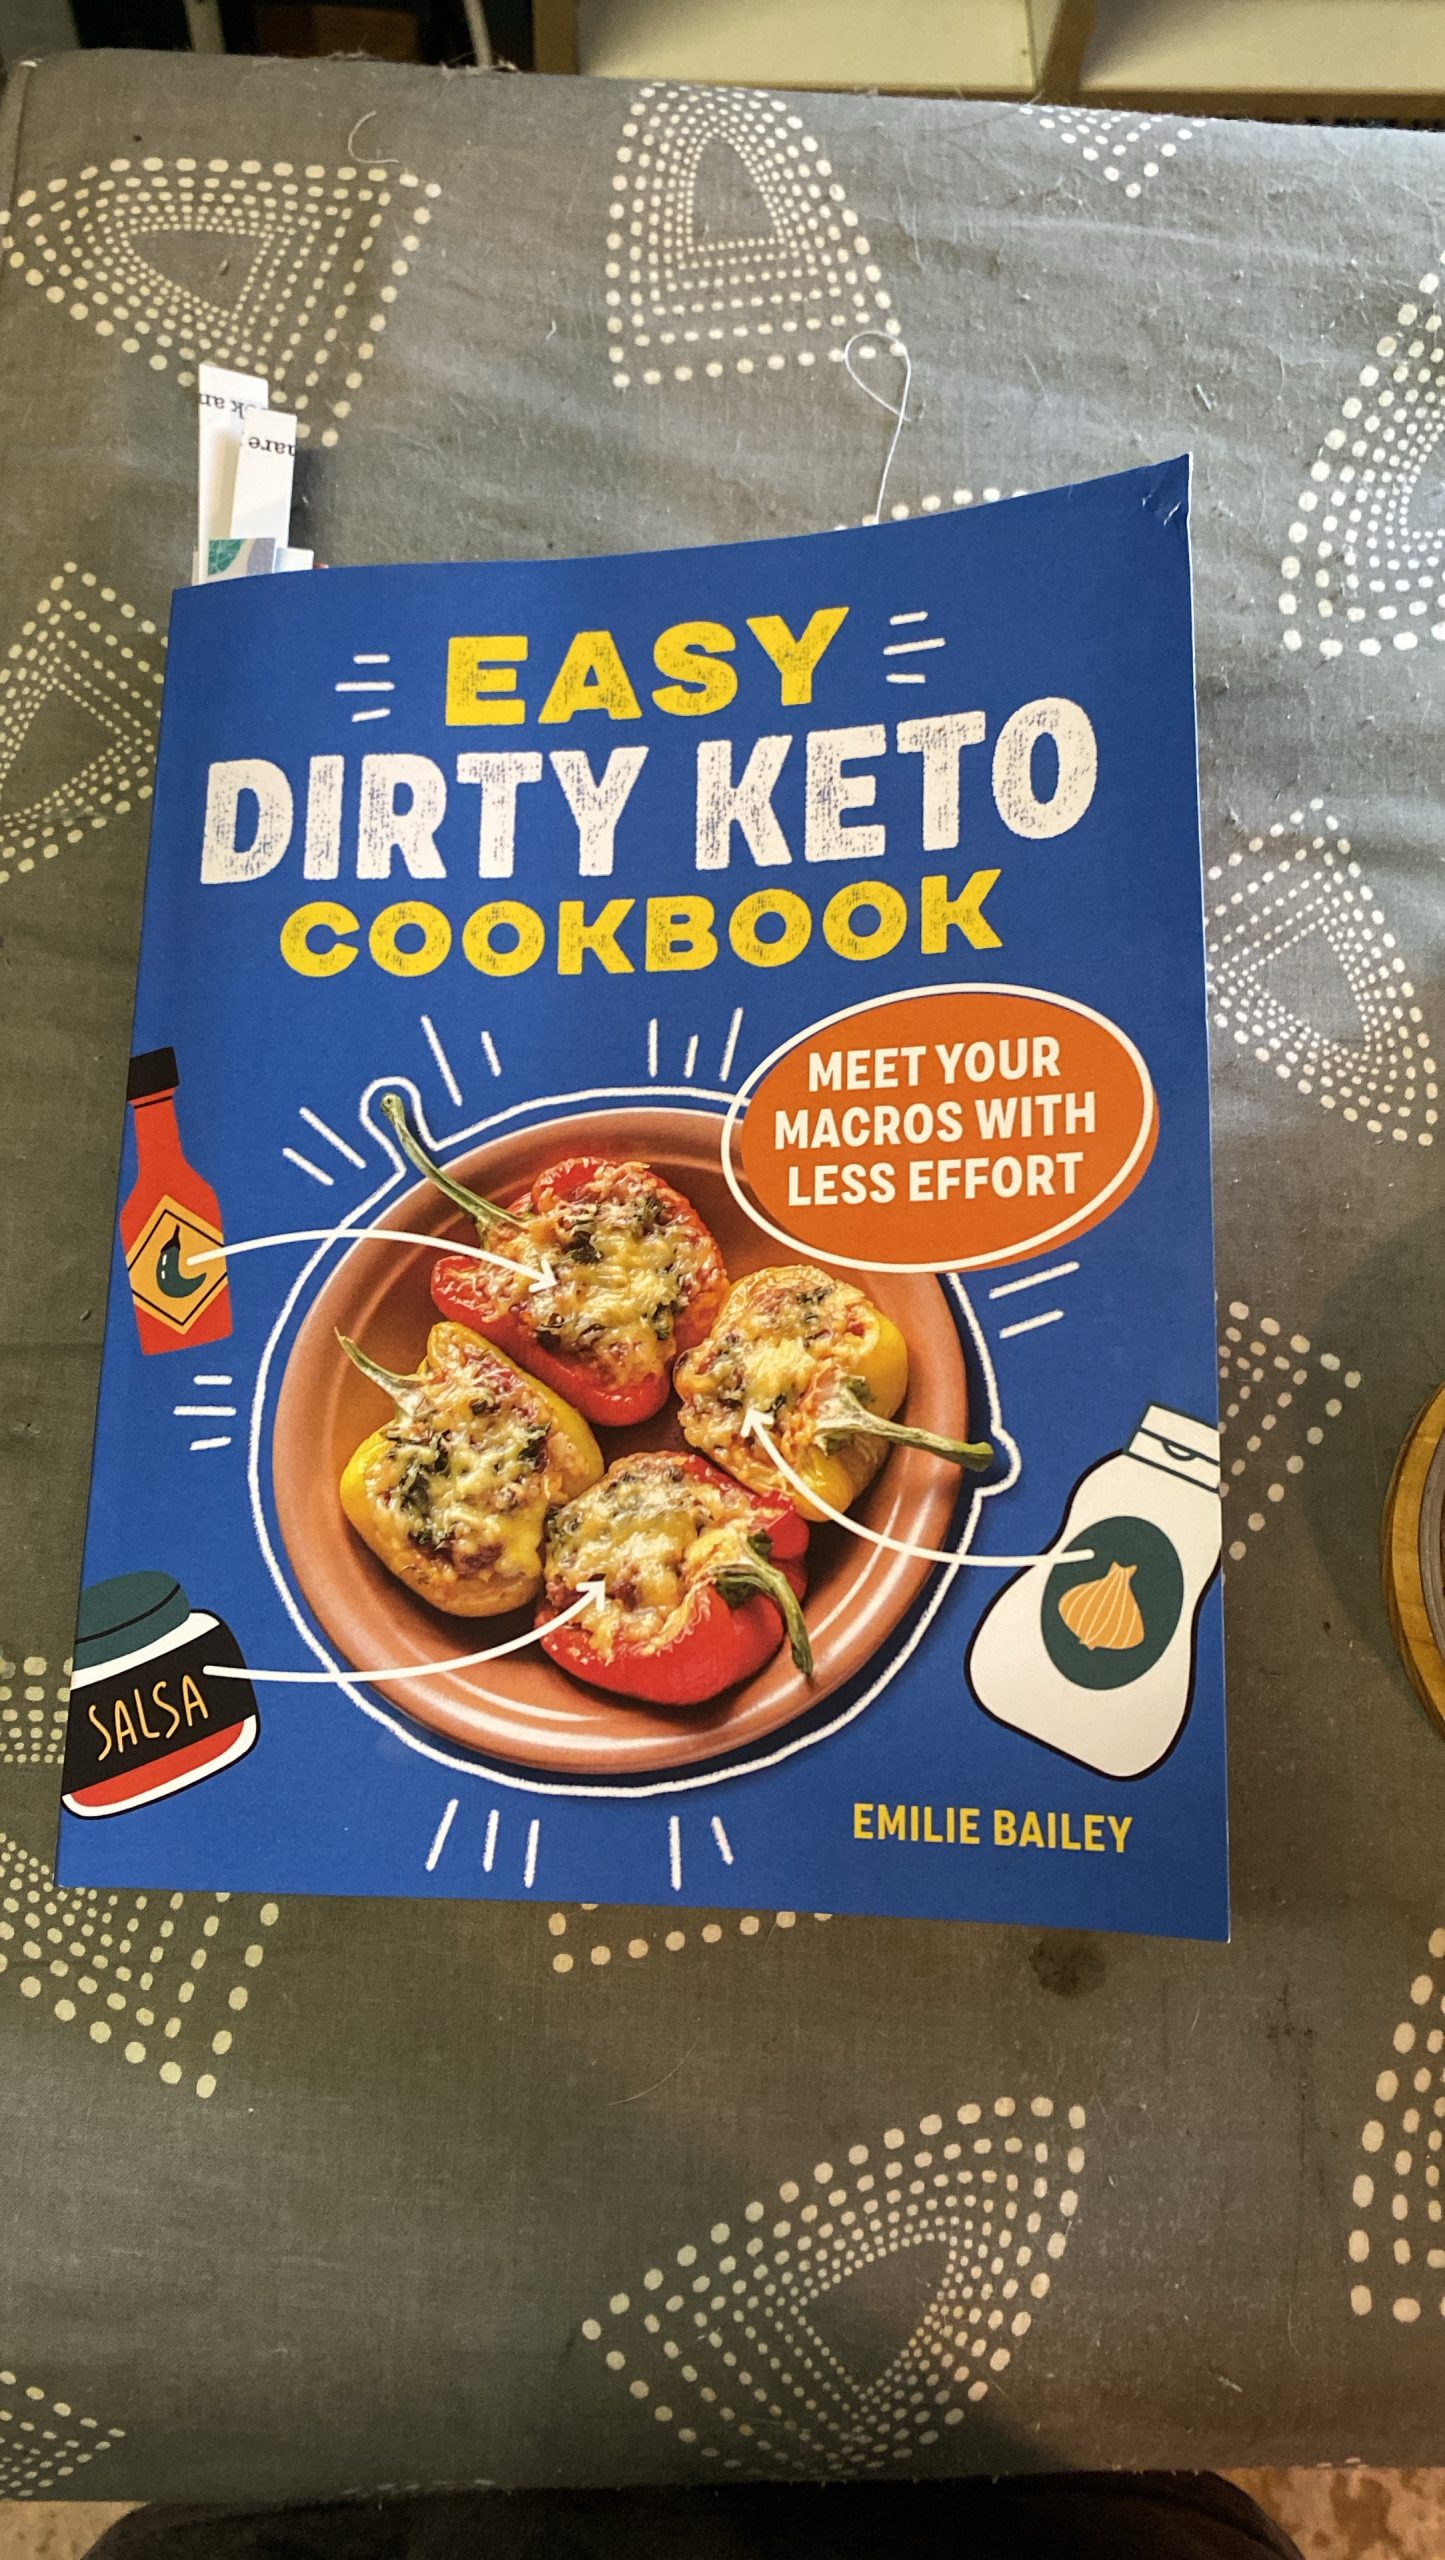
Easy Dirty Keto is the latest cookbook by Emilie Bailey. Today I’ll review it and tell you why it’s a good book to have in your collection, whether or not you eat keto.
Hello, again, Dear Readers:
Apologies for my tardiness, it’s been a busy few weeks. We watched as Hurricane Ian went through Florida doing pretty much the same thing Hurricane Ida did in Louisiana last year. One of my project managers lives right in the strike zone, and she finally got power and Internet back a few days ago. Don’t we know about that!
Others have checked in from the area on social media. Keep these folks in your thoughts and prayers, although I think the good Governor DeSantis has everything well in hand. We’ve been through it, and we know some folks who are still not back in their homes more than a year later. Everything moves VERY slowly here, but Florida’s working it.
We’ve had a few lovely cool fronts come through, and another brief one graces Texas and Louisiana tomorrow. There’s been scant rain for over a month. Autumn came early this year, and we’re thankful. I can open the windows some days and clear the air (especially after BF has been cooking.)
As promised, I’ve got a delicious new cookbook to tell you about, and five delicious recipes you can enjoy this week.
Get Ready For Dirty Keto
Are you looking for new and delicious keto recipes or just delicious food that’s easy to make? Well, aren’t we all? Today I’ll tell you all about the newest—and possibly final—book from The Texas Granola Girl, Emilie Bailey. This book covers both bases.

The book.
Let me say at the outset that I was fortunate to get a review copy of Easy Dirty Keto before its release on August 25th. Thank you, Emilie! (I feel special when that happens.) I’ve already left a five-star review on Amazon, because, well it deserves five stars, in my opinion. But that’s because the food is good.
Honestly, if the recipes weren’t any good, I wouldn’t be writing an entire blog post—it would be a short “news item” with my polite opinion. But this is Emilie, and the food is really, really, good—as usual.
Let’s get cooking.
What Is Dirty Keto?
No, it’s not something you get into trouble for, should be embarrassed about, or risk arrest. Nothing like that. It’s a form of keto that stays within the parameters but isn’t exact.
There are two types of keto:
- Clean keto, where you eat “clean,” no processed foods, artificial sweeteners, and the like
- Dirty keto, where the rules are a little looser, but still help you meet macros and stay in ketosis
Ingredients like these might be considered “dirty keto”:

Remember that this is non-dairy. Definitely dirty keto but I haven’t tried it myself.

Walmart’s own version and I haven’t tried this one either.
Or this one:

I haven’t tried this one yet, but will one day.
And if you wanted to classify my keto, it would be called “filthy dirty keto.” Because I can’t say I eat keto every day—especially when BF makes jambalaya or one of his other “specialties.”
The rule is to stay in ketosis. I can’t say I’ve ever checked that. Still, dirty keto isn’t as strict, and the variety of foods is wider because you can include some things that you wouldn’t under “clean keto.” You’ll see what I mean in the recipes.
Many people find clean keto to be difficult to sustain, or they just get bored with the same types of foods. With dirty keto, there’s a little more to enjoy that’s still “keto.” Emilie explains in the intro–she’s busy, like most people, and needed to loosen the rules a bit. One example is the sugar-free version of Cool Whip.
I’ve tried these five recipes myself and give my opinion on each. (Spoiler alert: they’re delicious!) I’ll be trying more of them in the future, and I may include them in a future blog post. So, here they are for your information and enjoyment.
Chorizo and Spaghetti Squash, Page 125
Let me say right up front that this is the recipe I really wanted to make first but had to wait until BF wasn’t home. I don’t want to listen to the retching.
It’s simple and straightforward. You might not believe it was really keto. The setup:

Just a few ingredients for this one.
First, start with the spaghetti squash:

This makes cutting easier.
Cut in half and scrape out the seeds:

Right into the trash, or elsewhere if you plan to save the seeds. One of these days I’ll do just that.
They should look like this:

Just like this.
Put them face down onto a microwave-safe plate and cook on high for ten minutes, until it’s fork-tender.

Just like that.
When it’s done, it looks like this:

This is tasty all on its own
While that’s cooking, measure out your spices and things:

Easy!
Then remove the chorizo from the casings and add it to the pan.

Just like browning ground meat.
You won’t need oil, because the chorizo gives off plenty once it starts cooking. Remember, it’s a highly seasoned pork sausage.

Doesn’t take long.
Once the chorizo is cooked, add in the pico de gallo:

It’s salsa, but I’ll explain in a minute.
Mix that around, then add the salt and the spaghetti squash:

Just like that
Toss that all around to distribute:

Just like that.
Then sprinkle the half-cup cheese on top:

Just like that.
And dinner is ready!
It takes about 30 minutes or so, but it’s really fast and easy. If you want, you can cook the spaghetti squash ahead of time (keep reading), refrigerate it, and add it to the pan when the chorizo is cooked. If the spaghetti squash is cold, you may need a few more minutes to let it reheat in the pan before topping it with the cheese.
When I finished, I posted this picture on Instagram:

Dinner!
And I tagged Emilie. She saw it and responded that it was one of her favorite recipes from this book. Well, yeah! But really—chorizo. Do we need anything else?
What I Did Wrong
I bet you weren’t expecting to read that. Let me explain.
The recipe was made according to Emilie’s directions. But because we were on a rushed trip to Winn-Dixie, two things were different:
- I bought salsa, not pico de gallo because that’s what I could find quickly
- I also couldn’t find the queso fresco quickly so I relied on the Cotija cheese I had in the freezer
Guess what? Both were wrong for this recipe—but it was still delicious!
The salsa I bought:


And the magic secret ingredient:

See it?
That’s right, sugar. They call it “cane sugar” so they can show that it’s “natural,” and not from high fructose corn syrup. It’s still sugar, though, and it matters if you’re a diabetic watching sugar or you’re just trying to cut down or eliminate your sugar consumption.
The Cotija cheese is tasty but has a stronger taste, similar to Manchego, but not as potent as Feta. Just not the same as Queso Fresco, which has a salty, mild taste. I love Queso Fresco, and BF won’t touch it, so it doesn’t last long when I buy some. Fortunately, the recipe only calls for a half-cup of cheese as a topping, so it doesn’t overwhelm. I was looking forward to the milder cheese taste.
A subsequent trip revealed that our local Winn-Dixie simply doesn’t carry Queso Fresco, but Walmart does, along with pico de gallo. Good thing, because there’s suddenly a lot more Spanish spoken in Walmart here than before. No kidding.
Because BF was gone on a recent weekend, I made it again with the “right” ingredients. (He still won’t touch it.) I made my own chorizo because I didn’t have any but did have ground pork in the freezer. Really good both ways, but I’ll stick with the recipe next time.
Here’s the printable recipe:

Chorizo & Spaghetti Squash Toss
From Easy Dirty Keto by Emilie Bailey, Page 125 (c. 2022)
Ingredients
- 1 medium spaghetti squash, about 2½ to 3 pounds, or four cups cooked spaghetti squash
- 1 pound Mexican chorizo, casings removed
- 1 cup pico de gallo
- ½ tsp Kosher salt
- ½ cup Queso Fresco (fresh Mexican crumbling cheese)
Instructions
- Carefully cut the ends off the squash, then slice it in half lengthwise. Remove the seeds, then place the squash halves cut side down on a microwave-safe plate. Microwave on high for ten minutes, or until the squash is soft and fork-tender.
- While the squash is cooking, preheat a large skillet over medium-high heat and add the chorizo to the skillet. Break apart the chorizo with a spoon and cook until lightly browned, about 5 to 7 minutes. Add the pico de gallo and cook for another 2 to 3 minutes, until the onions begin to soften.
- When the squash is cool enough to handle, remove the strands with a fork, and add them to the skillet. Season with the salt, and toss with the chorizo mixture until warmed through.
- Remove the skillet from the heat, top the mixture with queso fresco, and serve.
I have updated the chorizo blog post with a printable recipe for that, too.
Notes About Spaghetti Squash
Emilie calls for microwaving the spaghetti squash here. And for this recipe, it works great. But there are other ways to cook this wonderful vegetable if you like it and want to make it for something else.
It’s low-carb and keto and tastes good when cooked correctly. It’s an ideal substitute for wheat-flour spaghetti, and tasty with any kind of spaghetti sauce. But of course, it’s called “squash,” and that puts BF right off eating any. His comment, “I’ll try anything you make” is rendered null and void when anything contains the word or ingredient “squash.”
My first encounter was some 20 years ago with one of Suzanne Somers’s many low-carb cookbooks. Her recipes called for the same prep: cut in half and remove the seeds. But then the recipe called for:
- Rubbing both cut sides with olive oil
- Putting them cut side down on a sheet pan
- Roasting in a 350F oven for an hour
You must wait for the squash to cool before handling it. Or use a thick potholder to hold the halves and scrape out the stringy flesh into a bowl. I can roast a smaller one in the countertop oven easily.
I think the recipe I tried first called for a little salt and pepper with a pat of butter, which is probably my favorite way to eat this squash. If you’re not going to use it or eat it immediately, just put it into a dish and refrigerate it until you’re ready.
Slow Cooking Spaghetti Squash
Another way I found to cook spaghetti squash is in the slow cooker. No kidding, you can totally put your spaghetti squash into your slow cooker—whole—and let it cook on “low” while you’re at work or doing other things. You must poke it with a fork in a few places like a potato, but it cooks up nicely. It’s hot, of course, so be careful cutting it open and scraping out the seeds.
Why would you do that if this recipe calls for microwaving? It’s your choice, really. You can also use the countertop oven to cook one in advance if you wanted. But using the slow cooker also means it’s hands-off and ready when you are, although it does come out softer this way. Again, use immediately or refrigerate.
If you’re making this dish on a busy weeknight, the ready-to-use spaghetti squash can make it a little easier.
However you cook this, it’s delicious in a fantastic Tex-Mex sort of way.
Barbecue Glazed Chicken Tenders, Page 95
This is so easy and tasty with just a few ingredients. Here’s the recipe:
Barbecue Glazed Chicken Tenders
From Dirty Easy Keto, Emilie Bailey, Page 95
Ingredients
- ½ cup Sugar-free barbecue sauce
- ¼ cup Sugar-free peach jam I couldn't find peach, but apricot worked well here.
- 1½ tbsp Sugar-free barbecue rub or seasoning
- 1 pound chicken tenders
Instructions
- Preheat the oven to 400°F. Line a baking sheet with parchment paper and set it aside.
- In a bowl, stir together the barbecue sauce, peach jam, and seasoning. Reserve three tablespoons of this mixture for later.
- Dip each chicken tender in the sauce mixture and place it on the prepared baking sheet. Place the tenders in the oven and cook for about 20 minutes, or until the internal temperature of the chicken reaches 165°F. Base the tenders with the reserved sauce and bake for another 5 minutes.
- Serve as desired or store in an airtight container in the refrigerator for up to 4 days.
The setup:

Again, you don’t need much, and the salt was just sitting there for some reason.
See that sugar-free apricot jam over there? It’s supposed to be peach, but that’s all I could get in Winn-Dixie. It’s close, so I bought some, and it worked just fine. On sale, 2 for $6, with a jar of red raspberry. Because let’s face it, all you need is a spoon, and you have an instant keto dessert.
So. . . .
Preheat the oven to 400F, then line a sheet pan with parchment. I measured out the barbecue sauce in a measuring cup and then kept using it because it was just easier for mixing.
Mix the barbecue sauce, jam, and either some BBQ rub or other seasoning. I used a seasoned salt mix I like to make from another book.

One

Two
Mix well

Done!
And take out three tablespoons for later. I can’t find that picture, though. But it gets easier from here.

And you have just enough.
Dip the chicken tenders into the remaining mixture, just like you were breading them:

This worked for me really well.
Drop onto the baking sheet:

Then bake it at 400F for about twenty minutes.

Once done, brush with the reserved sauce and give it another five minutes or so.

So what should you serve this with?
Balsamic Brussels Sprouts, Page 64
Make this while the chicken is in the oven. I started heating the oil first, took care of the chicken, then went on to make this one.
And if I’d read the directions ahead of time, I would have passed. Why? You’re FRYING them in hot oil on the stove. I’m not saying it’s not tasty—it is. However, I quit frying back in the ’80s, I think. Big mess, dangerous, and all that.
But. . .these little babies are SO GOOD!!!! So if you’re up to it, and you can do it safely, I highly suggest making this recipe—as is.
I can see Aunt Kathy in Texas reading this and saying to herself, “Frying? Yeah, right.” Well, here’s how it went.

The setup
Admittedly, I didn’t realize I’d need so much oil. And the big chili pot I was planning to use would have required several bottles of olive oil, so I used the smaller, 3-quart Dutch oven. Lucky me, I bought it years ago and I’m very happy I did because it’s super handy. I also didn’t have a lot of olive oil, so I used coconut oil with some olive oil, which worked just fine.
Before I started with the chicken, I put the oil in the pot and put the thermometer in with it:

This becomes bubbling hot oil, so be extra careful
You can’t see it in the picture because the inside is so faded, but 400 degrees is at the top.
I bought pre-washed Brussels sprouts, so that was a good thing:

No prep work here
I dropped them into the very hot oil slowly and carefully, half the bag at a time.

Don’t rush this!
And this happened:

They’re frying!
Use your “splatter screen,” not the pot lid, because condensation will drip water back into the hot oil and cause popping and splattering. No.

Saves a lot of mess too
Let them cook for 3 to 5 minutes, the book says. I think the second batch cooked a bit longer, maybe 6 minutes, and they came out a little better.
When you take them out of the oil, put them on a sheet pan lined with paper toweling:
Repeat with a second batch if you need to.

After the frying is completed, sprinkle on a bit of salt:

Not too much
Transfer to your serving dish and sprinkle on a quarter-cup of Parmesan cheese:

A bit more salt:

Then drizzle over the tablespoon of the balsamic reduction:

If the chicken isn’t ready, keep this dish warm until it is. But the chicken should be about ready by this time. I stuck the dish into the toaster oven to keep it warm until the chicken was done.

Perfect!
This is a seriously good keto dinner:

Dinner is served!
I admit I was just going to use my default keto recipe, cauliflower rice. And it wouldn’t be bad, either. But Emilie suggests this recipe as an accompaniment, so I made it. I’m glad I did, frying mess and all.
This balsamic reduction is a syrupy condiment based on balsamic vinegar.

Find it with the fancy vinegars
It’s not totally keto, but then, you don’t need much to add a really nice extra touch of sweetness to any dish.

Here’s the printable recipe:

Carmelized Brussels Sprouts with Balsamic Glaze
From Easy Dirty Keto by Emilie Bailey, page 64 (c. 2022)
Ingredients
- Olive oil, for frying I used olive and coconut because I was nearly out of olive
- 1 pound prewashed fresh Brussels sprouts, cut in half, dry, and at room temperature
- ½ teaspoon kosher salt, divided
- ¼ cup grated Parmesan cheese
- 1 tablespoon Balsamic glaze
Instructions
- Line a baking sheet with a layer of paper towels for draining. Into a Dutch oven, pour about 1½ inches of oil and heat the oil to 400°F over medium heat.
- Put half the Brussels sprouts and any leaves that have fallen off into the hot oil. Turn the heat up to medium-high and cook for 3 to 5 minutes, stirring them often until they are dark golden brown and crisp. Remove with a slotted spoon to the prepared baking sheet to drain. Immediately season with ¼ teaspoon of salt.
- Bring the oil back up to temperature, add the remaining Brussels sprouts to the oil and repeat step 2.
- Place the crispy sprouts on a serving plate, sprinkle with the Parmesan cheese, and drizzle with the balsamic glaze. Serve immediately.
- NOTE: Emilie says that to ensure that the sprouts come out crispy, and to reduce any splattering, make sure that they are dry and at room temperature prior to frying. Don't use frozen sprouts, since they have much more moisture. Use a screen to control the splattering but don't use a lid, which will make the splattering worse.
Guess what? I made this dinner again, this time for BF, along with the Mint Chocolate Chip Ice Cream Whip (keep reading) a couple of weeks ago. I managed to find sugar-free peach preserves, too. He was looking forward to trying this menu and really enjoyed his dinner with dessert. So we have one more “acceptable” keto dinner for BF, thanks to Emilie’s great recipes. We’ll definitely be having this again sometime.
Boogie Cheeseburger Skillet, Page 117
What led me to try this, knowing BF wouldn’t eat it? Well, there’s a lot he doesn’t eat, so there’s that. A couple of other things, too:
- A lady I’ve known for a long time in nearby Albany calls everyone “Boogie” as a term of endearment. So naturally, the title caught my attention.
- One recipe called for chipotle mayo, but I wondered where I would find it here. I mean, soy sauce is considered “international food” in our local stores. Walking through our newly renovated Winn-Dixie, I found not only the chipotle mayo, but it was also on sale, so I bought a bottle. It is SO GOOD! Then I went back and found the recipe in the digital book. Warning: it’s got a strong bite. So if peppery is not something you’d like, Emilie says to substitute regular mayo in the sauce and the milder Monterey Jack cheese for the topping.
- And one recipe called for a poblano pepper, which happened to be growing outside in the paint bucket garden. It was the same recipe, so that was my chance to use it in a recipe before it went bad. I’ve got a couple more growing this late in the year, but I can get poblanos in both Winn-Dixie and Walmart, too.
Then it was a matter of getting a few more ingredients and cooking it.

The Setup
Yes, this is sugar-free ketchup by the same company that makes our favorite barbecue sauce.

Real sugar-free ketchup, and it’s good, too.
Start by preheating the oven to 400F, mix up your mayo, ketchup, and Worcestershire sauce, and set aside.


Just like that.
If you haven’t chopped anything yet, let me give you a tip: wear gloves for nearly any type of pepper but bells:

My prized poblano
You’ll seed it and cut it into two-inch strips:

That’s where the majority of the heat is, the seeds and ribs.
You’ll need a large, oven-safe skillet for this. A cast-iron skillet or stainless one like mine is perfect. Melt the butter, then add the chopped onion and Poblano pepper. Cook for 7 to 8 minutes, stirring often until the onion is translucent and starts to carmelize.

Remove this from the pan and set it aside. Now start with the ground beef, along with the salt, pepper and garlic powder:

You’re halfway there!
Brown it up really nicely, and break it up into small pieces, which will take about ten minutes:

Then add the requisite cauliflower rice:

The magic ingredient–cauliflower rice! You knew this was coming, right?
Cook until the cauli-rice is no longer frozen, just a few minutes. Then add the onion and pepper back into the pan and stir:

Take the pan off the heat, and stir in about two-thirds of the mayo mixture we made first:

Sprinkle with the cheese:

Put the pan into the oven for five to seven minutes:

The pizza pan on the bottom rack is not needed for this recipe. It just stays in there for storage. There’s no place else to put it, so if we need the bottom rack, we just remove it and put it elsewhere until we’re done.

Done!
Drizzle the reserved sauce on top and dig in.
No, BF wouldn’t eat this either, he told me at the outset. I’ll make it again when he’s working late or I decide he can have his favorite frozen pizza for dinner.
Here’s the printable recipe:

Boogie Cheeseburger Skillet
From Easy Dirty Keto by Emilie Bailey, page 117 (c. 2022). If you like fancy burgers, this one will hit the spot.
Ingredients
- ½ cup chipotle mayonnaise, plus more for serving You can use plain mayo here if you can't find chipotle mayo or prefer less or no spice
- 2 tbsp sugar-free ketchup
- 1 tbsp Worcestershire sauce
- 2 tbsp butter
- ½ onion, cut into ¼" wedges
- 1 poblano pepper
- 1 pound ground beef
- 1 tsp kosher salt
- ½ tsp ground black pepper
- ½ tsp garlic powder
- 1 12-ounce bag frozen cauliflower rice
- 1 cup shredded Pepper Jack cheese If you'd like to cut down on the spiciness, use Monterrey Jack instead
Instructions
- Preheat the oven to 400°F.
- In a small bowl, stir together the mayonnaise,ketchup, and Worchestershire sauce and set aside.
- Heat a large oven-safe skillet over medium-high heat. Melt the butter, then add onion and pepper; cook for 7 to 8 minutes, stirring often, until the onion is translucent and beginning to carmelize. Remove from the pan and set aside.
- Add the beef to the pan, and season with salt, pepper, and garlic powder. Cook for about 10 minutes or until browned, breaking it apart as it cooks. Add the frozen cauliflower rice and cook for another 2 to 3 minutes, until there is no liquid left in the pan and the cauliflower rice is tender. Stir the pepper and onion into the beef mixture.
- Remove the skillet from the heat and stir in two-thirds of the mayonnaise mixutre. Top with the shredded cheese. Put the skillet into the oven and bake for 5 to 7 minutes or until the cheese melts. Carefully remove the skillet from the oven and drizzle with the remaining sauce.
Mint-Chip Ice Cream Whip, Page 137
Let me just say that this is a total “cheat” of a recipe. It’s a prime example of “dirty keto,” since it’s not what you’d call “clean eating” under any circumstances. And I wouldn’t have considered it unless Emilie or another keto writer suggested it.
I’m talking about Cool Whip. It now comes in a version called Zero Sugar.

If you serve this dessert in fancy little dessert cups or glasses, I suggest calling it “Syllabub.” Chances are no one will know what that means, and it will sound posh. Maybe even French posh.
I’m not a fan of frozen non-dairy dessert toppings, even if it’s sugar-free. But now and again, this might just be what you need to hit the spot. As Emilie describes, it’s not really ice cream, just a little ice-cream-esque dessert that comes together quickly.
The prep for this one calls for putting the Cool Whip into the fridge for four hours to thaw. Don’t let it sit out or microwave this stuff because it will separate. Why? It’s non-dairy, and this commercial from about ten years ago (“Oil? Or Cream?” ) explains the difference. Read more on Kraft’s website.
Oh, and one more thing: I couldn’t get the white chocolate sugar-free pudding here, so I used regular chocolate sugar-free pudding. This, too, worked fine. The setup:

Once your Zero Sugar Cool Whip is sufficiently thawed to a soft texture, dump it into a bowl:

Add in the rest of the ingredients:

I did measure this into a pinch bowl that’s off-camera. I was doing this by myself with my iPhone on a tripod taking my own pictures.
Chop the mint patties up fine:


Add them:

And discover that the bowl you picked up is too small, so you switch to a larger one because it all fits in the dishwasher:
Fold carefully to mix:

Add it back to the Cool Whip container and stash it in the freezer for a couple of hours.

There you are! Your fancy and posh dessert–if nobody peeks in the freezer, of course.
When it’s stiffened up a bit, it’s ready to dish out and serve.
Don’t serve it from the Cool Whip container if you’re trying to be fancy and call it syllabub. However, if you collect this fine piece of culinary Americana, here’s another reason to add to your “collection.”
And if you’re a fan of regular Cool Whip, here’s a new dessert for you, whether you’re eating keto or not. I’m sure it would work well with the regular stuff, too. If you try it, leave a comment about it.
The first time I made it, I mentioned it to BF and offered him some. He declined. Amazing, because he’s a huge fan of the power of Listerine. But with the chicken and Brussels sprouts for dinner, he was open to trying some, and he really enjoyed a dish of this fast and non-fancy keto dessert.
Here’s the printable recipe:

Mint Chip Ice-Cream Whip
From Easy Dirty Keto by Emilie Bailey, page 137 (c. 2022)
Ingredients
- 1 8-ounce Container sugar-free whipped topping, thawed Do this by leaving in the fridge for four hours--don't leave it out or microwave
- 2 tblsp Sugar-free white chocolate pudding mix I used sugar free chocolate because I couldn't find white chocolate.
- ½ tsp Peppermint Extract
- 3 sugar-free peppermint patties, finely chopped
Instructions
- In a medium bowl, combine the whipped topping, (save the container), pudding mix, and peppermint extract and stir together well.
- Fold in the chopped peppermint patties and return the mixture to the whipped topping container.
- Put the container in the freezer for at least 2 to 3 hours for an ice cream-like consistency.
About Peppermint Extract
Be VERY careful not to add too much. Otherwise, the finished dish will taste like toothpaste. I speak from experience here. The mint can overpower everything else, so measure carefully, and not over the bowl. Now, do you see why I prep everything beforehand? You can’t add too much when it’s already measured into a small dish or pinch bowl.
Yes, I did that, but I didn’t stage the picture right. I was by myself, as usual, and I had to stand around the tripod.
Verdict: It’s A Great Book!
Easy Dirty Keto is a really nice cookbook to have in your collection. If you aren’t looking for dirty keto, I still recommend Emilie’s book. The recipes are easy, and most of the recipes don’t need a large number of ingredients. Plus, the food is so good that even non-keto folks can still enjoy them. Even BF!
When I had the opportunity to review Emilie’s first book, The Southern Keto Book, my first thought was something along the lines of, “Keto and Southern? Oh, come ON!” Of course, you know how that went, and now I’m a total fangirl.
Keto or not, I feel like these recipes are real comfort food. At least, that’s what I felt like when I made them and then enjoyed eating them. No kidding. Even though I grew up in New Orleans, the cuisine just isn’t appealing to me anymore, plus all the excess starch of rice and potatoes and the like. I liked Tex-Mex early on, and it’s what I’ve liked since the late ’80s. Nobody understands that here, but I’m sure Emilie does.
Delicious food is the best reason for buying any cookbook, isn’t it?
Is Easy Dirty Keto The End?
Emilie and her family are on a working game ranch in Texas. That’s probably the reason you can find several venison and wild game recipes on her website. While she’s enjoyed sharing her keto journey with readers, another book may be out of the question. We hope not, of course, but we’re thankful for the four she’s published. Read her blog, you’ll see that her blog and cookbooks are a “side hustle.” Like a lot of modern authors, she has a “day job” and writes on the side.
Should this be Emilie’s last book, I would just say thank you to Emilie for four great books with delicious food to enjoy for years to come. All four have become favorites with us, and even BF likes many of the dishes I’ve made. No more canned soup if he wants something better.
Emilie didn’t say anything about discontinuing her blog. Like me, Emilie doesn’t blog regularly. That’s OK—Emilie’s website is a huge collection of delicious keto recipes that aren’t in any books, to my knowledge. Those aforementioned venison recipes will be tried next time someone brings over deer or something. (It’s happened a few times, and deer roast is quite easy in the Instant Pot.) If you’re so inclined, sign up at her website (right-hand side, scroll down a little over halfway.)
Maybe one day we can make the trip to visit Emilie’s ranch in Texas. When we do, there will be a full blog post here with lots of pictures.
Enjoy!
Crab cakes in your air fryer? Yes—and they’re pretty good. Of all the versions of crab cakes you can find, this one is simple and easy to make. And if you want, it’s gluten-free, too. (Note: plenty of live affiliate links included today.)
Hi Again, Dear Readers:
Here’s hoping you had a great Labor Day. I sewed for most of the day, but I’d imagine Miss Alice, who is a teacher in HISD, slept in. Can’t say that I blame any teacher for that.
With fall in our forward sights, I need to use the basil and make some pesto soon. This year’s basil didn’t take off like it normally does, so next year it’s back to buying new plants or starting seeds inside. I was kind of proud of saving and propagating two cuttings from last year’s crop, but it just didn’t work well.
I’ll use up the basil, more mint, and some leftover parsley from this weekend’s recipe to make one or two batches of pesto for the freezer.

Most of this will be for pesto.
I only needed this much:

That’s it.
Thankfully, I’ve got a big pesto stash in the freezer from the last two or three years to hold me over. I just need to stock up on frozen peas.
Hungry? Let’s get started.
Finding A New Recipe
OK, this is part procrastination, and part “you need to know about this.”
Friday afternoon, I found a new recipe for crab cakes on Instagram and I just had to make some for us. BF, as always, was skeptical. After all, he can always have a ham sandwich or bowl of cereal if he doesn’t like what I made. But not this time.
For this occasion, I pulled out our little air fryer from the back of the cabinet.

It’s not much, but it works.
If you’ve not seen my previous blog post on the air fryer, you can read it here. At first, Neighbor E said he wasn’t getting an air fryer, but eventually, he decided to get one.

Nice, isn’t it?
E’s air fryer is a 2.5 quart, while ours is 1.9 quart. Most are not terribly expensive, and many are under $100. There’s even a Pioneer Woman branded 6.3-quart model. You can find them as big as 8 quarts or even more. Some have two baskets, so you can air fry two things separately at once, like burgers and French fries.
I bought ours for $30 two years ago. It now costs $50 in the store at Walmart but shows up as $40 on their website. If I was going to spend $50 on an air fryer, I’d get a bigger one. We may buy a bigger model one day, but for now, I’ll use this little dinky one.
The Crab Cakes Recipe
This comes from a blog called DanniMade Kitchen, and you can read Danni’s bio here. The Dash Company featured it on their ByDash Instagram account to show off their air fryer. It’s a quick and simple recipe that’s tasty, and you can make it anytime.
To make it easy, I’m putting the recipe here so you can print it and take it to the grocery with you. Heck, I need to print one for myself so I can add it to my notebook of recipes I have on the bookshelf.

Air Fryer Crab Cakes
A quick and delicious recipe from DanniMadeKitchen.com
Equipment
- 1 air fryer Cooking time will depend on the size of your air fryer; you may need to cook in batches
Ingredients
- 8 ounces lump crabmeat you can also use canned crab meat
- 1 tsp Old Bay Seasoning
- 1/4 cup Panko bread crumbs gluten-free Panko also works well
- 1 tbsp plain greek yogurt
- 1 to 2 tbsp freshly chopped parsley
- 1 tbsp Dijon Mustard
- 1 tsp Worchestershire sauce
- 1 tsp Hot sauce of choice I used Tabasco Chipotle for the flavor but not heat
- 1 egg, beaten
Instructions
- Mix all ingredients together until evenly combined. if the mixture is too wet, sprinkle more Panko breadcrumbs until they reach the desired texture and are easier to shape into patties.
- Form into six even balls, and lightly flatten balls to create patties,
- Lightly spray the air fryer basket with oil. Place the patties in an even layer inside the fryer basket. Spray lightly with oil then cook for six to eight minutes at 400F.
- Serve patties hot, warm, or at room temperature with tartar sauce, ketchup, or condiment of your choice for dipping.
So here are the ingredients:

The setup. Don’t tell BF about the Greek yogurt!
I made one change, and that was to use gluten-free panko breadcrumbs. I found them at Rouses, but I’ve bought them at our local Winn-Dixie before.
Longtime readers know I always like to measure everything out before I get started.

Ready to roll.
I do this even when I’m not taking pictures for a blog post because it just makes the process easier. Additionally, there’s no risk of “oops, I put too much salt” or something else in the mixing bowl, pot, etc. Then it’s one-two-three and you’re on your way.
Ina Garten, The Barefoot Contessa recommends cracking each egg into a separate bowl before you add it into your recipe. This is in case you get a bad egg, and you don’t ruin the entire recipe. I usually do that, too, although I’ve never found a bad egg.
Once you’ve got everything taken care of, it’s time to get started.
In the original recipe, Danni lists eight ounces of lump crab meat from Whole Foods. On Instagram, Dash lists “eight ounces of lump crab meat.” Of course, when Amy was buzzing through our Rouses on a busy Saturday after running errands, she read “eight ounces of canned crabmeat.” So that’s what I bought.
And it worked just fine.
Drain the Crabmeat
The cans are 6 oz, but once you drain the liquid off, it’s about 4½ ounces of crab meat. That’s why I bought 2, which comes to just over 8 oz.

Danni says that if the mixture is just a little too wet, add a little more of the panko. I drained the crabmeat as best I could, pressing it with my hands to squeeze out more of the liquid.

Quick drain
I didn’t spend too much time on that task, so the resulting mixture was a bit damp. Decided to add one or two more tablespoons of the panko, and that was perfect. The mixture must stick together like ground beef, or it will fall apart in the air fryer basket.
Bottom line is that if you can get fresh crab meat, great, but if not, the canned is available. I also know from another book by keto author Jen Fisch that Trader Joe’s has affordable crab meat in their own freezer section.
Mix And Air Fry
Really, once you have all the ingredients measured and the parsley chopped, it comes together quickly.

Just mix it and it’s ready.
Mix well, and pat down into the bowl:

Like this
Separate the mixture into 6 sections like you would ground beef:

Like this.
And shape them into little patties.

Easy!

The cutting board makes it easy.
Spray the inside of your air fryer basket with oil.

Just like you would with a frying pan, really
My air fryer’s instructions say to preheat it for five minutes before cooking. So if yours says that, do so now. Then spray the patties with oil.

Right before you cook them.
Add the crab cakes into the basket and cook at 400F degrees for about ten minutes. With my little air fryer, I had to do this in batches, but that’s OK. I put them into the countertop oven to keep them warm until dinnertime.
They really do come out nice and crispy and tasty.

Tah-dah!
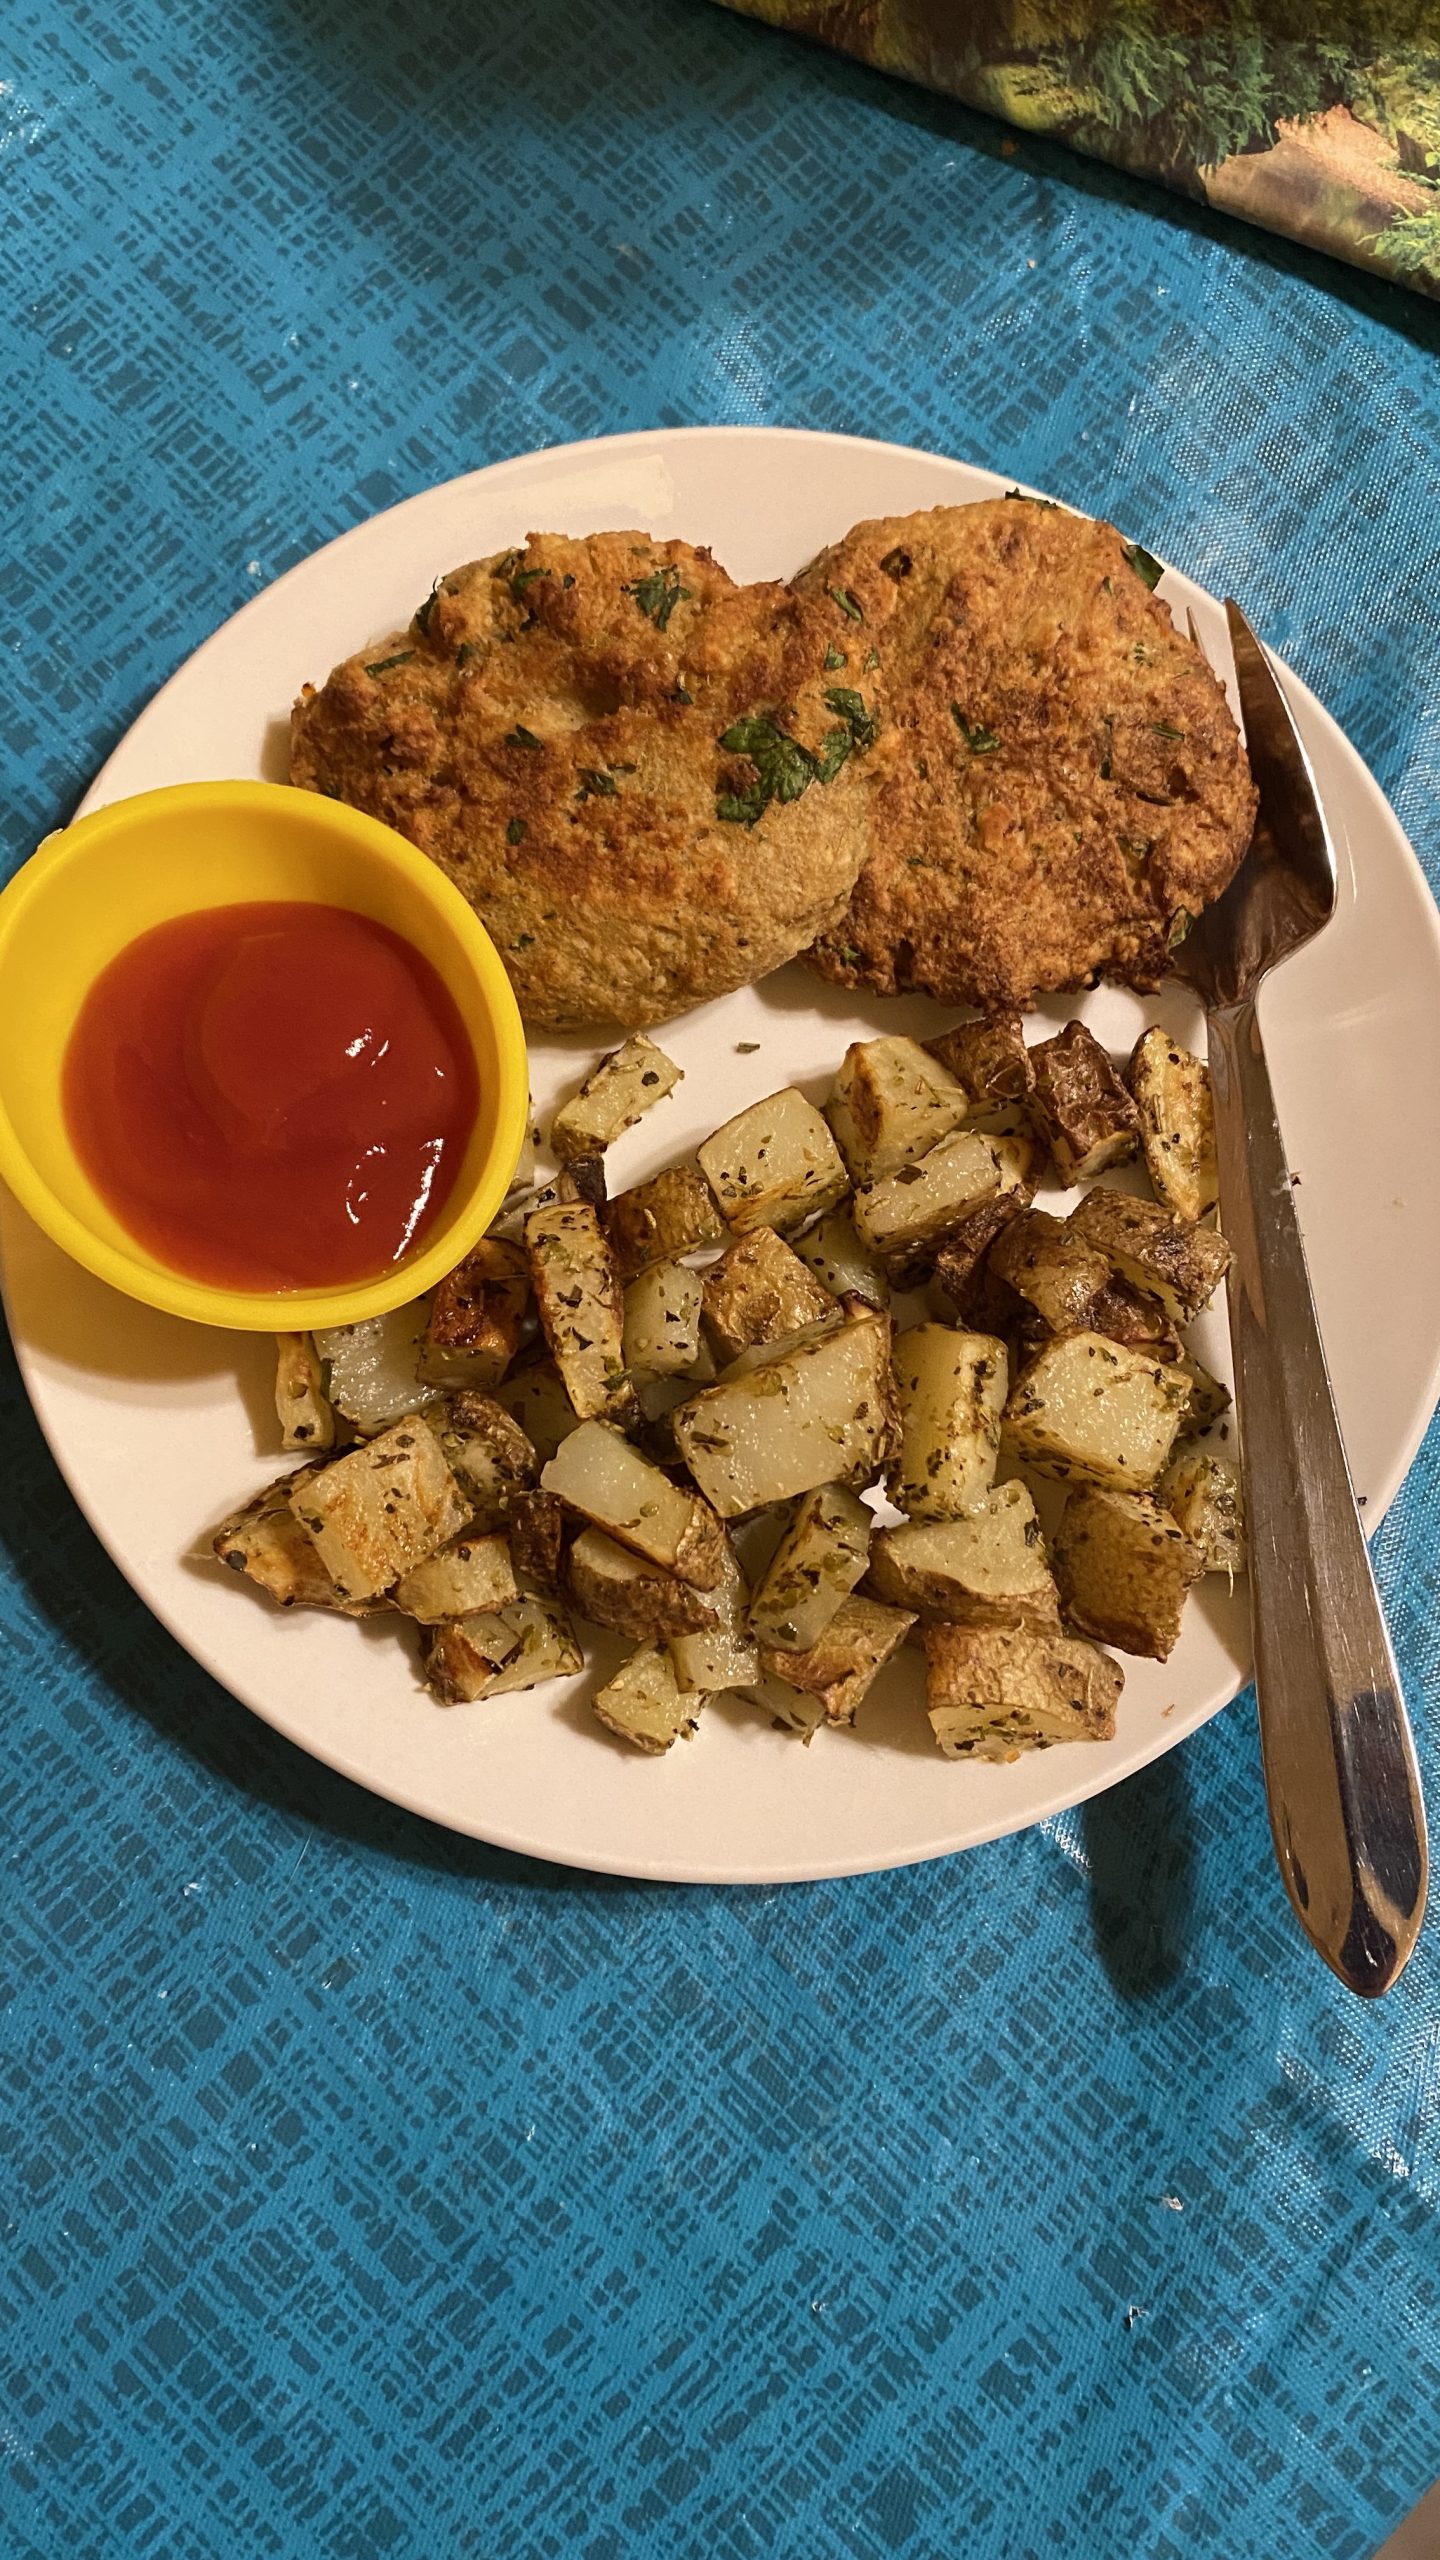
What to serve with it? Well, I made some Triston’s potatoes in the big oven:

These went well with the crab cakes.
Of course, if you’re making a keto dinner, you’ll have something else. The frequent rain means a not-so-hot summer, so it was OK to turn on the big oven. As always, they were delicious.

Dinner is served.
Danni suggests serving these with tartar sauce. BF didn’t want tartar sauce, so he didn’t buy a bottle. I just had some sugar-free ketchup with mine, and BF had his regular ketchup.
We both enjoyed dinner that night, with a thumbs-up to make them again sometime.
About The Oil
One of the more prominent features of air fryers is that they only need a small amount of cooking oil. But you still need some oil for most recipes. The difference is that compared to regular deep frying, you don’t need nearly the amount of oil that’s required to get the crispy texture.
Additionally, remember the quality of oil you use is also important. We use a lot of olive and coconut oils even when the recipe calls for vegetable oil. That’s because vegetable oil, which is toxic hydrogenated soybean oil, is banned at the Casa de Rurale.
You can use cooking spray, or get an oil sprayer, which sprays a fine mist of whatever oil you put in it.

Buy it or get a sprayer, your choice.
Olive oil, avocado oil, and coconut oil cooking sprays are available now, so it’s easy to use them. But oil sprayers easily and inexpensively do the same thing.
That white one in the picture is from the old Martha Stewart Everyday line at Kmart. I used to have two, but I think I threw one out. Only when I went to use the second one did I discover that you’re not supposed to fill it more than halfway full. You pump the cap a few times to build up the pressure and that’s what propels the oil through the sprayer nozzle. Works perfectly.
I recently washed it to get the old oil out and refilled it with fresh oil. I don’t know how long it’s been sitting since I moved here. Now that it’s clean and refilled, it still works perfectly.
But Amy, I Don’t Have An Air Fryer
Well, nobody said you had to use an air fryer. Like the Instant Pot, it’s 110v vs. 220v. It’s a neat little appliance that offers another way to cook meals. Some folks have reconfigured nearly all their cooking to the air fryer. They are devotees. An air fryer is not a bad thing, but not an absolute necessity.
I’m thinking about Aunt Ruth and Aunt Kathy dismissing the idea of getting an air fryer for this type of thing. Really, though, you don’t need one to enjoy these tasty crab cakes.
If you have a toaster/countertop oven or even a regular oven that has a convection setting, you already have an air fryer. But even if you don’t, there’s no reason why you can’t make them either in a 350F degree oven, or even in a frying pan with a small amount of olive oil.
Other Alternatives
Have a countertop grill like the Cuisinart Griddler? You can also fry them this way. There’s also the sauté function on your Instant Pot if you’re itching to use yours. If you’re lucky enough to have one with an air fryer lid, that would likely work too. I can’t see pressure cooking as a benefit to this recipe. But if you’re on a generator, as we were a year ago, the Instant Pot sauté function and the countertop grill are both good options for frying them.
You’ll still need to use a little oil. So don’t be afraid to use some however you cook them.
If you decide to make these crab cakes, I do hope you enjoy them as we did. It’s another recipe to add to our regular dinner rotation, long as we have some crabmeat and a few other ingredients available. There are two crabmeat recipes we like, so I guess I need to stock up on a few more cans. I don’t want to disappoint BF if he decides we should have crab cakes again.
Much as we both enjoyed them, BF says that they should be served alongside fried fish, as you would see in a restaurant. Maybe next time.
Incidentally, I told Neighbor E about this recipe on Saturday when I was making dinner. But because he no longer has a Facebook account, I had to send him two screenshots so he could see the recipe. He says he’ll try them one day this week.
Coming Soon
Labor Day is over, and so is “summer,” officially. All the fall décor is out at Hobby Lobby, Walmart, and every other retailer in the US. Next month is when retailers begin up-shifting for the holidays. They’ll shift into top gear the day after Thanksgiving when the fall frou-frou goes on sale for 50% or more off.
Here in the South, we know that cooler weather won’t be coming for a while. We’re still going to experience heat, humidity, and of course, mosquitoes for quite some time. But I’ll soon be sewing up fall things, including a sweater, this weekend because one day we’ll wake up and it’s chilly again.
I’m late on the Easy Dirty Keto book review, I know, but it’ll be worth the wait. It’s already a long blog post, and I just need to finish it up and load it and the pictures into the website. Plus, I have a couple more topics in the draft queue that I need to finish up soon.
Our sixth anniversary is on the 15th of this month, and I’m wondering what kind of nice dinner to make for BF that day. It’s not a “wedding anniversary,” but our date for getting together. I say we celebrate six years together no matter what. I’ll find something. I’ll blog it if I do anything spectacular.
As always, if there’s a topic you’d like me to research and write about, let me know.
Happy Dining!
Did you know that pesto isn’t always made from basil? Many fresh green herbs can be turned into a delicious addition to your meals. Come see what I made with what I had in the garden.
Hi, Again, Dear Readers:
My apologies, I’ve been away. After the last post from Beverly, I’ve been busy with a new client who gives me a chunk of work every week. I’ve been concentrating so much there that I haven’t had much time to do everything else. The only sewing I’ve been able to do is minor repair work.
Before I forget: I updated last month’s Spicy Calabrian Shrimp. I found the missing pictures and they’re now in the blog post.
Current Events
Speaking of work: don’t get me started on Depp V. Heard. I’ve been paid to write two blog posts on the subject, and like a lot of people, I’m anxiously awaiting the verdict. That case has captured my attention but not for the reasons you might think. It’s extremely interesting, especially with my legal background. Livestreamed online, it’s real life, not a movie or TV show. I’m not a big “Depp fan,” but the case is intriguing. Then again, I do a lot of research and writing for the legal industry, so you understand why I’m so interested.
You probably don’t want to know about the insanely X-rated language, or the distinguished attorneys on both sides reading it all aloud in front of the judge and jury. Scriptwriters couldn’t write that kind of thing on purpose, but will probably try now. The court reporter–who has to record every filthy, nasty word of it–got a standing ovation from Depp, his legal team, and the people in the public gallery. I’ll say this for him–Depp is certainly a creative writer when he’s fired up.
Enough of that.
Downton Abbey
As for our wonderful friend Beverly, she is planning to write another guest post, this time on the Unofficial Downton Abbey Cookbook, which, she says has food you can actually cook. The Official Downton Abbey Cookbook series is more pictures and stories from the show, rather than recipes you’d want to make. Like me, Beverly reads cookbooks the way others read novels. So that’s coming up soon.
BF and I went to see a matinee of Downton Abbey: A New Era last week, and let me tell you—if you loved the series, you’ll love this movie. It ties a bow around the entire Crawley family saga, I think. Not sure if there will be any more from the DA saga or if this is the conclusion, I haven’t heard. I won’t give away any secrets that weren’t in the trailers, but there are a couple of things I didn’t see coming. Maybe I wasn’t paying attention. If you go—BRING TISSUES. Trust me.
On the way home, BF reminded me: “Never forget how much I love you.” In other words, if he didn’t, there would be no way he’d be going to see that film. Ever. Next up we’re planning to see Top Gun: Maverick. I hear it’s as good as the original, and I’ll need to re-watch the original because I haven’t seen it since 1986. Fortunately, BF has the DVD.
But today I’ve got a post on a discovery that you might be interested in trying even if you don’t like basil.
Berry Picking Season
The wild blackberries that grow here are ripening a few at a time, so I’ve started picking them around the property.

Look!! Berries!!
I showed these pictures to Neighbor E this past weekend, too.

These are ripening bit by bit
These, of course, are not yet ripe, but they ripen individually. There are occasions when I walk outside with this beast.

He’s always around, looking for food. He’s taller than the pit bull now.
And pick a handful or two for us. (BF doesn’t much care unless I bake the berries into something.) Broccoli Stirfry and I eat berries together, and he loves them. The pit bull doesn’t seem to get as excited about them anymore.
But when I go out to pick for the freezer, I’m wearing a pair of these gloves, a pair of knee-high Muck Boots, jeans, sunglasses, and a hat. I can reach more ripe berries that way unless I’ve been out with the silly dog and we’ve had the “low-hanging fruit.”

I pick as many as I can reasonably reach.
But I still get scratches and mosquito bites.
So far, I’ve nearly filled a gallon freezer bag with this year’s pickings, and BF is asking me to make something for him with them. I moved last year’s crop into the kitchen freezer so I can do just that for him. I just received the new edition of The Pioneer Woman magazine today. There’s a blackberry cheesecake galette recipe that I’ll be trying soon. Unfortunately, it’s not on the website. (Blog post?) I’ll also be making my favorite keto blackberry cobbler again, too.
Making Pesto Out Of Anything
Last week on Facebook, Giada de Laurentiis’ Giadzy online magazine re-published an article from 2020 called How To Make Pesto Out Of Anything.
Anything? As in chocolate and raspberry anything? No, not that anything, but fresh herbs and greens that you may have on hand, like I do.
The point of the article is that, although it’s traditional in Genoa, pesto isn’t necessarily made from basil. Pesto is not an exact science, nor is it rocket science. “The true beauty of pesto,” the article states, “is that it’s greater than the sum of all of its parts.” In other words, the combination of all the ingredients is what makes it so delicious, not just one specific ingredient.
It’s a bit like a puzzle really—one piece is just that, but when you put together 10 pieces of the puzzle, then 100 pieces, then more, you get the entire picture.
Well, that’s how I think of it anyway. I hope that makes sense.
No Basil, But Lots Of Mint
So I recently planted the two little basil clippings that I rescued from last year’s crop. I kept them in the kitchen window for months, and I recently planted them outside along with a packet of basil seeds in the same pot. Those seeds have started to grow, and the rescued clippings are doing just fine.

More pesto this year!
Additionally, I planted two packets of lettuce seeds in a different pot, and they’re coming along just nicely.

The return of salad days
Not ready to cut yet, but I’m looking forward to having some with a tomato or two.
But the mint plant that I’ve had for quite some time became overgrown.

That’s mint. Mojito, anyone?
I had plenty, but just didn’t know what to do with it. The stuff just grows, and I don’t want to make that many Corsican Omelets with goat cheese and Mojito cocktails. Keep it watered and you’ll have more than you know what to do with. Every time I went outside, I told myself to cut it and do something with it, but I didn’t know what. Thanks to Giada, I now have the answer.
Her standard pesto recipe that I’ve used for many years is
- 2 cups of fresh basil leaves, tightly packed
- 1 clove of garlic
- ¼ cup of toasted pine nuts
- 1½ teaspoons kosher salt
- ½ teaspoon freshly grated black pepper
- About 2/3 of a cup of extra virgin olive oil
Once you blend that all up, mix in a half-cup of grated parmesan cheese. Use it, refrigerate it for a week or so, or do what I do and freeze it as long as you want. Right now I think I have frozen pesto going back to 2018 or 2019. It’s still fantastic.
Using that as a guide, and then taking the information from the article, I went on to make pesto in a new form.
How It’s Made
So, it started out with walking outside and clipping what seems to be a mountain of mint growing. You always keep mint in a container. Otherwise, you’ll find out what happens, as Banana Rat did many years ago when he planted it in his backyard.
Mint takes over wherever you plant it. A few years ago, he posted it on Facebook one day with a question: “Can you say endless mojitos?” He literally had mint growing in about half of the yard. I don’t know if he still has mint growing everywhere, but it is pretty difficult to tame and remove. So, if you like mint, keep it in a container, or you better really, really love mint with all your heart.
Next, I gathered up all the ingredients I had.

The Setup.
I didn’t have any Parmesan cheese because I hadn’t been to the grocery yet. I also took Giada’s suggestion to use walnuts instead of pine nuts.
So I clipped and I clipped and I clipped, filling up the salad spinner inner basket.

Yes, that’s all fresh mint.
Buddy doesn’t care for the mint

He tried it, though.
Then I washed the leaves well, spun them, and began picking the leaves from the stems.

Check out the water that comes out after you spin it. You don’t want this in your pesto.

That’s a lot, but you know the leaves are clean.
All told, I had about three cups of mint once I finished de-stemming. Perfect.
Making Pesto
Then everything went into the blender just as you would with basil pesto.

Don’t forget the salt and pepper
I like walnuts, so I figured I’d try them this time. Yes, pine nuts are delicious, but they are also pricey. Just for once, I figured walnuts would be OK. And you know what? They worked quite well. Plus, I could snack on them and not feel guilty. Toast them first, don’t burn them:

Watch them, they can burn, but they do take longer than pine nuts.
And put them in a cold bowl to stop the cooking and cool them off.

Ready to go
Next, add them to the blender:

Just like the pine nuts
And blend!

Just like that.
I tasted the finished product, and it was quite minty. The garlic and the olive oil sort of tame the extreme mint flavor, but you could still taste the inherent “mintiness.” I decided to put it in the freezer until I could figure out what else to do with it. I still needed to add Parmesan cheese, but I wanted to give some more thought to what else I would add.
The Next Step–Parsley
I needed to go to the grocery anyway, and we were indeed out of Parmesan cheese. So, after giving it some thought, I decided to add some Italian flat-leaf parsley.

I think that was half a cup
Then I got on with it.

Add a little at a time until you get the consistency you want.
First, I had to thaw the pesto because it froze quickly. I ended up having to microwave it for about 30 seconds just to soften it up. Even then, it was cold, and it was still kind of like a sludge.

Still frozen
Once I got it out of there I started with the parsley.

It was a bit easier this time.
But I managed to get it into the blender just fine after adding the requisite Parmesan cheese.
I just sliced the parsley leaves clean from the bundle at an angle with the blade of the knife. I didn’t take the bundle apart. Pulled the stems out to make sure it was just leaves and I added it all in after washing and spinning.
Because it was much thicker now I had to add a little more olive oil a couple of times. I also added in a couple more cloves of garlic, too.
I blended, and I blended, and I blended, stopping the motor to move it around with the blender spatula to make it catch everything. Finally. I had a nice emulsion.
I removed it from the blender, very carefully, as much as I could get out of it, and then added a little more of the Parmesan cheese.

This was the second addition of cheese, about a third of a cup I think.
Then mixed it well, and tasted it. I think I’ve got four cups of this stuff, which is great, I’ll have it for a while.

Take your time or you’ll make a big mess
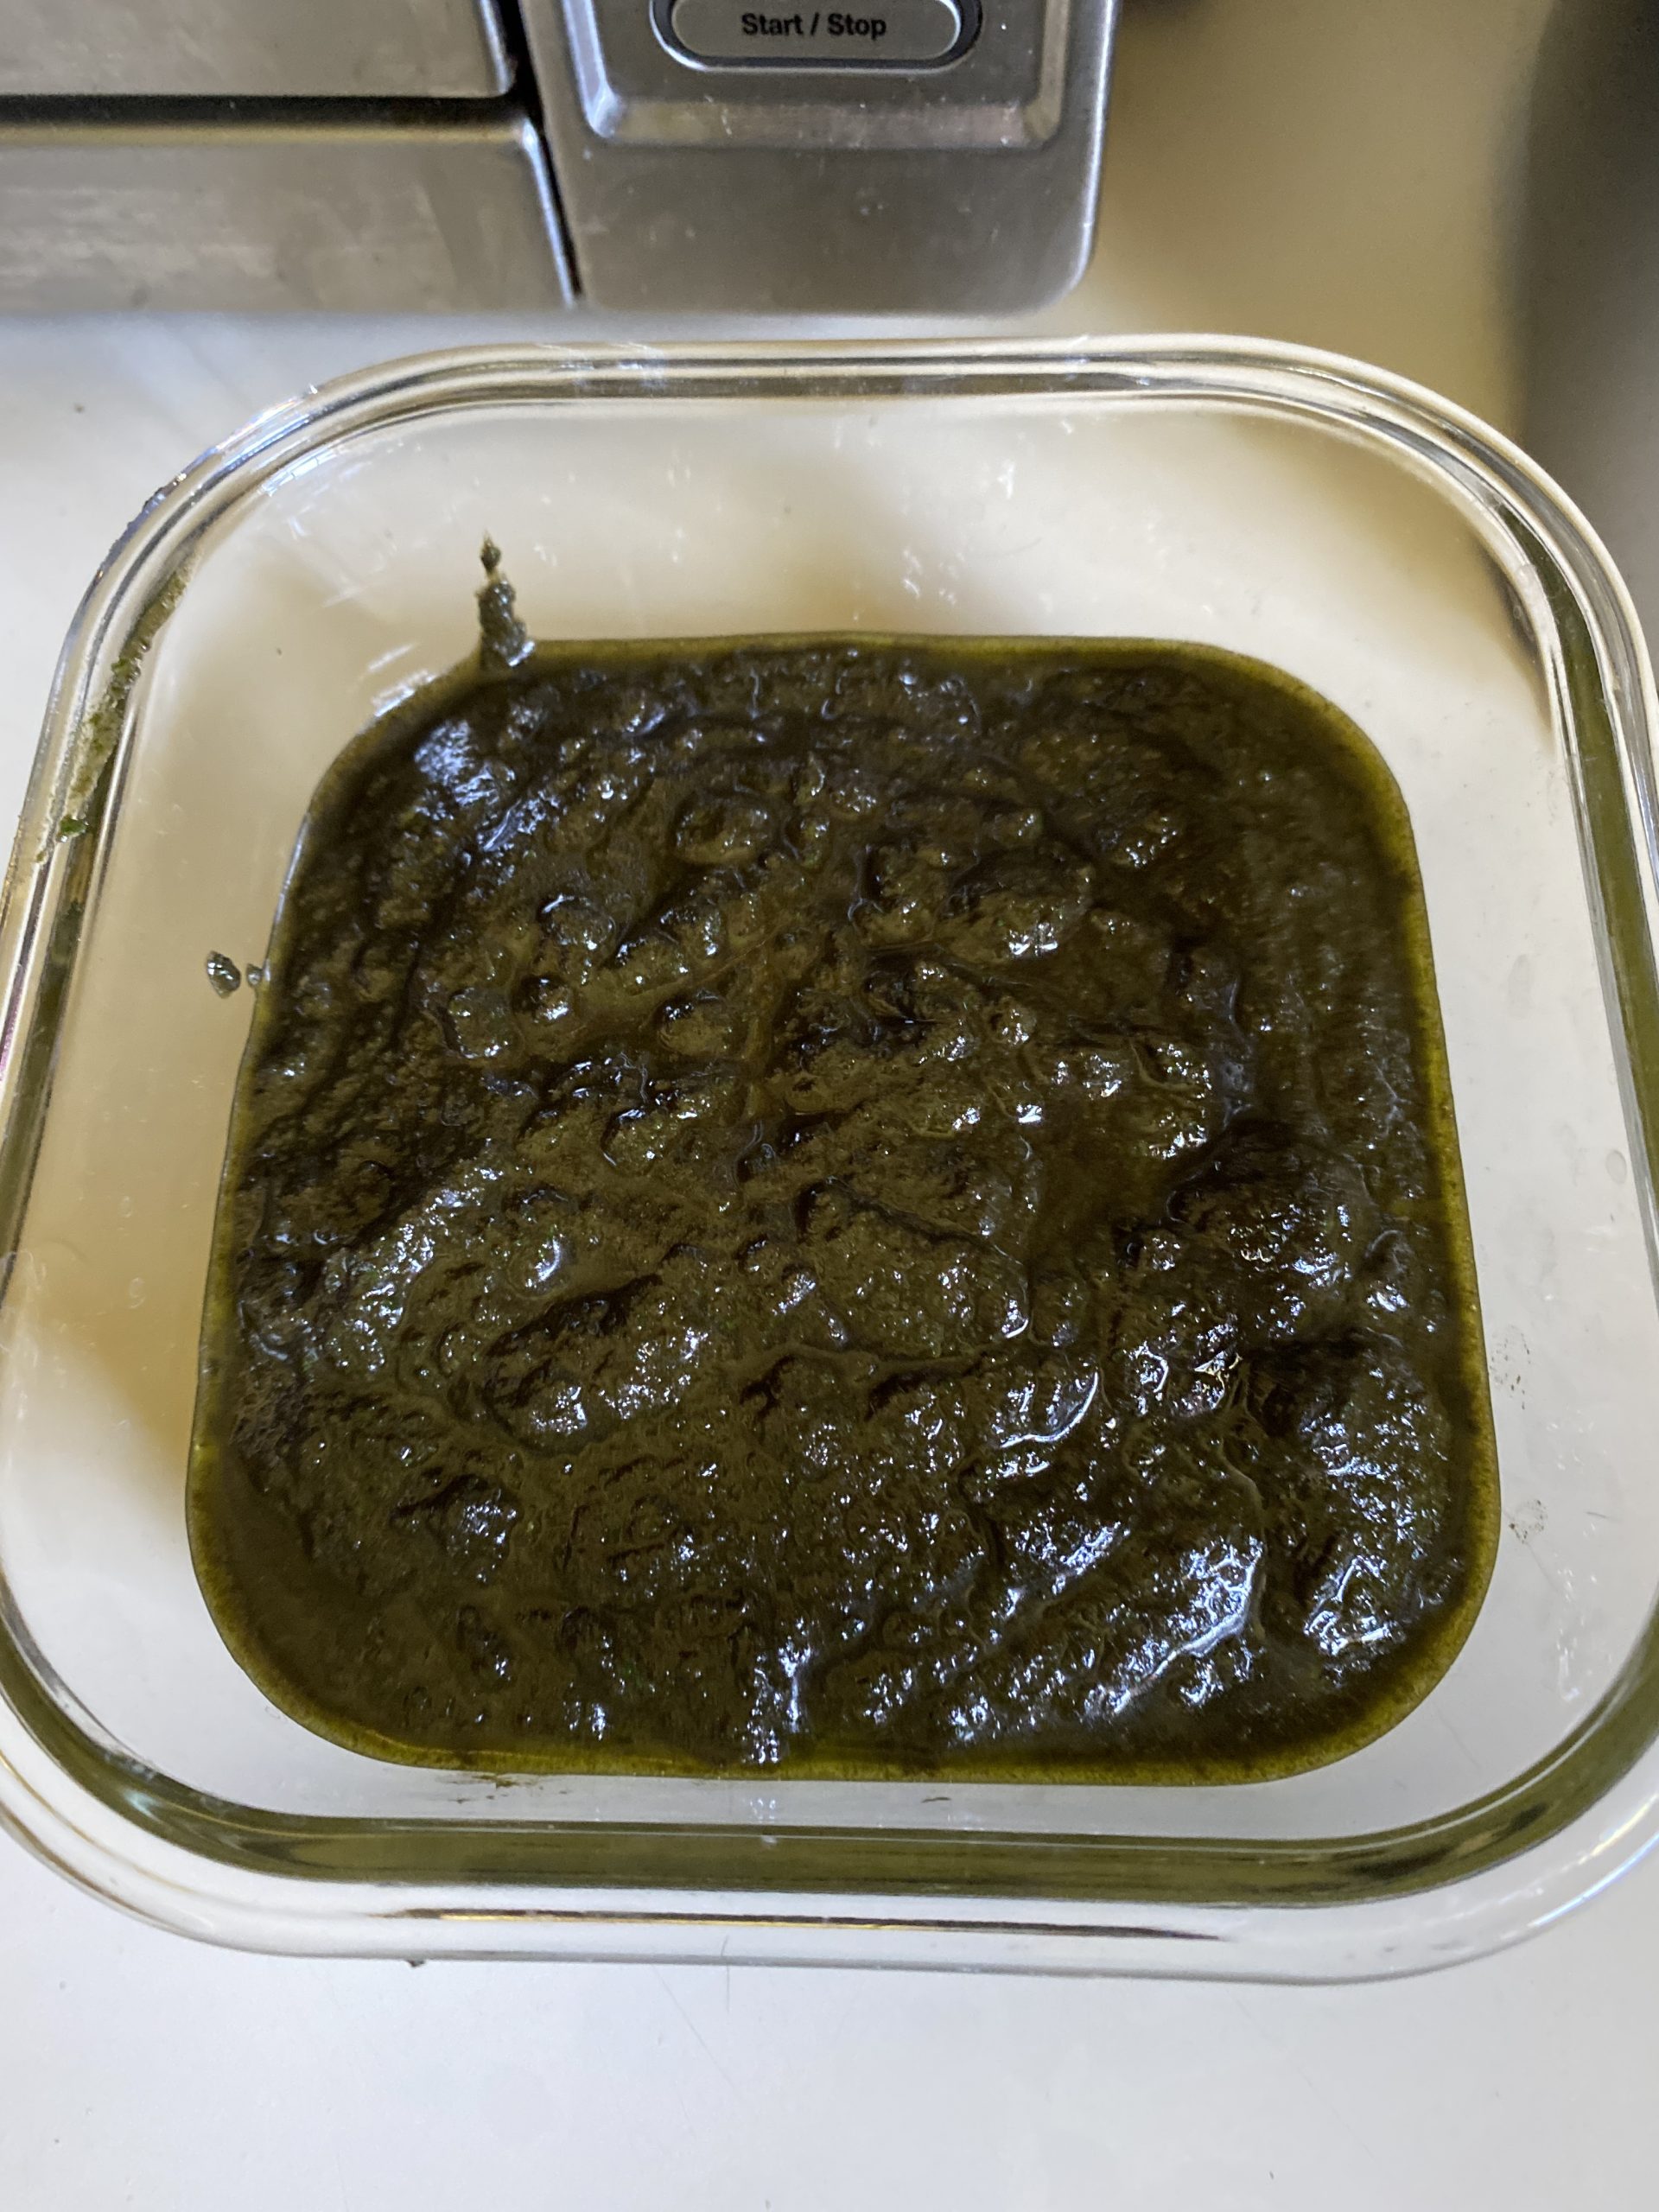
And then you have this, in a larger container than the usual one-cup or two-cup containers I use:

Done!
Verdict: incredibly delicious, and the parsley tames the mint flavor.
Where has this been all my life?
The Recipe
OK, so I can’t say I was trying to create a new recipe. But guided by the article and my previous experience making standard pesto from basil, here is my recipe for mint and parsley pesto.

Mint & Parsley Pesto
A fresh take on the Italian favorite with herbs that aren't basil
Equipment
- Blender Essential when you're making pesto
- Salad spinner This takes much of the water off the herbs after washing
Ingredients
- 3 cups Fresh mint
- 1 bunch Italian flat-leaf parsley
- 2 to 3 cloves Garlic
- 1 cup Extra virgin olive oil
- ° Salt & Pepper to taste
- ¾ cup Walnuts (increase or decrease as you like)
- ¾ cup Parmesan Cheese (increase or decrease as you like)
Instructions
- Toast the walnuts (or other nuts) until they are warm and fragrant. Do not burn. Add to a cold bowl and set aside.
- Remove mint leaves from the stems. Wash and spin in the salad spinner to remove excess water.
- Chop parsley leaves off the bunch, then repeat in the salad spinner to remove excess water.
- Add the herbs to the blender, along with the garlic, toasted nuts, and a little kosher salt and freshly ground pepper. Add the lid to the blender with the center part removed.
- Measure out 3/4 cup of the extra virgin olive oil. Slowly pour into the running blender through the open top until the cup is empty. If the contents don't seem to be chopping and mixing, turn OFF the mixer and use a spatula to move things around in the bottom. Remove the spatula, replace the lid, and try again. Add more olive oil a little at a time until the blender moves and you get the right consistency.
- Pour the pesto into a bowl, and add the Parmesan cheese. Stir until completely blended. Add to a storage container and either refrigerate for a week or freeze for later. Makes about 3 to 4 cups of pesto.
It’s as simple as making standard pesto, and the flavor is outstanding. I’ve got the finished product in the freezer, marked for identification. Of course, I did, so that there’s no question about what’s in it. I recommend using square or rectangular glass containers to freeze the pesto because they’ll fit better in your freezer and there’s no loss of flavor. I speak from experience on this one.
OXO makes some good ones, as does Target. I think I found a few at Ollie’s Bargain Outlet in Denham Springs, too. But I do miss the Pro Glass squares I used to get at Bed, Bath And Beyond, they don’t seem to have them anymore.
Uses
What am I going to do with this new version of fresh pesto? Well, my first thought is to add a small amount on top of a grilled or a roasted chicken breast, chicken thigh, grilled shrimp, or baked fish. One could also add it to some freshly cooked pasta (gluten-free for me.) Granted, BF insists on frying all fish in the house, so I would have to do this when he wasn’t around.
I also think it would be good in or as a dip. So if I was in the mood for some cut vegetables, a little bit of this pesto would be good for dipping. Maybe I could mix some in homemade mayonnaise, or some sour cream, or something else that would work as a base. Or I could turn it into salad dressing—I’ll think about that one too.
Note that it tastes like a pesto, not specifically like mint and parsley, so you could probably use it as you would basil pesto if you wanted.
Cause And Effect
I was quite happy to tell BF about this discovery. However, he was not as happy about hearing about the new recipe, as usual.
I described to him the process of cutting down all that mint, then blending it together. In between sentences, he gave me his requisite verbal retching sounds. This is the same guy who is very particular about his toothpaste and the type of minty-fresh Listerine mouthwash he buys.
While he was at work, I told him via text that I’d finished making it.

Thanks, Honey.
Well, more for me, I guess. I marked it so there’s no question about what’s frozen in the container. Of course, BF won’t touch it, because he’s been around my pesto-making for more than five years and declares it an abomination or something.
Still, I’m glad I made it, and I can’t wait to try it in or on something. It’s not the strong basil flavor, but it sure is tasty.
If you’ve got a good amount of herbs growing, a combination of the herbs would also work, given the garlic or other aromatic Giada recommended in the article. You could use any type of oil, but extra-virgin olive oil is the best for this. Walnuts—well, they’re tasty roasted in the pan, that’s all I’m saying. But you could use almonds, or leave the nuts out entirely.
Until Next Time
It’s pretty much summer here, so wherever you are, enjoy summer while you can. Of course, in the south, we enjoy it six to nine months out of the year. (Winter hung on a little longer this year.) It’s a great time for grilling and enjoying the outdoors. Don’t forget the berries.
Enjoy!
Have you brought Calabrian chili paste into your kitchen? If you like Sriracha, Tabasco, or other spicy additives, you really should try this condiment. I recently made a delicious shrimp recipe with it after trying to find it for quite a while.
Hello, again, Dear Readers:
After last week’s book review, I’ll show you the dish I cut my kitchen basil to make. It’s a delicious Italian recipe to add to your repertoire that’s anything but boring. Plus a couple of updates.
From The Last Blog
Since last week’s edition, I had a couple of email exchanges with Christopher Crompton of Pelargonium Press regarding Apartment Kitchen Gardening. He enjoyed my blog and loved the paint buckets, too. I sent him a few pictures, including the little plants that are now on the windowsill and will be planted soon. I have several tomatoes growing, and two strawberries, one of which will be ripe shortly. He suggested trying to plant the chickpeas, even after all this time. I’ll be doing that soon, too.
Christopher was surprised to find out that in the US, SNAP recipients can buy seeds and plants to grow their own food. Inspired by this info, he wrote a letter to the UK’s environment minister to suggest doing something similar there to help reduce the strong reliance on food banks. I don’t know if they have a program like SNAP there, but that would certainly help UK folks, too, especially if they could learn to grow in apartments. If it happens, I’m glad I could help, just a little.
Inflation
In a subsequent email, Christopher said that the “food front” in the UK also has a long road ahead. There is an effort to increase the standing of cooking classes in schools, as well as encourage people to grow their own food. He said that in time, there could be a shift in the UK’s culture. They are also experiencing a crisis with the higher cost of living now that will require a solution with multiple factors.
The man isn’t kidding. BF and I talk about this often. Inflation is getting worse with no end in sight, and it happened quickly. Public discourse can bring about needed changes, such as more people growing their own gardens. In example: on Sunday, I bought a box of 5 dozen eggs at Walmart that have gone up to $15. The price normally goes between $6 and $9, maybe $10. But after paying $13.33 for the last box just one week prior, it’s now over $15. I need to start looking for local chicken folks who sell their eggs, even if they’re the same price. I bought more white rice—yes, plain white rice, which I only restarted eating when I moved here. We’ll be getting more of that sort of thing in the coming months.
On a nicer note, I showed Christopher the blackberries that are growing here now, and I even picked four yesterday morning.

Aren’t they beautiful? More to come soon.
He said he has some type of cultivated berries growing, but after a few jars of jam and giving away many little baskets, he’s done with them. Our berry season is short, so I pick as many as I can until they’re gone. Maybe I should learn to make jam too.
He also picks wild sloes to make sloe gin for the winter. Sounds like Amy’s basil pesto obsession, doesn’t it?
Christopher was also surprised that I prefer the British brands of tea, and I’ll be talking about that in an upcoming blog post. I may have omitted the fact that I generally drink them from a cup with the Texas flag. Separately, I’ll be chatting with him again soon one day about the next book they’re planning.
The New Addition
This weekend, BF got a text message from one of his car-guy friends. The man and his wife were out somewhere and came across a scrawny little kitten. Unfortunately, the man is horribly allergic to cats, to the point where he has been hospitalized twice. So, knowing I love the cats (or at least, I did), he texted BF, who brought it up to me. He showed me the pictures of the fluffy orange and white cat.
Remembering our experience with the Christmas kittens five years ago, I was not thrilled with the idea of another cat in here. This kitten is a little bigger than the previous rescues, and of course, BF couldn’t say no. Well, I couldn’t either. I tried.
Dirty, scrawny, starving, and scared, they put her in a little carrier and brought her over. After some food and water, she didn’t waste any time making herself comfortable in the Casa de Rurale, either.

There she is.
She likes sitting on the sewing machine table, but pretty much anywhere she likes. I was trying to work.

Do you think she likes me?
She didn’t take long to discover great places to nap:

Where Catmandu and Kismet have gone before
Just make yourself at home, why don’t you?

Awwww. . . .
We did give her a bath, which went about as well as you think it did. BF has a few scratches on his back despite the claw clipping prior to the washing.
Unfortunately, Tab E. Cat isn’t as thrilled with the new addition and let us know about it:

He asserted his feline dominance, and left his “scent” behind on the dogs’ cushion, too.
Just as Broccoli Stirfry is starting to learn how to dog, Tab E. Cat restarted his antics. Thank heavens for Angry Orange, that’s all I’m saying.
The pit bull tried his favorite “get to know you” move, chasing her into a corner of the bathroom, and requiring me to pull him off by his collar. Earlier in the day, he and the now-30-pound puppy took off running after two people minding their own business on horseback. An 85-pound pit bull decided he was going to defend the homestead against horses. I’m sure the horses were laughing to themselves. It could have ended badly, but thankfully another neighbor saw it and stopped his Ford F150. The incident was mostly annoying and embarrassing.
I’m thinking of starting a GoFundMe page for the beasts.
Giada’s Italy: My Recipes For La Dolce Vita
This is Giada’s cookbook released in 2018, prior to her newest book, Eat Better, Feel Better. I bought a “signed copy” of Giada’s Italy at the Barnes & Noble in Mandeville one evening in April of 2018.
Ok, it was an “unauthorized purchase,” just something I wanted and there it was. It’s not something I do often (especially now), but I’m still a fan of Giada’s, so I bought one. However, I didn’t stand in line as I had before with a couple of her previous books—it was already signed, but likely not by Giada herself. That’s OK.
When I had the time, I read through the book and the recipes. It’s a marked departure from the previous formats of her books. After filming a couple of seasons of Giada in Italy in Positano and Florence instead of the usual California settings, there are plenty of pictures from both cities. One thing hasn’t changed: pictures of Giada, her daughter Jade, locals, and a few other family members enjoying the Italian seaside.
The Shrimp Recipe
Spicy Calabrian Shrimp is a recipe on page 41 of the book. Giada’s description says:
My version of a shrimp cocktail has a lot more kick than the steakhouse standard, thanks to the Calabrian chili paste. I use this spicy condiment in many of my recipes; it’s kind of like the Italian version of sriracha. If you can get your hands on fresh Thai basil, which has a slight licorice flavor, it’s really nice here, but if not, regular basil is just fine.
When BF saw the picture on page 40 of the shrimp, he said, “Oh, make that for me!” Sure, honey!
There was just one problem: Calabrian chili paste.
Remember, I now live in Central Louisiana, 300 miles away from Houston. Here, people get upset when you put salsa on cooked eggs as if you’ve committed a felony. Remember BF’s reaction years ago when I told him I needed allspice to make apple pie spice. Pointing at a huge rack of different local spice blends in Winn-Dixie, he said, “here’s all the allspice you need!” He didn’t know what I was talking about, and if he’d made that mistake in the Navy, he would have been thrown in the brig.
Nobody Had Any
Now, that link above will take you to Amazon’s entry for the condiment, but that wasn’t always the case—when they carried it, the site was always out. I literally couldn’t find the stuff.
A search turned up one brand on Nonna Box, a website that offers Italian ingredients shipped straight to your door, including the Calabrian chili paste. It’s currently out of stock, as it was before, but to buy it on this website would have been about $25 with taxes, shipping, and handling. OUCH.
I called the local outlets I thought should have such a thing, but nobody knew what I was talking about. (This was pre-pandemic.) Surprisingly, Rouse’s didn’t have it, considering their focus on Italian foods. I both visited Martin Wine & Spirits (formerly Martin Wine Cellar) in Metairie on one of my monthly jaunts and called the Mandeville store to no avail. I also called Red Stick Spice Company in Baton Rouge, they didn’t know what it was either.
My last resort: Phoenicia Foods in Houston. I sent an email, thinking, surely, they would have it, right?
Nope. And they still don’t, but they do offer to ship to addresses outside of Houston. Maybe I should take another look at their website. I so miss being able to shop in that huge place on Westheimer on the west side of town. They have the most interesting things imported from nearly everywhere.
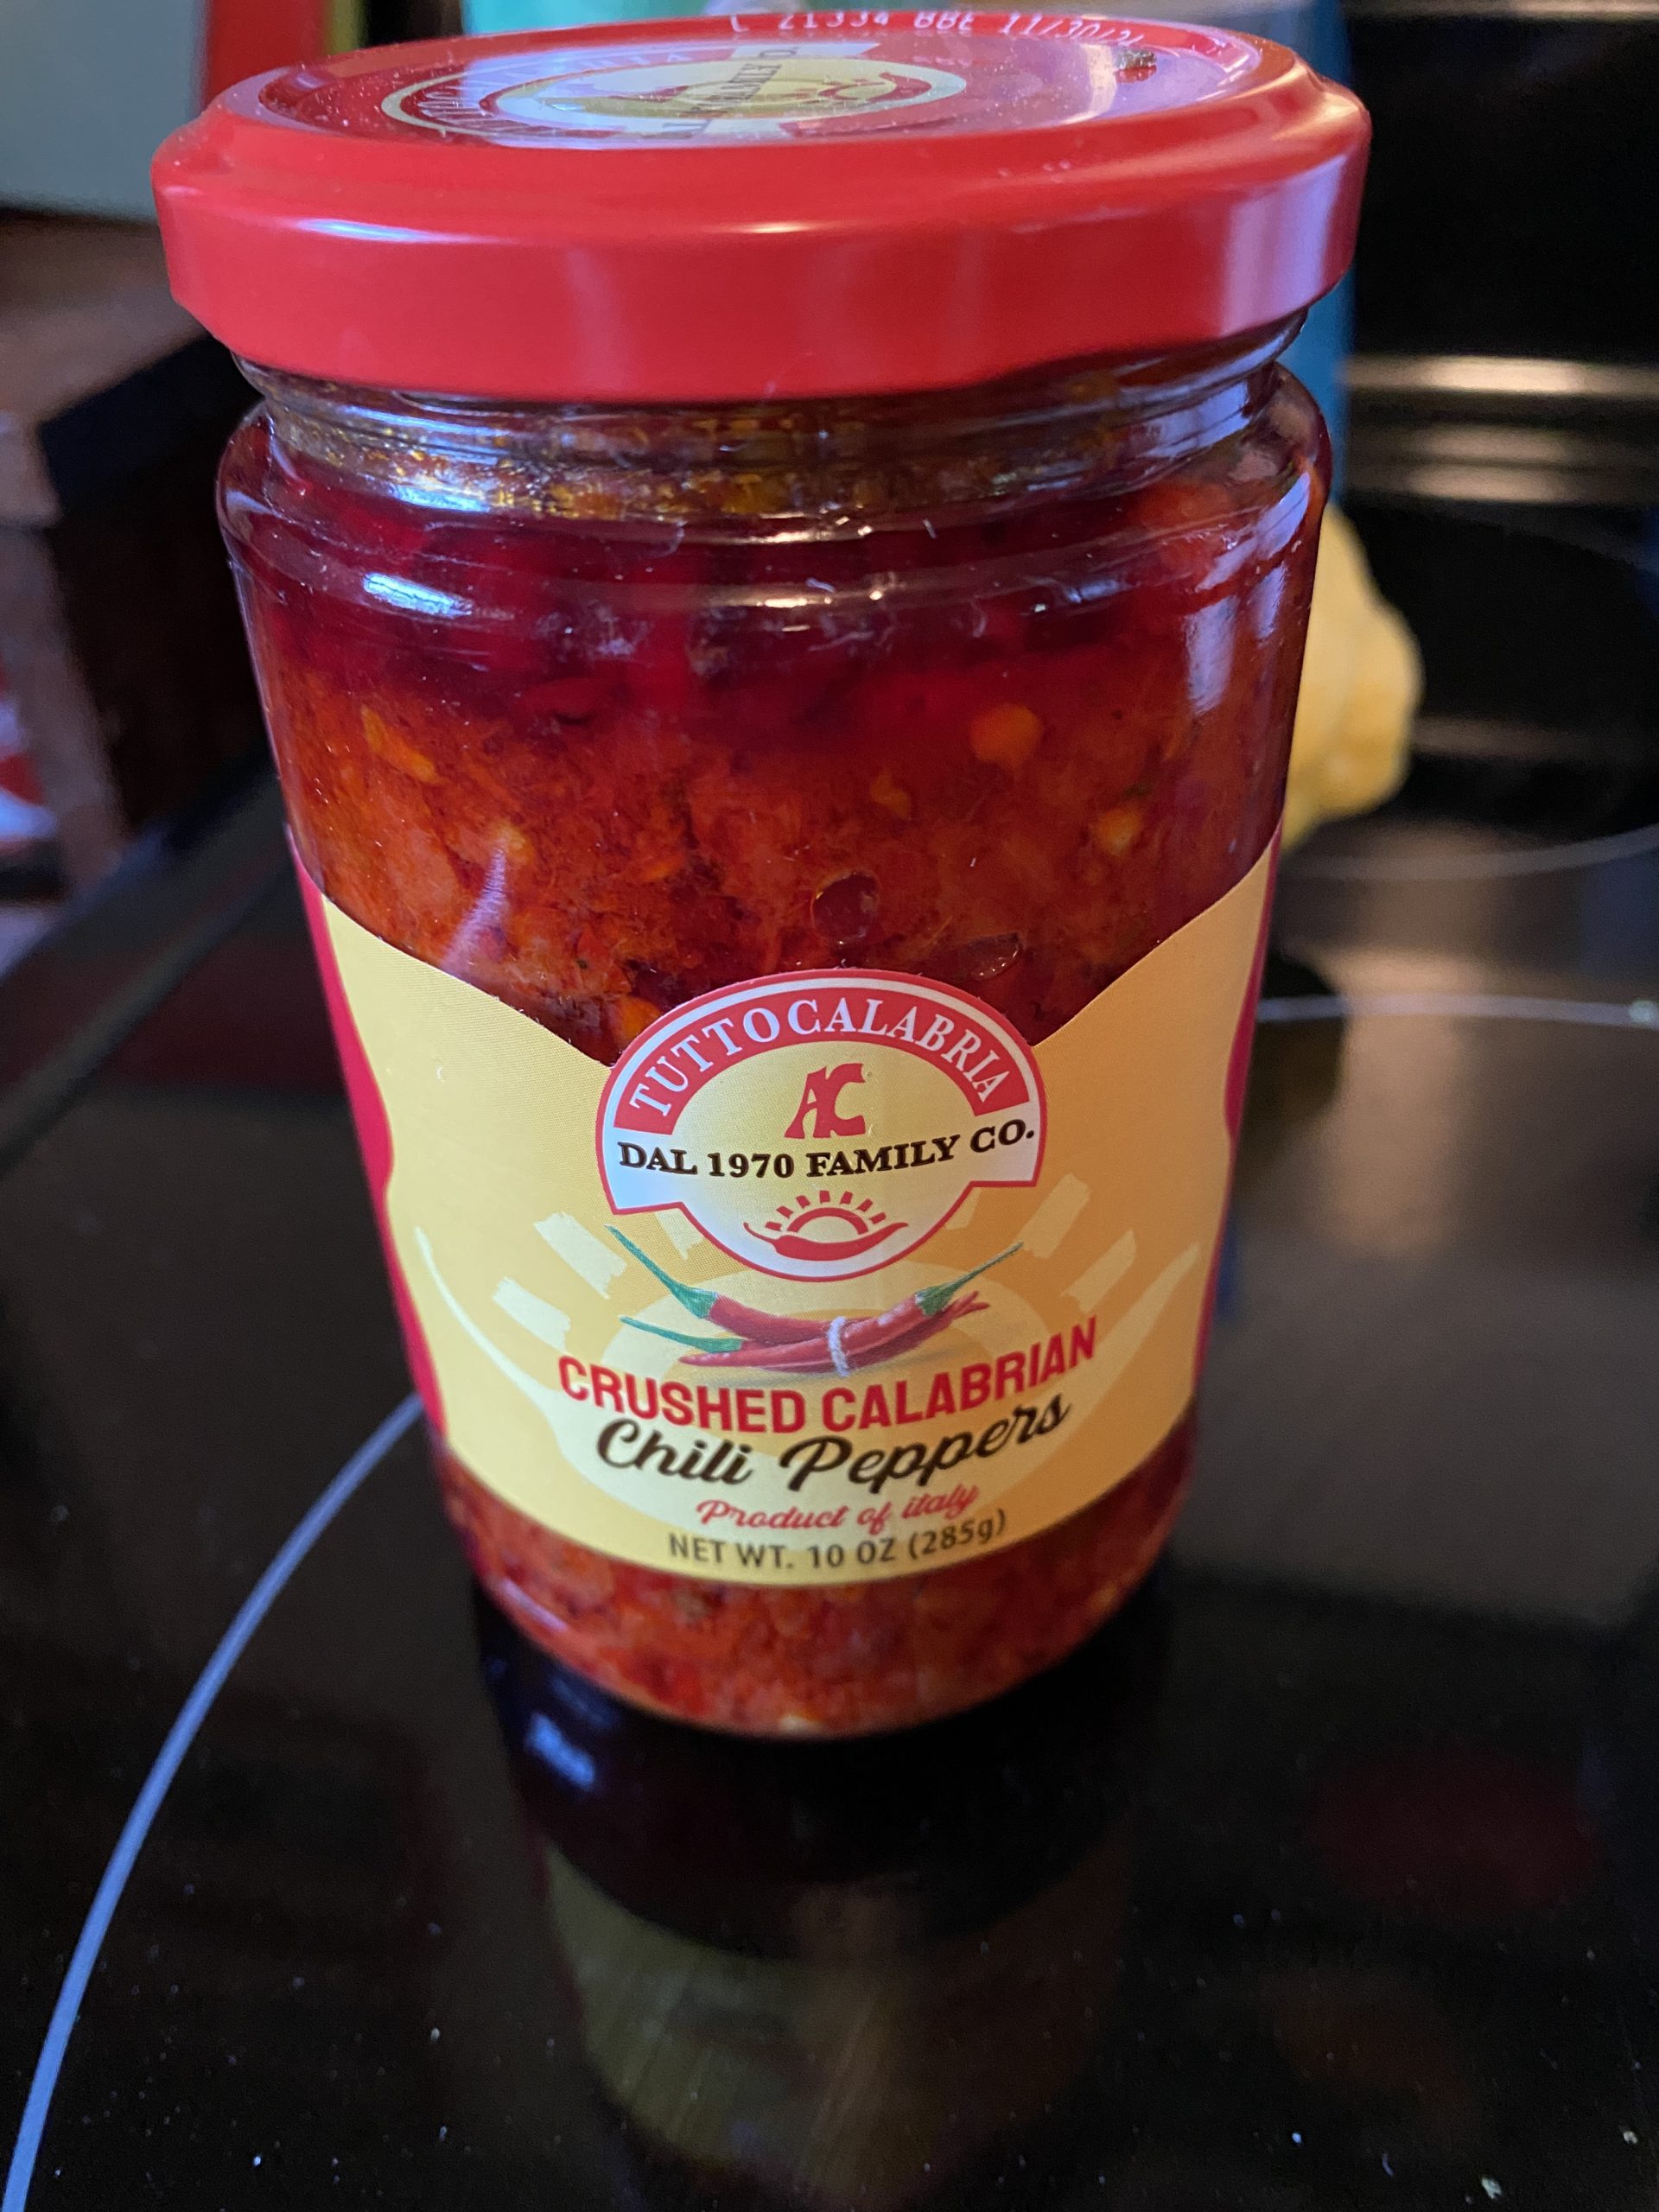
Calabrian Chili Paste-Finally!
BF has not forgotten this recipe, and occasionally asked when I would make it for him. I reminded him that I still couldn’t get the chili paste. The look on his face made me think I think he didn’t get that part. He says I was just telling him a story to get out of making it, but that’s not the case.
One irony was that Ree Drummond used this hot stuff on her own TV show one day. In Pawhuska, Oklahoma, famous for its “middle of nowhere” vibe. And then she makes a comment about how easy it is to find now. Sorry, what?

There it is, the magical stuff.
Y’all, I’m in the middle of Louisiana. When you talk about shrimp, they are either fried or boiled and only grilled if you ask for it specifically. Most people don’t know what cumin and coriander are used for, much less something like chorizo. Calabrian chili paste is just not something anyone knows here, and that became obvious quickly, even with many alleged “gourmet cooks.” (Yes, I’m still writing legal copy.)
A few weeks ago, The Giadzy, Giada’s online magazine and brand, published this article on her love of Calabrian chili paste. I saw it on Facebook. They even sell it on their website. Hmmm. . .OK, should I look again on Amazon?
BINGO! It was the same brand Giada uses, and it was finally in stock.
I needed something else from Amazon, so I ordered the paste along with the other item to get free shipping. (And why not?) The order arrived a few days later. We bought a bag of frozen shrimp at Winn-Dixie and made our dinner plans.
When I was getting ready to cook, BF said, “so we’ll have this with pasta, right?” Say what? No!! I read him what Giada instructs to cook with it, but. . .well, let me get to the making of this dish.
Shrimp For Dinner
Here’s the recipe to print.
Spicy Calabrian Shrimp
Giada de Laurentiis' version of shrimp cocktail, made spicy with Calabrian chili paste. From Giada's Italy, c.2018.
Ingredients
- ½ cup freshly grated Parmigiano-Reggiano cheese
- 2 tbsp olive oil extra-virgin
- 2 tsp Calabrian chili paste
- 1 tsp grated lemon zest from one-half lemon
- ¼ tsp kosher salt
- 1 lb large shrimp, peeled and deveined tails intact
- 1 tbsp fresh lemon juice
- 1 tbsp freshly chopped basil or Thai basil
Instructions
- Preheat the oven to 425F
- In a medium bowl, whisk together the Parmigiano-Reggiano, olive oil, chile paste, lemon zest, oregano, and salt. Add the shrimp and toss to coat. Allow the shrimp to marinate for 10 minutes at room temperature.
- Spread the shrimp evenly on a rimmed baking sheet and bake for 8 to 10 minutes, or until the shrimp are pink and opaque all the way through. Sprinkle the lemon juice and basil over the shrimp. Serve warm.
BF was quite happy that I was finally going to make it for him, four years after he first saw the recipe.
It’s simple to make, and Giada even tells you what to serve with it: Veal Saltimboca Milanese-Style on page 198 and Asparagus with Grilled Melon Salad on page 216. A teaspoon of Calabrian chili paste also goes in the salad along with cherry tomatoes, sliced cantaloupe, lime juice, Ricotta Salata cheese, and a few other ingredients. These ingredients are not the stuff of salads in this part of the US, save for cherry tomatoes, even in a restaurant that purports to be “Italian.”
One look at those recipes and I knew a) I would have more trouble finding ingredients, especially a 12-ounce veal chop and Ricotta Salata cheese, and b), he wouldn’t eat either of those anyway.
We’re not talking about the refined palates you see in Houston. No, we’re talking about a guy who spent three tours overseas: one with the US Army and two with the Navy Seabees, eating in chow halls. BF grew up not realizing that mac & cheese didn’t have to come from a box. He’ll eat ravioli from a can, but that little container of cheese tortellini from Trader Joe’s is still in the freezer because he’s not sure what it is or if he’s going to like it.
Spaghetti for him, and cauliflower rice for me.
I also realized I would need some Parmigiano-Reggiano cheese and might have to head to Rouses to get some. Nope—I already had a quart-sized bag in the big freezer, bought some time ago, and grated for whenever I need some.

A delicious cheese, but you don’t need much.
Now you’re cooking with gas.
Making The Recipe
So, once you’ve got your ingredients together—including the hard-to-find chili paste—it all comes together quickly.

The Setup
Preheat your oven to 425F. Then, mix up the ingredients:

Two teaspoons are plenty of chili paste, trust me.
Add in the shrimp, mixing well to coat:

Just like that.
Let them marinate for 10 minutes at room temperature. Then spread the shrimp out on a rimmed baking sheet and bake them for 10 minutes, until they’re pink and cooked.

This doesn’t take long
While that’s cooking, chop the basil:

That’s all I had, but I didn’t need much of it, thankfully

Then just set that aside with the lemon juice

Just like that.
When the shrimp are cooked, sprinkle the lemon juice and chopped fresh basil over them and serve warm.

Dinner! Spaghetti for him, Cauli-rice for me.
Guess what? He liked it! So now I can make it for him whenever we want, long as I have shrimp, the cheese, and the other ingredients.
Other Recipes In Giada’s Italy
The book has more delicious recipes, and I’ve tried a few:
- Avocado white bean dip, page 25—“smooth & creamy,” as I noted in the book on 4/11/2018
- Apricot Mostarda, page 38—delicious and sweet with a charge of spice. It’s intended for the antipasto platter, a sweet/hot bit among the meats, cheeses, and olives—much like a charcuterie board, really. It just really looked good to me, and I made some, but only once. BF wouldn’t touch it, so more for me.
- Zucchini Sottolio, page 226—someone gave us a couple of very large zucchini from their garden, and I wanted to do something different with them. Giada did not disappoint. Made on 6/18/2018, I noted “bold flavors with vinegar tang.” BF doesn’t like anything tangy or a vinegar taste, nor any type of squash, so again, it was just for me. The zucchini is sliced and quickly cooked in water and apple cider vinegar, drained, then added to a mixture of herbs. Put zucchini in a jar and cover with extra-virgin olive oil Add a tight-fitting lid before stashing in the fridge. This helps the zucchini last about three weeks in the fridge. Serve at room temperature as a side dish or other accompaniment.
- Roasted Parmigiano-Reggiano potatoes, page 219—BF liked this one too, and it was simple. I like the fresh rosemary, but I can’t seem to keep the plants growing here for some odd reason. I haven’t made it in a while but I should make it again, especially if we grow some potatoes.
Mind you, when I read this section aloud to him during proofreading, BF began his retching noises.
There are several recipes here I’d still like to try, like the Hazelnut Chicken on page 202. It’s a weekend meal for sure, but again, getting ingredients like Cerignola olives, Frangelico, and skinless hazelnuts requires some searching before I can make the plans. And of course, the question of if BF will eat it—but that’s why we keep cans of ravioli and Wolf Brand Chili around, too.
Until Next Time
I’ve been gifted a wonderful collection of things from across the pond, but not by Mr. Crompton. Pictures and explanations will come later in a blog post, including an explanation of some British biscuits (cookies) called Chocolate Hobnobs. Oh, yes, BF loved those, too.
I also have a couple of updates on some recently made recipes, and will again use the recipe plugin to create them so you can print them for yourself. A guest blog is also coming, as I mentioned last week.
Spring is here, so enjoy all the asparagus, fresh berries, and other delicious things that are becoming available.
Happy Dining!
Think you can’t garden because you live in an apartment or other small space? Well, think again—I’ve got just the book for you.
Hi, again, Dear Readers:
My apologies for being tardy again, it’s been a busy couple of weeks. I just wanted to make this blog look good.
But the good news is that suddenly I have several topics to blog about. This includes a couple of recipes that will use the new Recipe Maker plugin for WordPress. Those will be coming soon.
First, I have two disclosures:
- The publisher kindly offered me a complimentary copy of this book to review and to request my opinion; yes, I’ve read it
- As with many of my blog posts, there are multiple Amazon links to the book and other supplies here that, if used, earn me few commissions (aka “coffee money”)
Just thought I should mention it.
Amy’s Gardening Experiences
Longtime readers have been amused by my various gardening adventures since the inception of HeatCageKitchen in 2012.
Right now, I’ve got a bunch of purchased plants in the kitchen window, along with two basil sprouts in a pot that were salvaged from last year’s crop. I’m waiting for the nighttime temps to stay above the 50-degree mark so I can start planting them. Need to start some seeds as well.

Tomato, basil, cilantro, and a strawberry plant
We don’t yet have a place for an outside garden. There are flowers and green berries on those blackberry vines that are all over the place, so I’m anxiously awaiting their ripening and a bumper crop for the freezer.

Berries are coming soon
Some are already forming:

The first ones of a great wild berry season.
I’m hoping we can get out there and dig up a gardening spot soon, but I think it’s still a bit too chilly.
In my urban garden in Houston. I attempted to grow as much as I could in a 5’ x 8’ plot of land that had plenty of sun most of the year. Some plants did well, like basil and the Anaheim chili peppers, while I struggled with tomatoes and other plants.

Not really a “Hatch” chile, since it wasn’t grown in Hatch, NM. But close.
I relocated to rural Louisiana in 2016, and gardening here has also been a mixed bag.
Current And Future State
While BF contends that “we suck at gardening,” that’s not really the case. I did well in Houston, but that was also part experimentation and part paint bucket gardening because I knew that I would be moving out at some point. Most of my plants are currently in big white paint buckets, but we’re soon going to use a tractor to dig a garden.
That’s mint. Mojito, anyone? (I live with a mechanic)

See the flowers on the onions? that one was over two feet high.
The 10-year-old Meyer Lemon tree that came with me from Houston with me froze over this winter. But—surprise! It’s now flowering and coming back to life. We finally planted it in a nice spot this past Saturday.
Neighbor E still does some patio gardening, although his condo has only one patio, and not a large amount of sun. His patio is mostly or all concrete slabs. He doesn’t have any vegetables like tomatoes since Houston’s heat makes it somewhat inhospitable for them. There’s always Anaheim (aka “Hatch”) chili peppers, which grew like gangbusters my last two summers in Houston. I keep saving the seeds every year and keep trying to have a bumper crop here. Only BF and another SGI member in nearby Albany know what Hatch chiles are.
From Across The Pond
So, a few weeks ago I noticed an email from someone I’d never talked to before, Christopher Crompton of Pelargonium Press. I didn’t realize at first that he is in the UK, not the US. Somehow, he found me and my humble blog, and asked if I would review their new book, Apartment Kitchen Gardening by James Jacques.

The cover (may be different than the one on Amazon)
And why not? Of course, I said yes. Spoiler alert: it’s a pretty good book.
Christopher was even kind enough to send me a physical copy of the book as well as the digital. It’s not a long book, but it’s quite informative and, I have to say, interesting.
The book is geared to a UK audience, but most of it is relevant to US readers as well. Plenty of folks live in apartments, like the one I lived in for 7.5 years before I moved to Houston in 1998. It was a whopping 400 square feet, making the Houston place look like a small house. Somehow, I lived there with two cats, finished five years at Tulane University and graduated twice, cooked, sewed, and got married, all while working 40 hours a week. Then we moved all that to a larger Houston apartment. The best I ever did in Metairie was a few herbs in the windows, and unfortunately, killed an aloe vera with insufficient sunlight. This book would have been a great help.
I did give Christopher the business about the “incorrect spellings,” such as “colour.” But I’m used to those after 25+ years of watching British TV on PBS (now Britbox too) and reading overseas news.
Apartment Kitchen Gardening
This book packs a lot of information into the 133 pages of this 5” x 8” paperback. If reading more than 100 pages seems intimidating, it shouldn’t be—some pages have very nice hand-drawn illustrations, and not all the pages are full of text. The book is specific to people who live in apartments, not houses with nice-sized plots. But any gardener can benefit from the book. Author James Jacques gets straight to the point.
The book is divided into five chapters:
- Growing in an apartment
- Choosing your plants
- Growing places
- Taking things further
- Conclusion
In these chapters, Jacques describes everything you need for a successful indoor garden. And no, you don’t need to spend lots of money doing it, because he offers suggestions for repurposing household items for low-cost equipment, such as empty yogurt containers. Clear clamshell containers used for lettuces and berries are also good for starting seeds.
Gardening In Your Apartment
Yes, it is possible. But it takes some thinking on your part to figure out how you’re going to go about creating and growing your indoor garden.
Consider what you have available. Is it just a single windowsill, can you use a window box, or do you have a small patio/balcony available? Even a small balcony can grow quite a bit.
The most important factor is sunlight. The Metairie apartment had four windows because I was in the corner of a small apartment building. There were two windows in the bedroom that got good sunlight, and two in the living area, but only one with sunlight. In my first place in Houston, I had two large windows but none in the kitchen. When I moved to an El Dorado Trace condo in 2004, there were two large glass patio doors on either side of the unit to the fenced-in patios, plus the front door.
The back patio in El Dorado Trace had the sunlight that was good for growing, so that’s what I used. I was only able to grow a few houseplants on the front patio, and those were gifted houseplants on an old washer and dryer covered in a tarp. I tried growing tomatoes and rosemary out there, but nothing happened.
Here’s one suggestion I never would have considered—growing in the bathroom. And why not? It’s usually warmer and more humid than the rest of the house, right? Pineapples, vanilla orchid, figs, and mint love this kind of environment, Jacques says. So, take advantage of it if you have a sun-lit window in yours.
What You Can Grow
Ask yourself what you want to grow and go from there. Do you love fresh pesto (like me) and want to make it yourself? Obviously, sweet basil is on your list—buy one nice plant, cut it, and start rooting them in water so you’ll have plenty. Alternately, start growing your basil from seeds.
Depending on how much room you have and the incoming sunlight, you can grow a nice variety of plants inside. Jacques explains the need for sunlight, how much, and what you’ll need for different types of plants. And if your place doesn’t have enough light, there’s always the option of grow lights.
Salad Days
If you like salad the way I do, Jacques suggests what he calls “cut and come again” lettuce. I’ve only heard that term once before, from cookbook author Nigella Lawson, who used it to describe a cake in one of her earlier books. You bake the cake and keep it for company, then put it away until the next company visit. Jacques uses this description for lettuces that grow quickly and need to be cut frequently. Otherwise, you have the mess I’ve created in a paint bucket:

That is, or was, a Romaine lettuce plant
I didn’t cut it before because it attracted honeybees and gave them something to eat. One of BF’s car-guy friends has a bee box at the back of the property. When the plant flowers, we see the bees. I don’t think he’s getting the “bee action” he thought he would get. The flowers are gone, the plant dried up, and I pulled all the roots out a few days ago.
Recently, I bought a few more seed packets of different lettuces to plant. Hopefully I’ll I hope to have more “cut and come again” lettuce soon, even if it is in a paint bucket.
Hydroponic Gardening Systems
If you’ve ever seen grocery store produce called “hydroponic,” it means simply that it was grown in water. No kidding. Some plants can be grown only in water with added nutrients. I haven’t done hydroponics myself, although the author does discuss it at length for the indoor gardener. It’s ideal for the “cut and come again” lettuce.
You’re probably familiar with the hydroponic gardening setups by AeroGarden and the like.

You’ve probably seen these, but no, I don’t have one.
There are many brands of them now, and they’re also expensive. The cheapest model is under $100 but doesn’t grow as much. One of the top models sells for nearly $900. If you have the means and the room, and really want one, go for it. I considered buying one when I lived in Houston.
Jacques points out the differences between all the different types of kits, and that they may be a bit overwhelming at first. Some kits are basics that you can build upon, and others have more bells and whistles. Mostly, it’s dictated by budget. Like most endeavors, don’t spend more than you can afford.
Caveat
Understand that even when you buy one of these units, you’ll also have to buy the seed pods to replant. You can’t just drop by Walmart, Tractor Supply, or your local gardening spot and buy seeds. It’s a bit like the Keurig or Nespresso coffee makers—you must buy the pods to make more coffee because it’s not like making coffee in a French press. If this works for you—and I know folks with these kinds of coffee makers—go for it. I’m not criticizing anyone for buying either, just pointing out that the pod thing is a consideration if you’re thinking about buying one.
The author addresses these setups, but in the last chapter. Guess what? These systems aren’t necessary for you to garden in your apartment. From recycled milk and yogurt containers to fancy pots with grow lights, there is a way for nearly anyone to garden indoors.
Why Garden?
You’re probably thinking, “Amy, gardening books aren’t really interesting.” If you’re not into gardening and don’t think it’s worthwhile, chances are NO gardening book is going to catch your interest no matter how well it’s written.
But understand that people have an interest in gardening for different reasons:
- Supplement their grocery shopping and cooking with fresh produce
- Include more organic foods in their diet
- Get outdoors more and get some exercise
- Become more self-sufficient and secure their own food supply
- Learn a new hobby
- Increase their own food security in an insecure time (like right now)
- They grew up gardening and want to continue for the enjoyment and the harvest
My interests are a little of all these reasons. I started my little urban garden in 2008 or 2009. The GER offered advice, and he still gardens in his backyard next to the fence. The man I was dating at the time also had some gardening experience and helped when he visited.
You’ve seen the unusual gardening results BF and I had in the blog—like the septic tank tomatoes. We didn’t plan those. But I’m hoping we can dig up a garden plot in the next few weeks.
Re-Growing Veg
Jacques also discusses re-growing vegetables, which I’ve also done and blogged about. Right now, I’ve got several green onions re-growing outside, and three have flowered. I cut the flowers off and added them to the soil, so I hope they’ll grow more onions. I recently planted a sprouted celery base. There are two basil sprouts from last year’s plants that are also re-growing in the kitchen window. However, I had to cut that for dinner last week for a recipe that I’ll show in an upcoming blog.

One of the nice illustrations from the book
On page 25, Jacques talks about growing pea shoots from “cheap, dried supermarket peas.” I haven’t tried that yet, but darn it, now I want to! (When I do, the next comment I hear from BF will be, “is this another one of your science experiments?”)
Jacques also talks about the science of soil, including mixing your own. There’s even a chapter on compositing and even a wormery! In an apartment? Well. . .I don’t know if I’d go that far. Depends on how into gardening you are.
Gardening can also yield a few flops, like when BF staked the weeds instead of the green bean vines. But it can also be a great activity that leads to a delicious meal, too.
Stretching The Limited Food Budget
With inflation getting worse, chances are you’ll see more people gardening again as they did during the last economic downturn. Who can blame them? They’ll also see the benefits in freshly grown produce that’s readily available. But the people who need it the most may not realize that they have the ability, and just need some guidance.
If you know someone who is on SNAP (Supplemental Nutrition Assistance Program, the government assistance program formerly known as “food stamps”) let them know that they can also buy seeds and plants to grow foodstuffs with their benefits. I bet you didn’t know that, but it’s true.
Anything that grows and produces food can be purchased with SNAP benefits. Planting seeds and plants along with re-growing purchased produce like green onions, celery, and potatoes, and saving seeds from peppers, tomatoes, and other fresh vegetables can help a limited food budget go further.
Gardening is also a great project to do with children and will teach them where food comes from at the same time.
Further Reading
Apartment Kitchen Gardening is not only a great little book but also an easy read, too. Not everyone is up for 1,100 pages of War And Peace anymore, including me.
While Jacques touches on re-growing vegetables from purchased produce, several years ago I found a book called Don’t Throw It—Grow It! by Deborah Peterson and Millicent Selsam. The authors describe 68 different types of grocery-store bought food plants that can be re-grown on a windowsill and eventually grown in pots or even turned into a full-fledged crop.
Successes & Failures
I’ve tried to grow avocados three ways—with the toothpicks in water, with the sphagnum moss they suggest, and then just planting the seeds. I’ve had little luck here because it’s just not warm enough and does get cold in the winter. The seeds eventually sprout when you bury them in the soil. But once it gets cold, that’s the end of it. Avocados are also good for houseplants—if you can keep pets from destroying them.
I have some organic dried chickpeas I bought so many years ago to plant, and they’re still in the pantry. They might be viable, but I’ll have to plant them to find out.
Because I love pomegranates, I have some from last fall still in the fridge. Time to harvest those seeds and plant them, along with garlic, bulb onions, and other frequently used things. I also saved the top of a purchased pineapple, too. The last one I grew in a paint bucket got to be quite large:

The monster pineapple plant.
Let’s see if I have better luck this time, and maybe get to have some fresh pineapple, eventually. Jacques says it will take about two years before you’ll be able to “harvest” the fresh pineapple.
Until Next Time
I’m always looking for new topics for blog posts. I do have a few in the queue, including a couple of recipe updates and one recipe that I finally made for BF. Amazingly, he was quite happy with it, despite not understanding what was in it beforehand.
Coming soon is also a guest post! A fellow copywriter and a friend of the blog asked about doing a guest post, and I accepted her offer. We’ll be talking about it in the next week or so, and I’m sure it will be fantastic. She understands the blog’s tone but has a different idea on a blog post, so that’s in the works. Plus, she gave me another topic idea.
Springtime is here, so don’t procrastinate. Plants are in the stores now, so grab them while you can. Whether you’re an avid gardener or just thinking about a garden, get started so you can enjoy fresh vegetables, fruits, and herbs from your apartment.
Enjoy!