Posts Tagged ‘Garlic’

Did you know that pesto isn’t always made from basil? Many fresh green herbs can be turned into a delicious addition to your meals. Come see what I made with what I had in the garden.
Hi, Again, Dear Readers:
My apologies, I’ve been away. After the last post from Beverly, I’ve been busy with a new client who gives me a chunk of work every week. I’ve been concentrating so much there that I haven’t had much time to do everything else. The only sewing I’ve been able to do is minor repair work.
Before I forget: I updated last month’s Spicy Calabrian Shrimp. I found the missing pictures and they’re now in the blog post.
Current Events
Speaking of work: don’t get me started on Depp V. Heard. I’ve been paid to write two blog posts on the subject, and like a lot of people, I’m anxiously awaiting the verdict. That case has captured my attention but not for the reasons you might think. It’s extremely interesting, especially with my legal background. Livestreamed online, it’s real life, not a movie or TV show. I’m not a big “Depp fan,” but the case is intriguing. Then again, I do a lot of research and writing for the legal industry, so you understand why I’m so interested.
You probably don’t want to know about the insanely X-rated language, or the distinguished attorneys on both sides reading it all aloud in front of the judge and jury. Scriptwriters couldn’t write that kind of thing on purpose, but will probably try now. The court reporter–who has to record every filthy, nasty word of it–got a standing ovation from Depp, his legal team, and the people in the public gallery. I’ll say this for him–Depp is certainly a creative writer when he’s fired up.
Enough of that.
Downton Abbey
As for our wonderful friend Beverly, she is planning to write another guest post, this time on the Unofficial Downton Abbey Cookbook, which, she says has food you can actually cook. The Official Downton Abbey Cookbook series is more pictures and stories from the show, rather than recipes you’d want to make. Like me, Beverly reads cookbooks the way others read novels. So that’s coming up soon.
BF and I went to see a matinee of Downton Abbey: A New Era last week, and let me tell you—if you loved the series, you’ll love this movie. It ties a bow around the entire Crawley family saga, I think. Not sure if there will be any more from the DA saga or if this is the conclusion, I haven’t heard. I won’t give away any secrets that weren’t in the trailers, but there are a couple of things I didn’t see coming. Maybe I wasn’t paying attention. If you go—BRING TISSUES. Trust me.
On the way home, BF reminded me: “Never forget how much I love you.” In other words, if he didn’t, there would be no way he’d be going to see that film. Ever. Next up we’re planning to see Top Gun: Maverick. I hear it’s as good as the original, and I’ll need to re-watch the original because I haven’t seen it since 1986. Fortunately, BF has the DVD.
But today I’ve got a post on a discovery that you might be interested in trying even if you don’t like basil.
Berry Picking Season
The wild blackberries that grow here are ripening a few at a time, so I’ve started picking them around the property.

Look!! Berries!!
I showed these pictures to Neighbor E this past weekend, too.

These are ripening bit by bit
These, of course, are not yet ripe, but they ripen individually. There are occasions when I walk outside with this beast.

He’s always around, looking for food. He’s taller than the pit bull now.
And pick a handful or two for us. (BF doesn’t much care unless I bake the berries into something.) Broccoli Stirfry and I eat berries together, and he loves them. The pit bull doesn’t seem to get as excited about them anymore.
But when I go out to pick for the freezer, I’m wearing a pair of these gloves, a pair of knee-high Muck Boots, jeans, sunglasses, and a hat. I can reach more ripe berries that way unless I’ve been out with the silly dog and we’ve had the “low-hanging fruit.”

I pick as many as I can reasonably reach.
But I still get scratches and mosquito bites.
So far, I’ve nearly filled a gallon freezer bag with this year’s pickings, and BF is asking me to make something for him with them. I moved last year’s crop into the kitchen freezer so I can do just that for him. I just received the new edition of The Pioneer Woman magazine today. There’s a blackberry cheesecake galette recipe that I’ll be trying soon. Unfortunately, it’s not on the website. (Blog post?) I’ll also be making my favorite keto blackberry cobbler again, too.
Making Pesto Out Of Anything
Last week on Facebook, Giada de Laurentiis’ Giadzy online magazine re-published an article from 2020 called How To Make Pesto Out Of Anything.
Anything? As in chocolate and raspberry anything? No, not that anything, but fresh herbs and greens that you may have on hand, like I do.
The point of the article is that, although it’s traditional in Genoa, pesto isn’t necessarily made from basil. Pesto is not an exact science, nor is it rocket science. “The true beauty of pesto,” the article states, “is that it’s greater than the sum of all of its parts.” In other words, the combination of all the ingredients is what makes it so delicious, not just one specific ingredient.
It’s a bit like a puzzle really—one piece is just that, but when you put together 10 pieces of the puzzle, then 100 pieces, then more, you get the entire picture.
Well, that’s how I think of it anyway. I hope that makes sense.
No Basil, But Lots Of Mint
So I recently planted the two little basil clippings that I rescued from last year’s crop. I kept them in the kitchen window for months, and I recently planted them outside along with a packet of basil seeds in the same pot. Those seeds have started to grow, and the rescued clippings are doing just fine.

More pesto this year!
Additionally, I planted two packets of lettuce seeds in a different pot, and they’re coming along just nicely.

The return of salad days
Not ready to cut yet, but I’m looking forward to having some with a tomato or two.
But the mint plant that I’ve had for quite some time became overgrown.

That’s mint. Mojito, anyone?
I had plenty, but just didn’t know what to do with it. The stuff just grows, and I don’t want to make that many Corsican Omelets with goat cheese and Mojito cocktails. Keep it watered and you’ll have more than you know what to do with. Every time I went outside, I told myself to cut it and do something with it, but I didn’t know what. Thanks to Giada, I now have the answer.
Her standard pesto recipe that I’ve used for many years is
- 2 cups of fresh basil leaves, tightly packed
- 1 clove of garlic
- ¼ cup of toasted pine nuts
- 1½ teaspoons kosher salt
- ½ teaspoon freshly grated black pepper
- About 2/3 of a cup of extra virgin olive oil
Once you blend that all up, mix in a half-cup of grated parmesan cheese. Use it, refrigerate it for a week or so, or do what I do and freeze it as long as you want. Right now I think I have frozen pesto going back to 2018 or 2019. It’s still fantastic.
Using that as a guide, and then taking the information from the article, I went on to make pesto in a new form.
How It’s Made
So, it started out with walking outside and clipping what seems to be a mountain of mint growing. You always keep mint in a container. Otherwise, you’ll find out what happens, as Banana Rat did many years ago when he planted it in his backyard.
Mint takes over wherever you plant it. A few years ago, he posted it on Facebook one day with a question: “Can you say endless mojitos?” He literally had mint growing in about half of the yard. I don’t know if he still has mint growing everywhere, but it is pretty difficult to tame and remove. So, if you like mint, keep it in a container, or you better really, really love mint with all your heart.
Next, I gathered up all the ingredients I had.

The Setup.
I didn’t have any Parmesan cheese because I hadn’t been to the grocery yet. I also took Giada’s suggestion to use walnuts instead of pine nuts.
So I clipped and I clipped and I clipped, filling up the salad spinner inner basket.

Yes, that’s all fresh mint.
Buddy doesn’t care for the mint

He tried it, though.
Then I washed the leaves well, spun them, and began picking the leaves from the stems.

Check out the water that comes out after you spin it. You don’t want this in your pesto.

That’s a lot, but you know the leaves are clean.
All told, I had about three cups of mint once I finished de-stemming. Perfect.
Making Pesto
Then everything went into the blender just as you would with basil pesto.

Don’t forget the salt and pepper
I like walnuts, so I figured I’d try them this time. Yes, pine nuts are delicious, but they are also pricey. Just for once, I figured walnuts would be OK. And you know what? They worked quite well. Plus, I could snack on them and not feel guilty. Toast them first, don’t burn them:

Watch them, they can burn, but they do take longer than pine nuts.
And put them in a cold bowl to stop the cooking and cool them off.

Ready to go
Next, add them to the blender:

Just like the pine nuts
And blend!

Just like that.
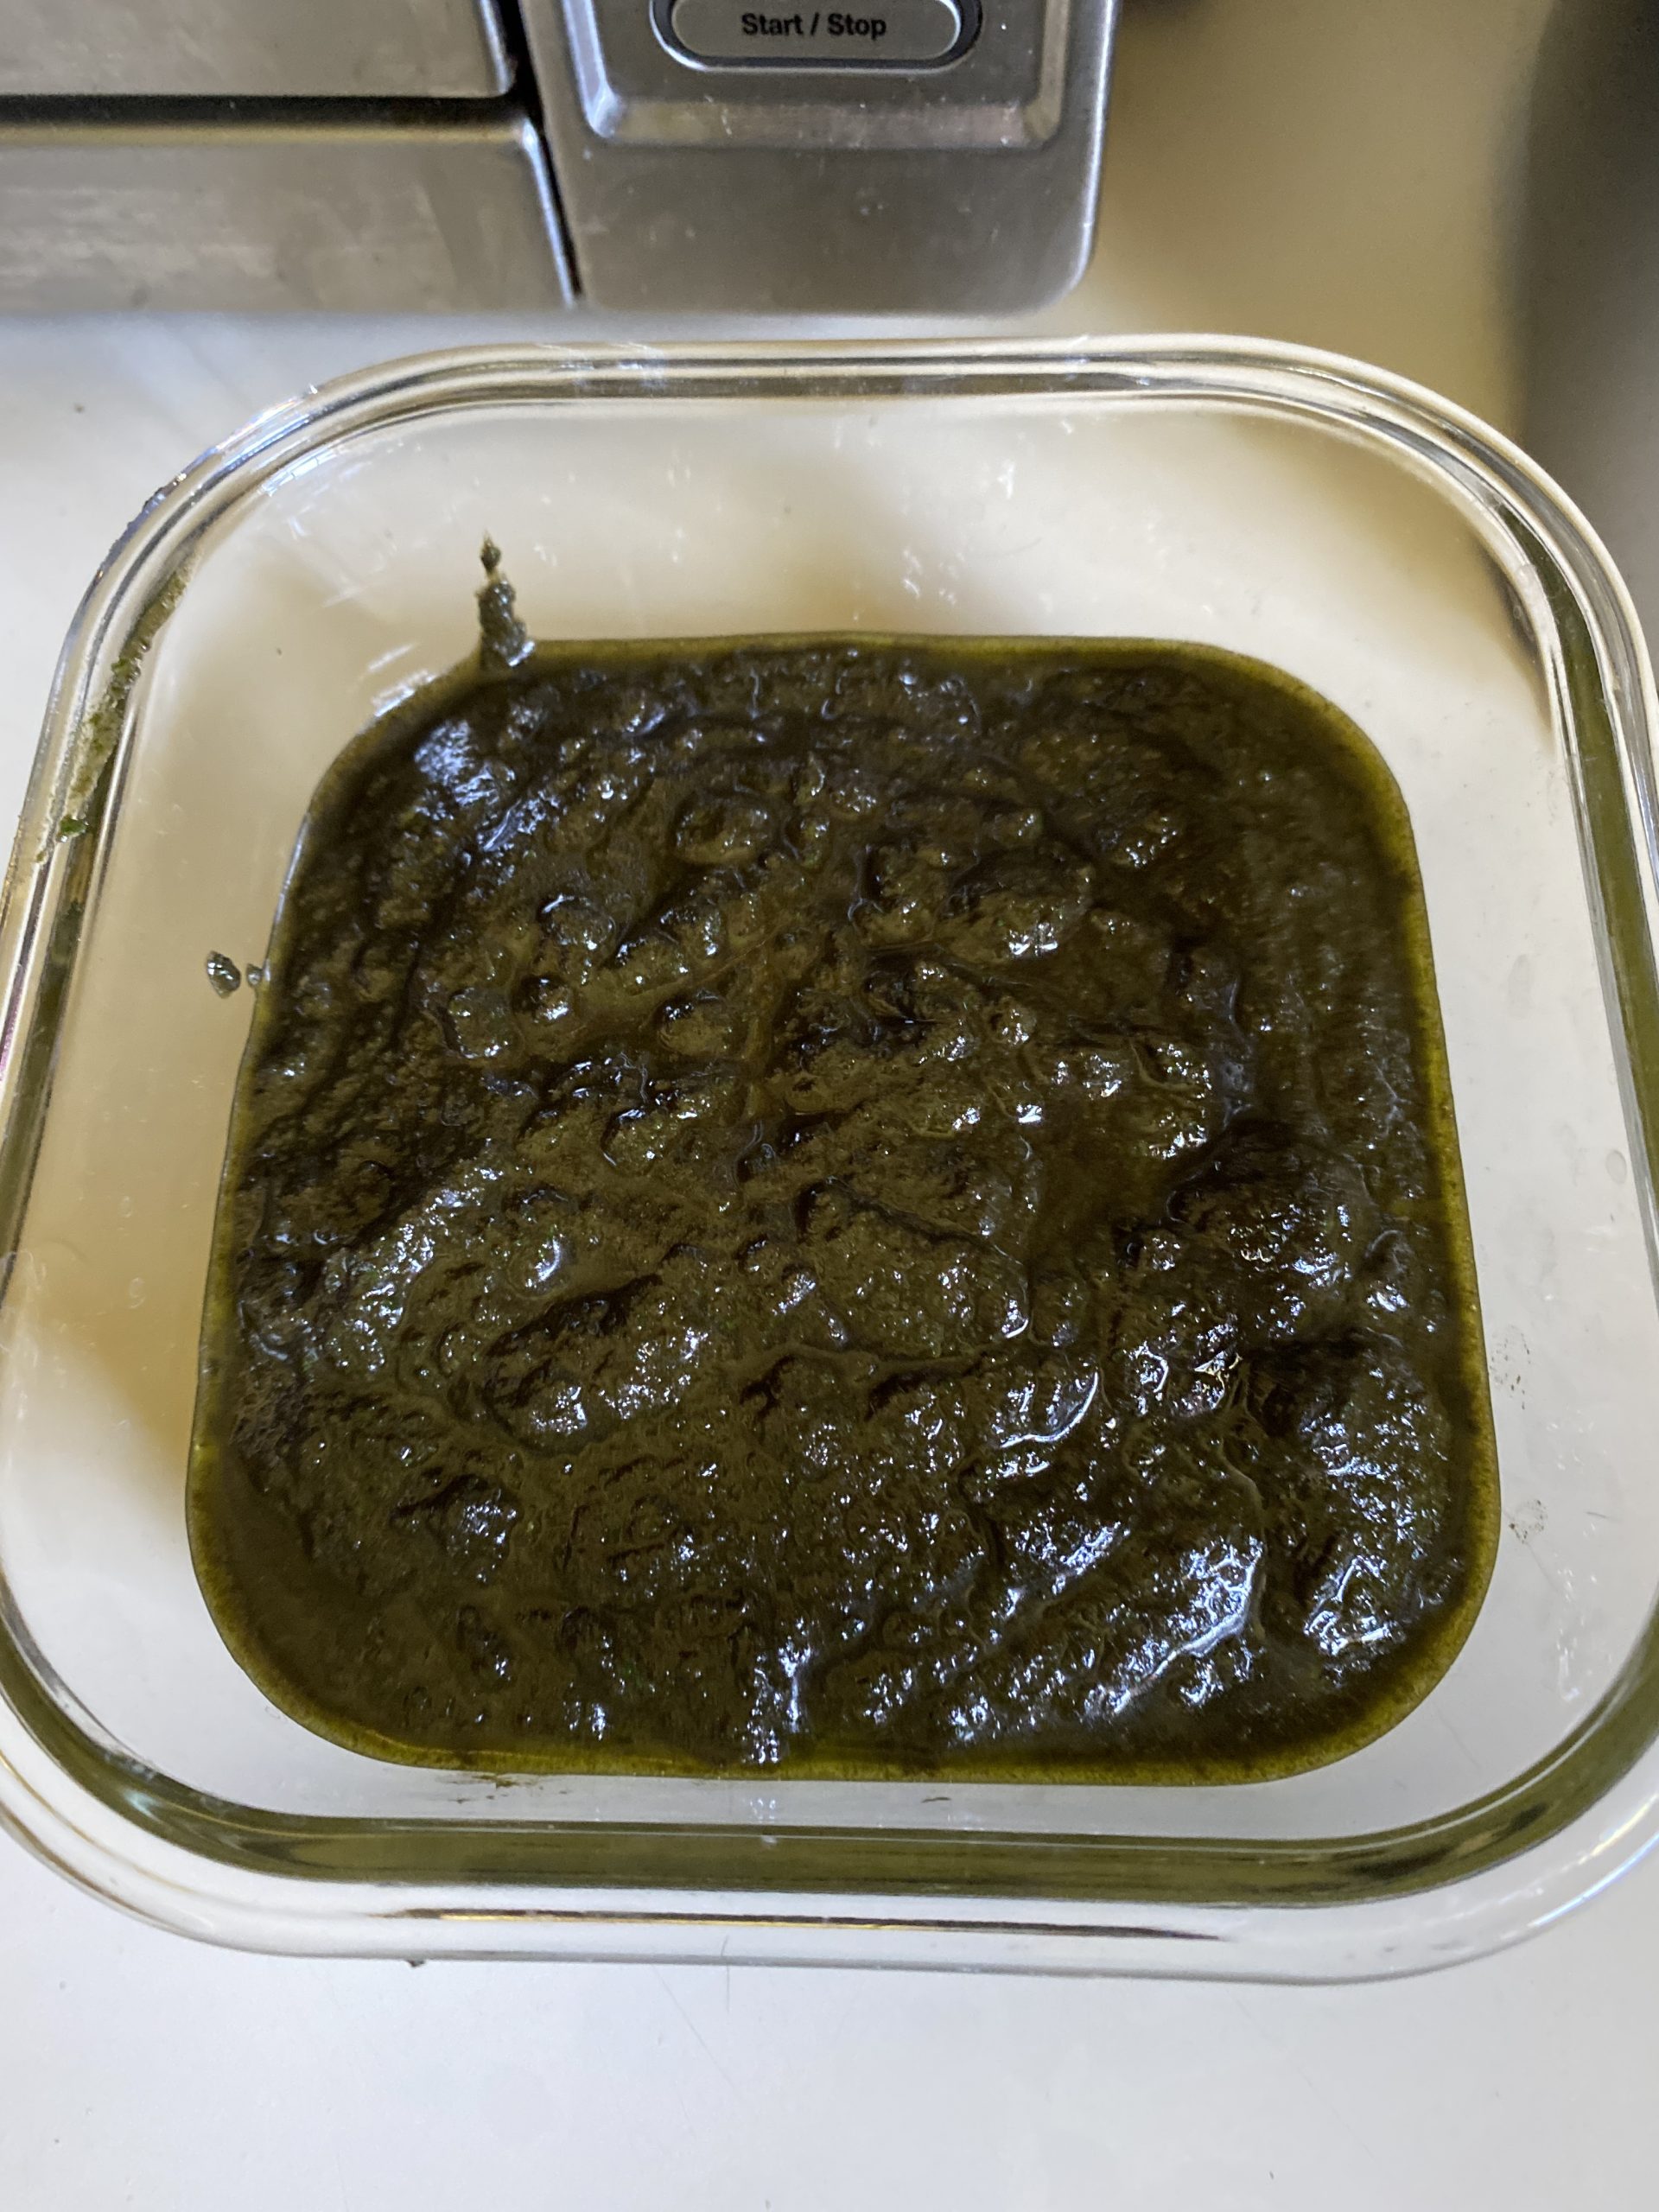
I tasted the finished product, and it was quite minty. The garlic and the olive oil sort of tame the extreme mint flavor, but you could still taste the inherent “mintiness.” I decided to put it in the freezer until I could figure out what else to do with it. I still needed to add Parmesan cheese, but I wanted to give some more thought to what else I would add.
The Next Step–Parsley
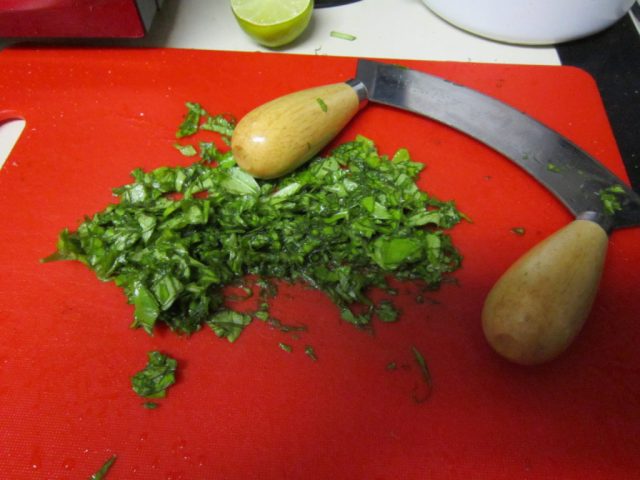
I needed to go to the grocery anyway, and we were indeed out of Parmesan cheese. So, after giving it some thought, I decided to add some Italian flat-leaf parsley.

I think that was half a cup
Then I got on with it.

Add a little at a time until you get the consistency you want.
First, I had to thaw the pesto because it froze quickly. I ended up having to microwave it for about 30 seconds just to soften it up. Even then, it was cold, and it was still kind of like a sludge.

Still frozen
Once I got it out of there I started with the parsley.

It was a bit easier this time.
But I managed to get it into the blender just fine after adding the requisite Parmesan cheese.
I just sliced the parsley leaves clean from the bundle at an angle with the blade of the knife. I didn’t take the bundle apart. Pulled the stems out to make sure it was just leaves and I added it all in after washing and spinning.
Because it was much thicker now I had to add a little more olive oil a couple of times. I also added in a couple more cloves of garlic, too.
I blended, and I blended, and I blended, stopping the motor to move it around with the blender spatula to make it catch everything. Finally. I had a nice emulsion.
I removed it from the blender, very carefully, as much as I could get out of it, and then added a little more of the Parmesan cheese.

This was the second addition of cheese, about a third of a cup I think.
Then mixed it well, and tasted it. I think I’ve got four cups of this stuff, which is great, I’ll have it for a while.

Take your time or you’ll make a big mess
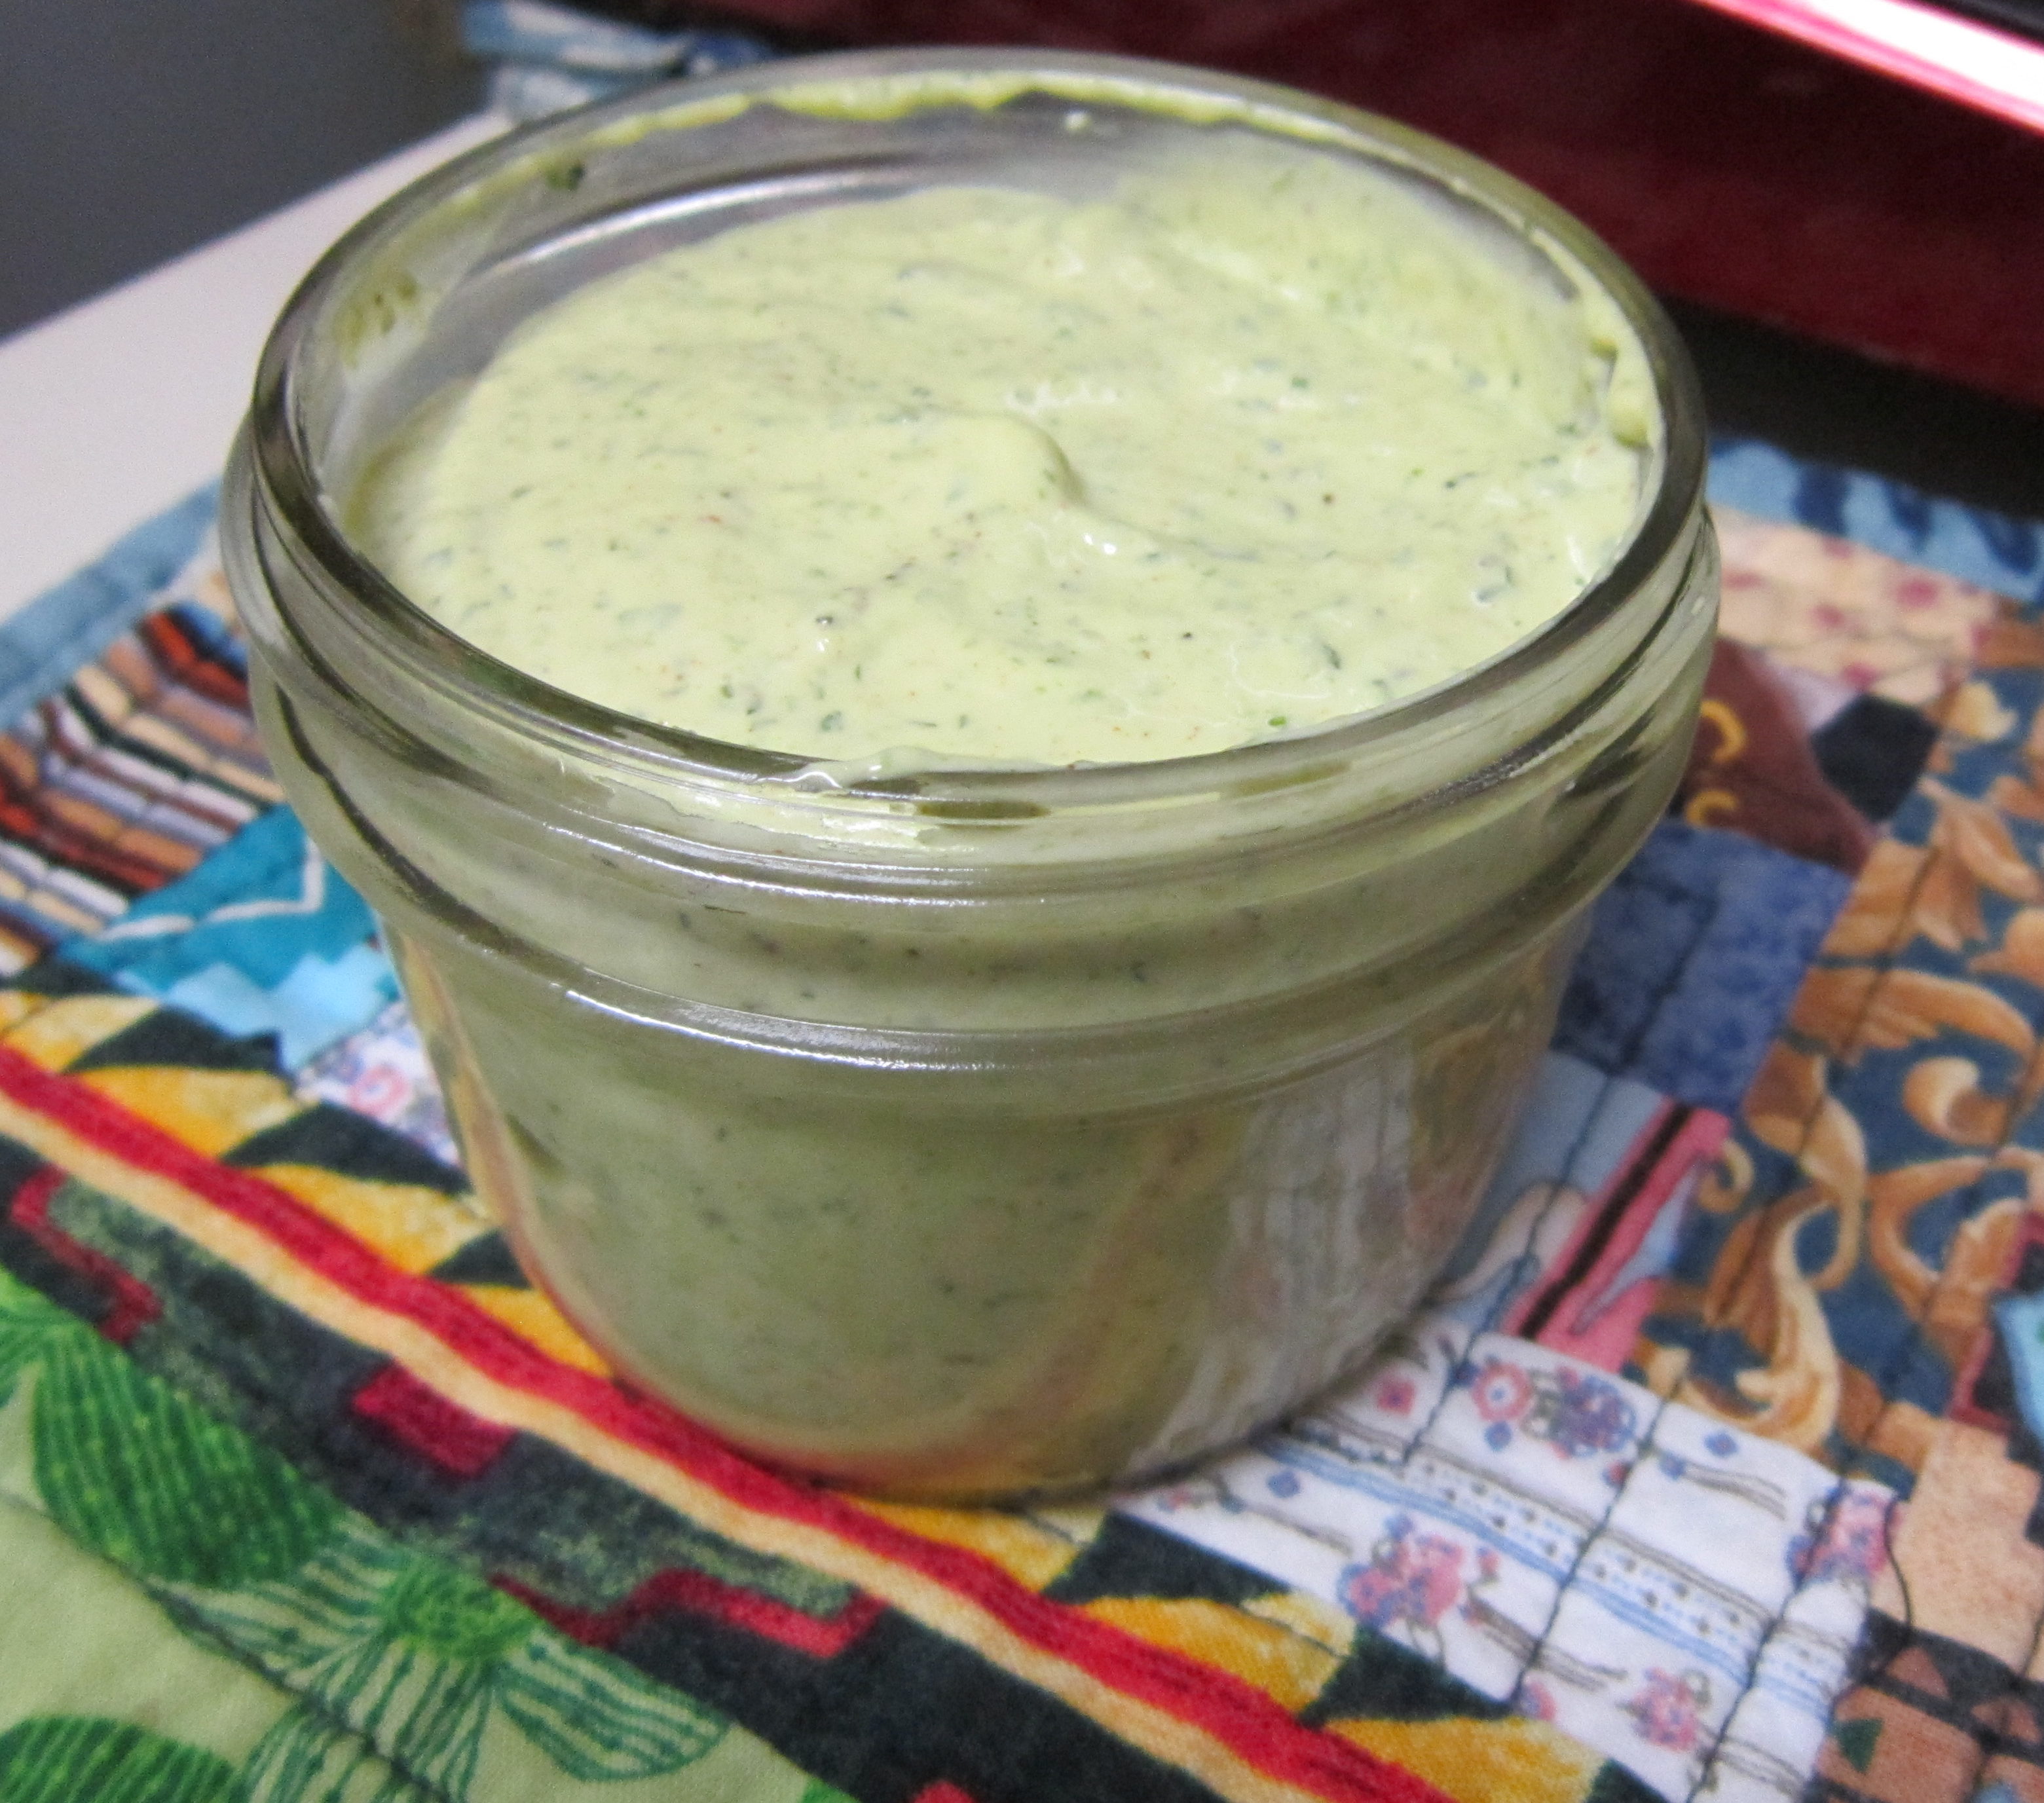
And then you have this, in a larger container than the usual one-cup or two-cup containers I use:

Done!
Verdict: incredibly delicious, and the parsley tames the mint flavor.
Where has this been all my life?
The Recipe
OK, so I can’t say I was trying to create a new recipe. But guided by the article and my previous experience making standard pesto from basil, here is my recipe for mint and parsley pesto.

Mint & Parsley Pesto
A fresh take on the Italian favorite with herbs that aren't basil
Equipment
- Blender Essential when you're making pesto
- Salad spinner This takes much of the water off the herbs after washing
Ingredients
- 3 cups Fresh mint
- 1 bunch Italian flat-leaf parsley
- 2 to 3 cloves Garlic
- 1 cup Extra virgin olive oil
- ° Salt & Pepper to taste
- ¾ cup Walnuts (increase or decrease as you like)
- ¾ cup Parmesan Cheese (increase or decrease as you like)
Instructions
- Toast the walnuts (or other nuts) until they are warm and fragrant. Do not burn. Add to a cold bowl and set aside.
- Remove mint leaves from the stems. Wash and spin in the salad spinner to remove excess water.
- Chop parsley leaves off the bunch, then repeat in the salad spinner to remove excess water.
- Add the herbs to the blender, along with the garlic, toasted nuts, and a little kosher salt and freshly ground pepper. Add the lid to the blender with the center part removed.
- Measure out 3/4 cup of the extra virgin olive oil. Slowly pour into the running blender through the open top until the cup is empty. If the contents don't seem to be chopping and mixing, turn OFF the mixer and use a spatula to move things around in the bottom. Remove the spatula, replace the lid, and try again. Add more olive oil a little at a time until the blender moves and you get the right consistency.
- Pour the pesto into a bowl, and add the Parmesan cheese. Stir until completely blended. Add to a storage container and either refrigerate for a week or freeze for later. Makes about 3 to 4 cups of pesto.
It’s as simple as making standard pesto, and the flavor is outstanding. I’ve got the finished product in the freezer, marked for identification. Of course, I did, so that there’s no question about what’s in it. I recommend using square or rectangular glass containers to freeze the pesto because they’ll fit better in your freezer and there’s no loss of flavor. I speak from experience on this one.
OXO makes some good ones, as does Target. I think I found a few at Ollie’s Bargain Outlet in Denham Springs, too. But I do miss the Pro Glass squares I used to get at Bed, Bath And Beyond, they don’t seem to have them anymore.
Uses
What am I going to do with this new version of fresh pesto? Well, my first thought is to add a small amount on top of a grilled or a roasted chicken breast, chicken thigh, grilled shrimp, or baked fish. One could also add it to some freshly cooked pasta (gluten-free for me.) Granted, BF insists on frying all fish in the house, so I would have to do this when he wasn’t around.
I also think it would be good in or as a dip. So if I was in the mood for some cut vegetables, a little bit of this pesto would be good for dipping. Maybe I could mix some in homemade mayonnaise, or some sour cream, or something else that would work as a base. Or I could turn it into salad dressing—I’ll think about that one too.
Note that it tastes like a pesto, not specifically like mint and parsley, so you could probably use it as you would basil pesto if you wanted.
Cause And Effect
I was quite happy to tell BF about this discovery. However, he was not as happy about hearing about the new recipe, as usual.
I described to him the process of cutting down all that mint, then blending it together. In between sentences, he gave me his requisite verbal retching sounds. This is the same guy who is very particular about his toothpaste and the type of minty-fresh Listerine mouthwash he buys.
While he was at work, I told him via text that I’d finished making it.

Thanks, Honey.
Well, more for me, I guess. I marked it so there’s no question about what’s frozen in the container. Of course, BF won’t touch it, because he’s been around my pesto-making for more than five years and declares it an abomination or something.
Still, I’m glad I made it, and I can’t wait to try it in or on something. It’s not the strong basil flavor, but it sure is tasty.
If you’ve got a good amount of herbs growing, a combination of the herbs would also work, given the garlic or other aromatic Giada recommended in the article. You could use any type of oil, but extra-virgin olive oil is the best for this. Walnuts—well, they’re tasty roasted in the pan, that’s all I’m saying. But you could use almonds, or leave the nuts out entirely.
Until Next Time
It’s pretty much summer here, so wherever you are, enjoy summer while you can. Of course, in the south, we enjoy it six to nine months out of the year. (Winter hung on a little longer this year.) It’s a great time for grilling and enjoying the outdoors. Don’t forget the berries.
Enjoy!
Happy Monday, Dear Readers:
Once again, apologies for being absent. Life has pulled me in other directions. I’ve still got one post I’m trying to get to finish, but it requires research, and I haven’t sat down to do much of it. But if you like to read about foodie subjects, it’ll be worth it. I like to make sure I give all of you something interesting to read.
I keep thinking I don’t have anything to write about. Then something else shows up, and I write a blog post about it.
This post involves some garlic, and I’ve been meaning to mention this important point for a while. I read recently that when you’re buying garlic, there’s a simple way to know if you are getting domestically produced garlic or garlic grown in China: the roots. If you are buying garlic that has roots attached, it’s domestic, grown in California, Texas, or somewhere else domestically. But if the roots are scraped off, and the bottom is concave, it’s China-grown. This article on the Living Traditionally blog explains it further. Garlic from China is bleached, and even organic garlic is grown under questionable conditions. I have not yet been successful growing garlic here in the HeatCageKitchen garden, twice buying some from Territorial Seed and finding nothing in the spring. (Not their fault, of course, I’m an obvious amateur.) I put the question to the lecturer at our last monthly Green Thumb klatch, and she told me to just look for local garlic, probably grown in nearby Dickinson, and let it sprout. DUH, Amy.
I like to read myself, if you didn’t know that, but most of it is online now. I think I mentioned that I cancelled my 20-year subscription to Martha Stewart Living earlier this year; it just wasn’t “Martha” anymore. But I do read other things, and one of them is a wonderful publication called Mary Jane’s Farm. What? You’ve never heard of it? Me either, until I got a flier from them a few years ago. I wasn’t particularly interested, since I was reading Hobby Farms, along with the now-defunct Hobby Farms Home and Urban Farm, all at the same time. The second and third magazines were eventually rolled up to the first, and I later subscribed to Mary Jane’s Farm. It’s a replacement, I suppose, for Martha Stewart Living, although the content is somewhat different. The target demographic for Mary Jane’s Farm are women who live on farms, those who want to live on a farm, and those, like your humble blog author, who dream about living rural in the future.
I received the August/September issue last week, but finally got around to reading it on last Tuesday. Oh, BOY! A feature article on. . .Farmgirl Barbecue! Being a naturalized Texan (September will be 18 years since I moved here), I appreciate good barbecue. Even though I have my favorite barbecue sauce from one of Suzanne Somers’ books, and my favorite barbecue rub from the May 2002 issue of Martha Stewart Living, I’m open to considering new forms of barbecue. Mary Jane’s Farm delivers.
What first got my attention was the Blackberry Barbecue Sauce on page 46. WHAT?? (Warning: that recipe also has fresh ginger.) Unfortunately, it also calls for “2 cups ketchup,” and the recipe for said ketchup is on page 43. (GRRRR.) OK, so I look at that recipe but would have to buy 6 large tomatoes parsley, coconut sugar and lemon juice (I generally have limes around.) Not going to make this today. . .but the recipe for yellow mustard is next to it, and I have everything I need to make that. I’d like to try it soon.
Then on page 44, I see a beautiful picture and a recipe for Creole Aioli.

How could I resist? (Recipe available on the Recipes page.)
I’ve got everything I need to make it! Almost.
Now, hang on. . .I’m sure there’s at least one person who’s thinking, “what is Aioli, and can I get arrested for making it?” Relax, it’s legal (at least, for now.) Aioli is a French version of mayonnaise, made by hand (usually) and is more of a dressing than mayo. There is a good version of it in Suzanne Somers’ first cookbook, and she explains it. However, this farmgirl “Creole” version packs a seriously garlic punch. (Not all “Creole,” “Cajun,” “New Orleans”and “Louisiana-style” food is burning hot.)
So what excuse did I tell myself for making it? Well, there were four:
- I can write a blog post about it
- It’s from the new issue of Mary Jane’s Farm
- I have everything I need to make it right now
- It would taste great with some waffle maker hash browns
And here we are!
I don’t normally have sour cream in the fridge, and that’s one of those things that goes great with potatoes. (Thanks, Neighbor E!) So the first thing to do is get some hash browns cooking, since it takes about ten minutes or so once you put the lid down.

Nothing like the loud, satisfying sizzle when this hits the waffle plates. (The potatoes might not have been dried out enough, either, but they were still pretty tasty.)
Ready to rev up nearly anything you’re having for dinner–or any other time–and make a big mess while you’re at it? Let’s make some.

The setup
As you can see, I had everything handy, with the exception of a lemon, so I used lime. (You can do that in many recipes, unless you’re making a Mojito.) Normally, I would not cut that much basil (you see the size of them leaves?) but when I saw Miss Shirley last week after the gardening lecture, I told her about the big, leafy basil I was getting, and she suggested cutting a third off. So. . .I did. And that fresh oregano plant needed a bit of cutting, too.
I started out doing Mise en Place, or prepping everything and setting up. (I heard Martha Stewart say that on the show years ago and never forgot it.) There’s someone on set on those cooking shows and morning-show food segments doing this before they go live, you know. Neighbor R gets upset watching cooking segments on those get-together TV shows because she knows how long stuff takes. But, she says (while gesticulating with both hands), “when you watch them cook on TV, it’s boom-boom-boom and it’s all done!” They’re set up before the cameras turn on so that everything is ready to go, and the cooking host can make that dish in a matter of seconds. For more complicated things, like bread, several are made so that you can see how it’s supposed to look in various stages of completion.
Anyway. . .mise en place. I do it all the time.
I measured out the spices and put them in a pinch bowl, then separated out the eggs:

Makes life easier when you prep first.
Went to town on the basil and oregano:


I cut a little too much basil, so the remainder went in the fridge covered in some olive oil and I used it to coat some chicken leg quarters I roasted yesterday. Along with two egg whites in another pinch bowl, which went into the weekly slow-cooked breakfast quiche.
Once everything else was done, I set out to deal with the 3 cloves with a half-teaspoon of salt. In a mortar and pestle. No kidding.

When was the last time you saw me use one of these? I don’t know either, but I have one.
If you don’t have a mortar and pestle, you could try smashing it in a small bowl with the back of a wooden spoon, mixing with the salt to make the paste. I haven’t tried that, it’s just the first thing off the top of my head.
The salt acts like an abrasive while you grind it into a paste. That’s right, a paste. It takes a few minutes of elbow-greased grinding, but it does come out that way:

Garlic/salt paste.
Once that’s done, the recipe says to add it to a small bowl with the egg yolks and whisk them while you slowly pour in the olive oil. However, I decided to not to entertain the possibility of making a huge mess with eggs and olive oil and spending the rest of the night scrubbing them off the floor.

The alternative, aka “direct-application” method.
You may be asking yourself, “Why is Amy using an immersion blender for this?” Answer: because Amy also has no patience.
I’ve made mayo before, either like this or with a regular stand blender. It’s not difficult, but I have no idea why they don’t suggest a blender. So I did it.

POWERRRRR!!!
First you whiz together the egg and garlic paste. Then you add in a half-cup of olive oil, whiz that around (or whisk it by hand if you prefer) then add the spices, herbs and lemon juice, and blitz it again (or just mix it well.) If you’ve ever made mayonnaise from scratch, you know how this works. (Placing a small cut of rug backing under the bowl helps keep it in place and prevent sliding, just like the anti-slip cutting board trick I mentioned in my last post.)
You end up with this:

Holy Shish Kebab. You really, REALLY need to like garlic for this one.
What does it taste like? WOW–Garlic! Pepper! Spice! Herbs! You don’t need much–this Aioli will knock you over. The recipe calls for 1/8 teaspoon of cayenne, but I used about a third of that. (In other words, not very much.) You can leave it out altogether, if you like–the garlic stands on its own, and will still throw you off your chair if you’re not ready for it.
Proceed with caution, and dip carefully. You’ve been warned. (The good news: it’s gluten free!)
This is very tasty on the waffle hash browns, (like the hash browns themselves) really, REALLY creamy and so good. There’s a lot of taste in this little cup of sauce. It keeps for about a week in the fridge. A little goes a LONG way. But dip with care–the strong taste will compete with other flavors like sweet potatoes. I tried it with baked sweet potato fries, and the tastes compete too much. But it’s great on the regular white potatoes.
I need to make more soon.
I gave some to Neighbor E to try. (I didn’t give any to Neighbor R, since she’s elderly and the cayenne pepper might bother her stomach.) He forgot to pick up a potato to bake on his last food forage, so he could try it that way. E finally decided to use it on a sandwich and loved it.
WARNING: Remember that there are raw eggs in this aioli, so anyone who is allergic to eggs, is very young or elderly, or has a compromised immune system, will need to leave it alone. I hate to be a Debbie Downer, but you don’t want to surprise anyone who can’t have raw eggs for any reason. Unfortunately, my longtime friend The E Man is allergic to eggs. . .sorry, Dude.
But if you don’t have a problem with the raw egg yolks, enjoy garlic, and can handle the pungency, Creole Aioli is a delicious spread or dressing for you, any time. As always, the printable PDF is on the Recipes Page for you.
Enjoy!