Namecheap.com
Front cover of Easy Dirty Keto book by Emilie Bailey
Cookbook Review: Easy Dirty Keto

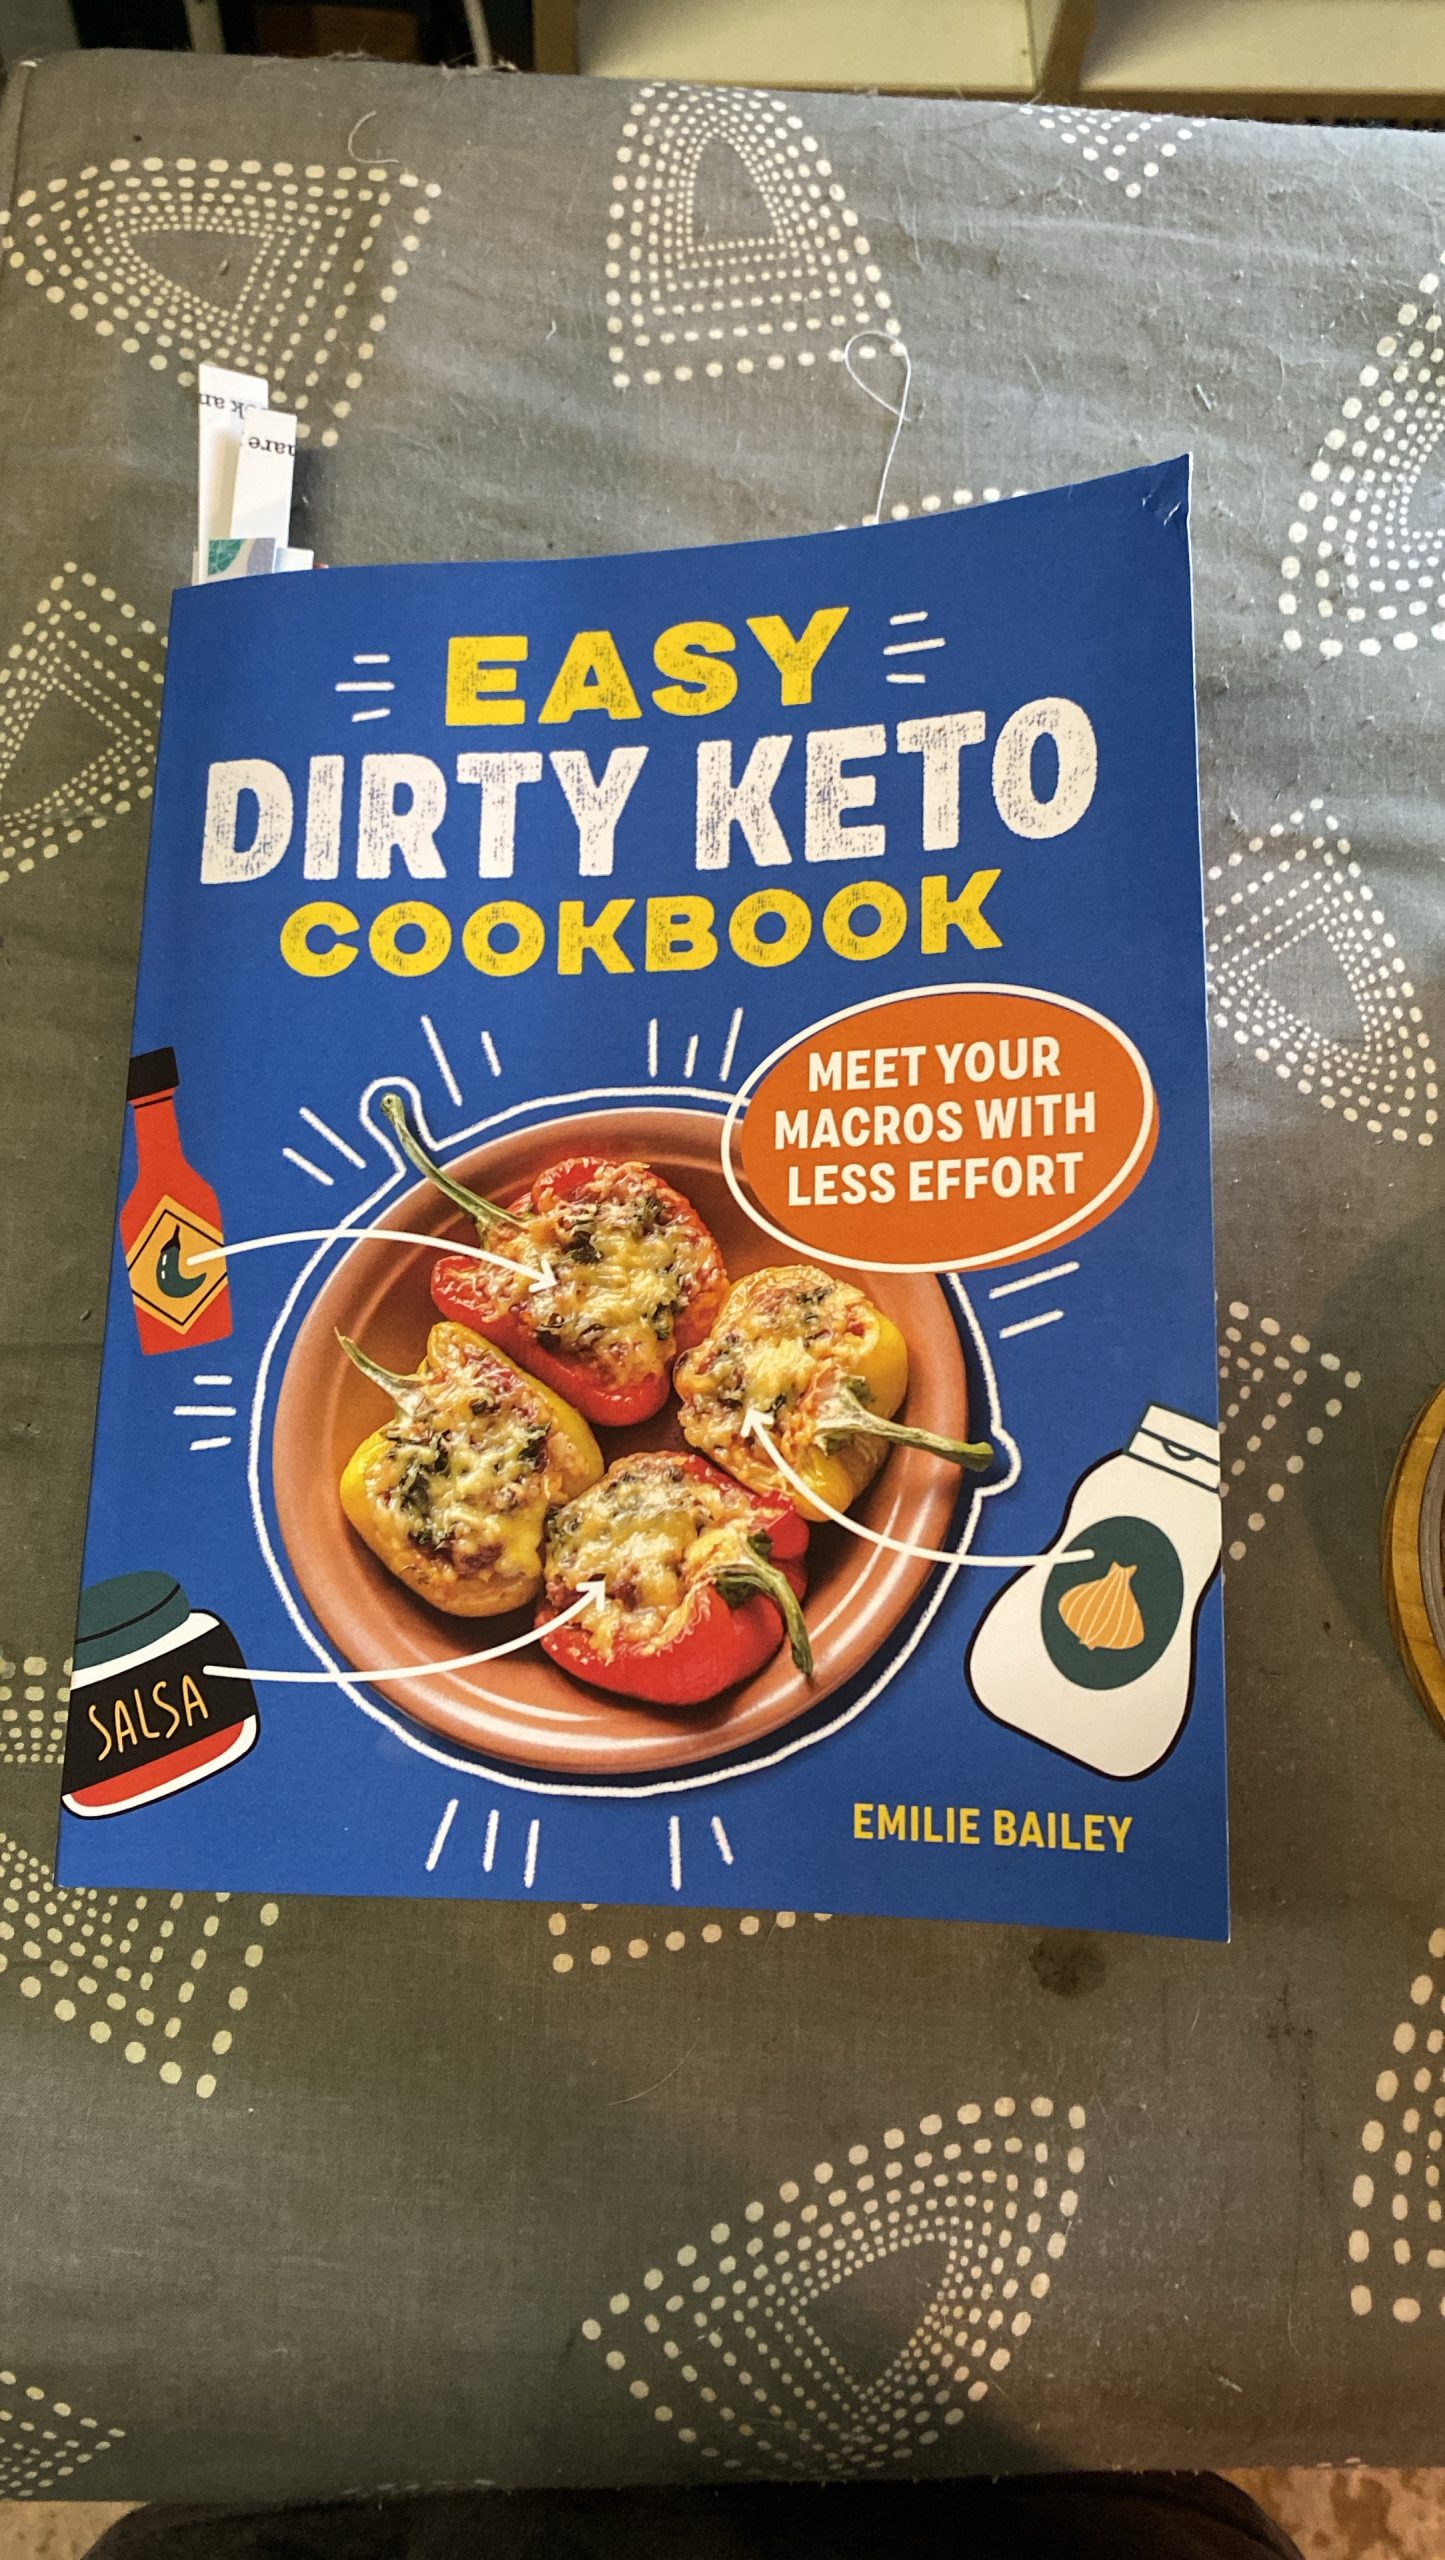
Easy Dirty Keto is the latest cookbook by Emilie Bailey. Today I’ll review it and tell you why it’s a good book to have in your collection, whether or not you eat keto.

Find me on Bloglovin’

Hello, again, Dear Readers:

Apologies for my tardiness, it’s been a busy few weeks. We watched as Hurricane Ian went through Florida doing pretty much the same thing Hurricane Ida did in Louisiana last year. One of my project managers lives right in the strike zone, and she finally got power and Internet back a few days ago. Don’t we know about that! 

Others have checked in from the area on social media. Keep these folks in your thoughts and prayers, although I think the good Governor DeSantis has everything well in hand. We’ve been through it, and we know some folks who are still not back in their homes more than a year later. Everything moves VERY slowly here, but Florida’s working it.

We’ve had a few lovely cool fronts come through, and another brief one graces Texas and Louisiana tomorrow. There’s been scant rain for over a month. Autumn came early this year, and we’re thankful. I can open the windows some days and clear the air (especially after BF has been cooking.)

As promised, I’ve got a delicious new cookbook to tell you about, and five delicious recipes you can enjoy this week.

Get Ready For Dirty Keto

Are you looking for new and delicious keto recipes or just delicious food that’s easy to make? Well, aren’t we all? Today I’ll tell you all about the newest—and possibly final—book from The Texas Granola Girl, Emilie Bailey. This book covers both bases.

Front cover of Easy Dirty Keto book by Emilie Bailey

The book.

Let me say at the outset that I was fortunate to get a review copy of Easy Dirty Keto before its release on August 25th. Thank you, Emilie! (I feel special when that happens.) I’ve already left a five-star review on Amazon, because, well it deserves five stars, in my opinion. But that’s because the food is good.

Honestly, if the recipes weren’t any good, I wouldn’t be writing an entire blog post—it would be a short “news item” with my polite opinion. But this is Emilie, and the food is really, really, good—as usual.

Let’s get cooking.

What Is Dirty Keto?

No, it’s not something you get into trouble for, should be embarrassed about, or risk arrest. Nothing like that. It’s a form of keto that stays within the parameters but isn’t exact.

There are two types of keto:

  • Clean keto, where you eat “clean,” no processed foods, artificial sweeteners, and the like
  • Dirty keto, where the rules are a little looser, but still help you meet macros and stay in ketosis

Ingredients like these might be considered “dirty keto”:

Remember that this is non-dairy. Definitely dirty keto but I haven’t tried it myself.


Walmart’s own version and I haven’t tried this one either.

Or this one:

I haven’t tried this one yet, but will one day.

And if you wanted to classify my keto, it would be called “filthy dirty keto.” Because I can’t say I eat keto every day—especially when BF makes jambalaya or one of his other “specialties.”

The rule is to stay in ketosis. I can’t say I’ve ever checked that. Still, dirty keto isn’t as strict, and the variety of foods is wider because you can include some things that you wouldn’t under “clean keto.” You’ll see what I mean in the recipes.

Many people find clean keto to be difficult to sustain, or they just get bored with the same types of foods. With dirty keto, there’s a little more to enjoy that’s still “keto.” Emilie explains in the intro–she’s busy, like most people, and needed to loosen the rules a bit. One example is the sugar-free version of Cool Whip.

I’ve tried these five recipes myself and give my opinion on each. (Spoiler alert: they’re delicious!) I’ll be trying more of them in the future, and I may include them in a future blog post. So, here they are for your information and enjoyment.

Chorizo and Spaghetti Squash, Page 125

Let me say right up front that this is the recipe I really wanted to make first but had to wait until BF wasn’t home. I don’t want to listen to the retching.

It’s simple and straightforward. You might not believe it was really keto. The setup:

Ingredients

Just a few ingredients for this one.


First, start with the spaghetti squash:

Spaghetti squash with ends cut off an standing on end

This makes cutting easier.

Cut in half and scrape out the seeds:

Scraping seeds out of the spaghetti squash

Right into the trash, or elsewhere if you plan to save the seeds. One of these days I’ll do just that.

They should look like this:

Spaghetti Squash cut in half

Just like this.

Put them face down onto a microwave-safe plate and cook on high for ten minutes, until it’s fork-tender.

Spaghetti squash halves in microwave

Just like that.

When it’s done, it looks like this:

Bowl of cooked spaghetti squash

This is tasty all on its own

While that’s cooking, measure out your spices and things:

Measured ingredients in cups

Easy!

Then remove the chorizo from the casings and add it to the pan.

Chorizo in casing

Just like browning ground meat.

You won’t need oil, because the chorizo gives off plenty once it starts cooking. Remember, it’s a highly seasoned pork sausage.

Browning chorizo in a large stainless steel pan

Doesn’t take long.

Once the chorizo is cooked, add in the pico de gallo:

Adding salsa to the pan

It’s salsa, but I’ll explain in a minute.

Mix that around, then add the salt and the spaghetti squash:

Salt and spaghetti squash added into pan

Just like that

Toss that all around to distribute:

Tossing spaghetti squash into mixture

Just like that.

Then sprinkle the half-cup cheese on top:

Sprinkling cheese on top of pan

Just like that.

And dinner is ready!

It takes about 30 minutes or so, but it’s really fast and easy. If you want, you can cook the spaghetti squash ahead of time (keep reading), refrigerate it, and add it to the pan when the chorizo is cooked. If the spaghetti squash is cold, you may need a few more minutes to let it reheat in the pan before topping it with the cheese.

When I finished, I posted this picture on Instagram:

Chorizo spaghetti squash toss in a bowl with a Splayd

Dinner!

And I tagged Emilie. She saw it and responded that it was one of her favorite recipes from this book. Well, yeah! But really—chorizo. Do we need anything else?

What I Did Wrong

I bet you weren’t expecting to read that. Let me explain.

The recipe was made according to Emilie’s directions. But because we were on a rushed trip to Winn-Dixie, two things were different:

  • I bought salsa, not pico de gallo because that’s what I could find quickly
  • I also couldn’t find the queso fresco quickly so I relied on the Cotija cheese I had in the freezer

Guess what? Both were wrong for this recipe—but it was still delicious!

The salsa I bought:


And the magic secret ingredient:

Ingredients of salsa including sugar

See it?

That’s right, sugar. They call it “cane sugar” so they can show that it’s “natural,” and not from high fructose corn syrup. It’s still sugar, though, and it matters if you’re a diabetic watching sugar or you’re just trying to cut down or eliminate your sugar consumption.

The Cotija cheese is tasty but has a stronger taste, similar to Manchego, but not as potent as Feta. Just not the same as Queso Fresco, which has a salty, mild taste. I love Queso Fresco, and BF won’t touch it, so it doesn’t last long when I buy some. Fortunately, the recipe only calls for a half-cup of cheese as a topping, so it doesn’t overwhelm. I was looking forward to the milder cheese taste.

A subsequent trip revealed that our local Winn-Dixie simply doesn’t carry Queso Fresco, but Walmart does, along with pico de gallo. Good thing, because there’s suddenly a lot more Spanish spoken in Walmart here than before. No kidding.

Because BF was gone on a recent weekend, I made it again with the “right” ingredients. (He still won’t touch it.) I made my own chorizo because I didn’t have any but did have ground pork in the freezer. Really good both ways, but I’ll stick with the recipe next time.

Here’s the printable recipe:

Chorizo & Spaghetti Squash Toss in Large pan on stove
Amy

Chorizo & Spaghetti Squash Toss

From Easy Dirty Keto by Emilie Bailey, Page 125 (c. 2022)
Prep Time 10 minutes
Cook Time 10 minutes
Servings: 4
Course: Main Course
Cuisine: Tex-Mex

Ingredients
  

  • 1 medium spaghetti squash, about 2½ to 3 pounds, or four cups cooked spaghetti squash
  • 1 pound Mexican chorizo, casings removed
  • 1 cup pico de gallo
  • ½ tsp Kosher salt
  • ½ cup Queso Fresco (fresh Mexican crumbling cheese)

Method
 

  1. Carefully cut the ends off the squash, then slice it in half lengthwise. Remove the seeds, then place the squash halves cut side down on a microwave-safe plate. Microwave on high for ten minutes, or until the squash is soft and fork-tender.
  2. While the squash is cooking, preheat a large skillet over medium-high heat and add the chorizo to the skillet. Break apart the chorizo with a spoon and cook until lightly browned, about 5 to 7 minutes. Add the pico de gallo and cook for another 2 to 3 minutes, until the onions begin to soften.
  3. When the squash is cool enough to handle, remove the strands with a fork, and add them to the skillet. Season with the salt, and toss with the chorizo mixture until warmed through.
  4. Remove the skillet from the heat, top the mixture with queso fresco, and serve.

I have updated the chorizo blog post with a printable recipe for that, too.

Notes About Spaghetti Squash

Emilie calls for microwaving the spaghetti squash here. And for this recipe, it works great. But there are other ways to cook this wonderful vegetable if you like it and want to make it for something else.

It’s low-carb and keto and tastes good when cooked correctly. It’s an ideal substitute for wheat-flour spaghetti, and tasty with any kind of spaghetti sauce. But of course, it’s called “squash,” and that puts BF right off eating any. His comment, “I’ll try anything you make” is rendered null and void when anything contains the word or ingredient “squash.”

My first encounter was some 20 years ago with one of Suzanne Somers’s many low-carb cookbooks. Her recipes called for the same prep: cut in half and remove the seeds. But then the recipe called for:

  • Rubbing both cut sides with olive oil
  • Putting them cut side down on a sheet pan
  • Roasting in a 350F oven for an hour

You must wait for the squash to cool before handling it. Or use a thick potholder to hold the halves and scrape out the stringy flesh into a bowl. I can roast a smaller one in the countertop oven easily.

I think the recipe I tried first called for a little salt and pepper with a pat of butter, which is probably my favorite way to eat this squash. If you’re not going to use it or eat it immediately, just put it into a dish and refrigerate it until you’re ready.

Slow Cooking Spaghetti Squash

Another way I found to cook spaghetti squash is in the slow cooker. No kidding, you can totally put your spaghetti squash into your slow cooker—whole—and let it cook on “low” while you’re at work or doing other things. You must poke it with a fork in a few places like a potato, but it cooks up nicely. It’s hot, of course, so be careful cutting it open and scraping out the seeds.

Why would you do that if this recipe calls for microwaving? It’s your choice, really. You can also use the countertop oven to cook one in advance if you wanted. But using the slow cooker also means it’s hands-off and ready when you are, although it does come out softer this way. Again, use immediately or refrigerate.

If you’re making this dish on a busy weeknight, the ready-to-use spaghetti squash can make it a little easier.

However you cook this, it’s delicious in a fantastic Tex-Mex sort of way.

Barbecue Glazed Chicken Tenders, Page 95

This is so easy and tasty with just a few ingredients. Here’s the recipe:

Barbecue Glazed Chicken Tenders

From Dirty Easy Keto, Emilie Bailey, Page 95
Prep Time 5 minutes
Cook Time 25 minutes
Servings: 4 servings
Course: Main Course
Cuisine: American

Ingredients
  

  • ½ cup Sugar-free barbecue sauce
  • ¼ cup Sugar-free peach jam I couldn't find peach, but apricot worked well here.
  • tbsp Sugar-free barbecue rub or seasoning
  • 1 pound chicken tenders

Method
 

  1. Preheat the oven to 400°F. Line a baking sheet with parchment paper and set it aside.
  2. In a bowl, stir together the barbecue sauce, peach jam, and seasoning. Reserve three tablespoons of this mixture for later.
  3. Dip each chicken tender in the sauce mixture and place it on the prepared baking sheet. Place the tenders in the oven and cook for about 20 minutes, or until the internal temperature of the chicken reaches 165°F. Base the tenders with the reserved sauce and bake for another 5 minutes.
  4. Serve as desired or store in an airtight container in the refrigerator for up to 4 days.

The setup:

Ingredients for barbecue chicken tenders

Again, you don’t need much, and the salt was just sitting there for some reason.

See that sugar-free apricot jam over there? It’s supposed to be peach, but that’s all I could get in Winn-Dixie. It’s close, so I bought some, and it worked just fine. On sale, 2 for $6, with a jar of red raspberry. Because let’s face it, all you need is a spoon, and you have an instant keto dessert.

So. . . .

Preheat the oven to 400F, then line a sheet pan with parchment. I measured out the barbecue sauce in a measuring cup and then kept using it because it was just easier for mixing.


Mix the barbecue sauce, jam, and either some BBQ rub or other seasoning. I used a seasoned salt mix I like to make from another book.

One

Two

Mix well

Done!

And take out three tablespoons for later. I can’t find that picture, though. But it gets easier from here.

Barbecue sauce in measuring cup

And you have just enough.

Dip the chicken tenders into the remaining mixture, just like you were breading them:

chicken dipped in sauce

This worked for me really well.

Drop onto the baking sheet:

Then bake it at 400F for about twenty minutes.

Once done, brush with the reserved sauce and give it another five minutes or so.

So what should you serve this with?

Balsamic Brussels Sprouts, Page 64

Make this while the chicken is in the oven. I started heating the oil first, took care of the chicken, then went on to make this one.

And if I’d read the directions ahead of time, I would have passed. Why? You’re FRYING them in hot oil on the stove. I’m not saying it’s not tasty—it is. However, I quit frying back in the ’80s, I think. Big mess, dangerous, and all that.

But. . .these little babies are SO GOOD!!!! So if you’re up to it, and you can do it safely, I highly suggest making this recipe—as is.

I can see Aunt Kathy in Texas reading this and saying to herself, “Frying? Yeah, right.” Well, here’s how it went.

The setup

Admittedly, I didn’t realize I’d need so much oil. And the big chili pot I was planning to use would have required several bottles of olive oil, so I used the smaller, 3-quart Dutch oven. Lucky me, I bought it years ago and I’m very happy I did because it’s super handy. I also didn’t have a lot of olive oil, so I used coconut oil with some olive oil, which worked just fine.

Before I started with the chicken, I put the oil in the pot and put the thermometer in with it:

This becomes bubbling hot oil, so be extra careful

You can’t see it in the picture because the inside is so faded, but 400 degrees is at the top.

I bought pre-washed Brussels sprouts, so that was a good thing:

No prep work here

I dropped them into the very hot oil slowly and carefully, half the bag at a time.

Don’t rush this!

And this happened:

They’re frying!

Use your “splatter screen,” not the pot lid, because condensation will drip water back into the hot oil and cause popping and splattering. No.

Saves a lot of mess too

Let them cook for 3 to 5 minutes, the book says. I think the second batch cooked a bit longer, maybe 6 minutes, and they came out a little better.

When you take them out of the oil, put them on a sheet pan lined with paper toweling:

Repeat with a second batch if you need to.

After the frying is completed, sprinkle on a bit of salt:

Not too much

Transfer to your serving dish and sprinkle on a quarter-cup of Parmesan cheese:

A bit more salt:

Then drizzle over the tablespoon of the balsamic reduction:


If the chicken isn’t ready, keep this dish warm until it is. But the chicken should be about ready by this time. I stuck the dish into the toaster oven to keep it warm until the chicken was done.

Perfect!

This is a seriously good keto dinner:

Dinner is served!

I admit I was just going to use my default keto recipe, cauliflower rice. And it wouldn’t be bad, either. But Emilie suggests this recipe as an accompaniment, so I made it. I’m glad I did, frying mess and all.

This balsamic reduction is a syrupy condiment based on balsamic vinegar.

Find it with the fancy vinegars

It’s not totally keto, but then, you don’t need much to add a really nice extra touch of sweetness to any dish.

Here’s the printable recipe:

Carmelized Brussels Sprouts with Balsamic Glaze
Amy

Carmelized Brussels Sprouts with Balsamic Glaze

From Easy Dirty Keto by Emilie Bailey, page 64 (c. 2022)
Prep Time 5 minutes
Cook Time 10 minutes
Servings: 4 servings
Course: Side Dish
Cuisine: American

Ingredients
  

  • Olive oil, for frying I used olive and coconut because I was nearly out of olive
  • 1 pound prewashed fresh Brussels sprouts, cut in half, dry, and at room temperature
  • ½ teaspoon kosher salt, divided
  • ¼ cup grated Parmesan cheese
  • 1 tablespoon Balsamic glaze

Method
 

  1. Line a baking sheet with a layer of paper towels for draining. Into a Dutch oven, pour about 1½ inches of oil and heat the oil to 400°F over medium heat.
  2. Put half the Brussels sprouts and any leaves that have fallen off into the hot oil. Turn the heat up to medium-high and cook for 3 to 5 minutes, stirring them often until they are dark golden brown and crisp. Remove with a slotted spoon to the prepared baking sheet to drain. Immediately season with ¼ teaspoon of salt.
  3. Bring the oil back up to temperature, add the remaining Brussels sprouts to the oil and repeat step 2.
  4. Place the crispy sprouts on a serving plate, sprinkle with the Parmesan cheese, and drizzle with the balsamic glaze. Serve immediately.
  5. NOTE: Emilie says that to ensure that the sprouts come out crispy, and to reduce any splattering, make sure that they are dry and at room temperature prior to frying. Don't use frozen sprouts, since they have much more moisture. Use a screen to control the splattering but don't use a lid, which will make the splattering worse.

Guess what? I made this dinner again, this time for BF, along with the Mint Chocolate Chip Ice Cream Whip (keep reading) a couple of weeks ago. I managed to find sugar-free peach preserves, too. He was looking forward to trying this menu and really enjoyed his dinner with dessert. So we have one more “acceptable” keto dinner for BF, thanks to Emilie’s great recipes. We’ll definitely be having this again sometime.

Boogie Cheeseburger Skillet, Page 117

What led me to try this, knowing BF wouldn’t eat it? Well, there’s a lot he doesn’t eat, so there’s that. A couple of other things, too:

  • A lady I’ve known for a long time in nearby Albany calls everyone “Boogie” as a term of endearment. So naturally, the title caught my attention.
  • One recipe called for chipotle mayo, but I wondered where I would find it here. I mean, soy sauce is considered “international food” in our local stores. Walking through our newly renovated Winn-Dixie, I found not only the chipotle mayo, but it was also on sale, so I bought a bottle. It is SO GOOD! Then I went back and found the recipe in the digital book. Warning: it’s got a strong bite. So if peppery is not something you’d like, Emilie says to substitute regular mayo in the sauce and the milder Monterey Jack cheese for the topping.
  • And one recipe called for a poblano pepper, which happened to be growing outside in the paint bucket garden. It was the same recipe, so that was my chance to use it in a recipe before it went bad. I’ve got a couple more growing this late in the year, but I can get poblanos in both Winn-Dixie and Walmart, too.

Then it was a matter of getting a few more ingredients and cooking it.

The Setup

Yes, this is sugar-free ketchup by the same company that makes our favorite barbecue sauce.

Real sugar-free ketchup, and it’s good, too.

Start by preheating the oven to 400F, mix up your mayo, ketchup, and Worcestershire sauce, and set aside.

Just like that.

If you haven’t chopped anything yet, let me give you a tip: wear gloves for nearly any type of pepper but bells:

My prized poblano

You’ll seed it and cut it into two-inch strips:


That’s where the majority of the heat is, the seeds and ribs.

You’ll need a large, oven-safe skillet for this. A cast-iron skillet or stainless one like mine is perfect. Melt the butter, then add the chopped onion and Poblano pepper. Cook for 7 to 8 minutes, stirring often until the onion is translucent and starts to carmelize.

Remove this from the pan and set it aside. Now start with the ground beef, along with the salt, pepper and garlic powder:

You’re halfway there!

Brown it up really nicely, and break it up into small pieces, which will take about ten minutes:

Then add the requisite cauliflower rice:

The magic ingredient–cauliflower rice! You knew this was coming, right?

Cook until the cauli-rice is no longer frozen, just a few minutes. Then add the onion and pepper back into the pan and stir:

Take the pan off the heat, and stir in about two-thirds of the mayo mixture we made first:

Sprinkle with the cheese:

Put the pan into the oven for five to seven minutes:

The pizza pan on the bottom rack is not needed for this recipe. It just stays in there for storage. There’s no place else to put it, so if we need the bottom rack, we just remove it and put it elsewhere until we’re done.

Done!

Drizzle the reserved sauce on top and dig in.

No, BF wouldn’t eat this either, he told me at the outset. I’ll make it again when he’s working late or I decide he can have his favorite frozen pizza for dinner.

Here’s the printable recipe:

Boogie cheeseburger skillet with Syllabub dessert
Amy

Boogie Cheeseburger Skillet

From Easy Dirty Keto by Emilie Bailey, page 117 (c. 2022). If you like fancy burgers, this one will hit the spot.
Prep Time 5 minutes
Cook Time 25 minutes
Servings: 4 servings
Course: Main Course
Cuisine: Tex-Mex

Ingredients
  

  • ½ cup chipotle mayonnaise, plus more for serving You can use plain mayo here if you can't find chipotle mayo or prefer less or no spice
  • 2 tbsp sugar-free ketchup
  • 1 tbsp Worcestershire sauce
  • 2 tbsp butter
  • ½ onion, cut into ¼" wedges
  • 1 poblano pepper
  • 1 pound ground beef
  • 1 tsp kosher salt
  • ½ tsp ground black pepper
  • ½ tsp garlic powder
  • 1 12-ounce bag frozen cauliflower rice
  • 1 cup shredded Pepper Jack cheese If you'd like to cut down on the spiciness, use Monterrey Jack instead

Method
 

  1. Preheat the oven to 400°F.
  2. In a small bowl, stir together the mayonnaise,ketchup, and Worchestershire sauce and set aside.
  3. Heat a large oven-safe skillet over medium-high heat. Melt the butter, then add onion and pepper; cook for 7 to 8 minutes, stirring often, until the onion is translucent and beginning to carmelize. Remove from the pan and set aside.
  4. Add the beef to the pan, and season with salt, pepper, and garlic powder. Cook for about 10 minutes or until browned, breaking it apart as it cooks. Add the frozen cauliflower rice and cook for another 2 to 3 minutes, until there is no liquid left in the pan and the cauliflower rice is tender. Stir the pepper and onion into the beef mixture.
  5. Remove the skillet from the heat and stir in two-thirds of the mayonnaise mixutre. Top with the shredded cheese. Put the skillet into the oven and bake for 5 to 7 minutes or until the cheese melts. Carefully remove the skillet from the oven and drizzle with the remaining sauce.

Mint-Chip Ice Cream Whip, Page 137

Let me just say that this is a total “cheat” of a recipe. It’s a prime example of “dirty keto,” since it’s not what you’d call “clean eating” under any circumstances. And I wouldn’t have considered it unless Emilie or another keto writer suggested it.

I’m talking about Cool Whip. It now comes in a version called Zero Sugar.

If you serve this dessert in fancy little dessert cups or glasses, I suggest calling it Syllabub.” Chances are no one will know what that means, and it will sound posh. Maybe even French posh.

I’m not a fan of frozen non-dairy dessert toppings, even if it’s sugar-free. But now and again, this might just be what you need to hit the spot. As Emilie describes, it’s not really ice cream, just a little ice-cream-esque dessert that comes together quickly.

The prep for this one calls for putting the Cool Whip into the fridge for four hours to thaw. Don’t let it sit out or microwave this stuff because it will separate. Why? It’s non-dairy, and this commercial from about ten years ago (“Oil? Or Cream?” ) explains the difference. Read more on Kraft’s website.

Oh, and one more thing: I couldn’t get the white chocolate sugar-free pudding here, so I used regular chocolate sugar-free pudding. This, too, worked fine. The setup:

Once your Zero Sugar Cool Whip is sufficiently thawed to a soft texture, dump it into a bowl:

Add in the rest of the ingredients:

I did measure this into a pinch bowl that’s off-camera. I was doing this by myself with my iPhone on a tripod taking my own pictures.

Chop the mint patties up fine:

Add them:

And discover that the bowl you picked up is too small, so you switch to a larger one because it all fits in the dishwasher:

Fold carefully to mix:

Add it back to the Cool Whip container and stash it in the freezer for a couple of hours.

Mint Chip Ice Cream Whip in Cool Whip Bowl

There you are! Your fancy and posh dessert–if nobody peeks in the freezer, of course.

When it’s stiffened up a bit, it’s ready to dish out and serve.

Don’t serve it from the Cool Whip container if you’re trying to be fancy and call it syllabub. However, if you collect this fine piece of culinary Americana, here’s another reason to add to your “collection.”

And if you’re a fan of regular Cool Whip, here’s a new dessert for you, whether you’re eating keto or not. I’m sure it would work well with the regular stuff, too. If you try it, leave a comment about it.

The first time I made it, I mentioned it to BF and offered him some. He declined. Amazing, because he’s a huge fan of the power of Listerine. But with the chicken and Brussels sprouts for dinner, he was open to trying some, and he really enjoyed a dish of this fast and non-fancy keto dessert.

Here’s the printable recipe:

Mint Chip Ice Cream Whip in Cool Whip Bowl
Amy

Mint Chip Ice-Cream Whip

From Easy Dirty Keto by Emilie Bailey, page 137 (c. 2022)
Prep Time 5 minutes
Course: Dessert
Cuisine: American

Ingredients
  

  • 1 8-ounce Container sugar-free whipped topping, thawed Do this by leaving in the fridge for four hours--don't leave it out or microwave
  • 2 tblsp Sugar-free white chocolate pudding mix I used sugar free chocolate because I couldn't find white chocolate.
  • ½ tsp Peppermint Extract
  • 3 sugar-free peppermint patties, finely chopped

Method
 

  1. In a medium bowl, combine the whipped topping, (save the container), pudding mix, and peppermint extract and stir together well.
  2. Fold in the chopped peppermint patties and return the mixture to the whipped topping container.
  3. Put the container in the freezer for at least 2 to 3 hours for an ice cream-like consistency.

About Peppermint Extract

Be VERY careful not to add too much. Otherwise, the finished dish will taste like toothpaste. I speak from experience here. The mint can overpower everything else, so measure carefully, and not over the bowl. Now, do you see why I prep everything beforehand? You can’t add too much when it’s already measured into a small dish or pinch bowl.

Yes, I did that, but I didn’t stage the picture right. I was by myself, as usual, and I had to stand around the tripod.

Verdict: It’s A Great Book!

Easy Dirty Keto is a really nice cookbook to have in your collection. If you aren’t looking for dirty keto, I still recommend Emilie’s book. The recipes are easy, and most of the recipes don’t need a large number of ingredients. Plus, the food is so good that even non-keto folks can still enjoy them. Even BF!

When I had the opportunity to review Emilie’s first book, The Southern Keto Book, my first thought was something along the lines of, “Keto and Southern? Oh, come ON!” Of course, you know how that went, and now I’m a total fangirl.

Keto or not, I feel like these recipes are real comfort food. At least, that’s what I felt like when I made them and then enjoyed eating them. No kidding. Even though I grew up in New Orleans, the cuisine just isn’t appealing to me anymore, plus all the excess starch of rice and potatoes and the like. I liked Tex-Mex early on, and it’s what I’ve liked since the late ’80s. Nobody understands that here, but I’m sure Emilie does.

Delicious food is the best reason for buying any cookbook, isn’t it?

Is Easy Dirty Keto The End?

Emilie and her family are on a working game ranch in Texas. That’s probably the reason you can find several venison and wild game recipes on her website. While she’s enjoyed sharing her keto journey with readers, another book may be out of the question. We hope not, of course, but we’re thankful for the four she’s published. Read her blog, you’ll see that her blog and cookbooks are a “side hustle.” Like a lot of modern authors, she has a “day job” and writes on the side.

Should this be Emilie’s last book, I would just say thank you to Emilie for four great books with delicious food to enjoy for years to come. All four have become favorites with us, and even BF likes many of the dishes I’ve made. No more canned soup if he wants something better.

Emilie didn’t say anything about discontinuing her blog. Like me, Emilie doesn’t blog regularly. That’s OK—Emilie’s website is a huge collection of delicious keto recipes that aren’t in any books, to my knowledge. Those aforementioned venison recipes will be tried next time someone brings over deer or something. (It’s happened a few times, and deer roast is quite easy in the Instant Pot.) If you’re so inclined, sign up at her website (right-hand side, scroll down a little over halfway.)

Maybe one day we can make the trip to visit Emilie’s ranch in Texas. When we do, there will be a full blog post here with lots of pictures.

Enjoy!


Tea cup with a bag and hot water
The Tea Post, Part 1

Do you like iced tea in summer or hot tea in the wintertime? Or is tea just something that’s always in your pantry?

We’ve been drinking tea for hundreds of years. It’s so readily available that we don’t give it a second thought. In this first of two blogs, I’ll introduce you to tea. In the second, I’ll tell you about British tea and why I think it’s the best. Put the kettle on, make a cuppa, and I’ll tell you more.

Follow me on Bloglovin’

Hello again, Dear Readers:

I intended to write this blog post weeks ago, but time got away from me again. Right before July 4th, we both got sick. No, it wasn’t that, just some weird Louisiana swamp bug. BF got sick first, then me. We didn’t visit a doctor or hospital, so no testing for the you-know-what. We’re fine now, so what’s the point?

I’m dividing this topic into two parts because nobody wants a 5,000-word plus blog post. Besides, after a certain point, it’s diminishing returns from Google.

If you haven’t seen the video of HRH Queen Elizabeth having tea with Paddington Bear, this YouTube link takes you right to it. The video became available after my last post.

Around The Casa de Rurale

It’s summer, and it’s HOT. Everywhere. Houston is again seeing multiple days of temps above 100F. At least there are amusing memes, like this one:

If you can bake lasagna in your mailbox, why not? Remember, your stove/oven is 220 volts, whereas your mailbox is free solar power.

Yes, that’s a joke. It also might be a violation of federal law, but I haven’t checked. In other news. . . .

Emilie Bailey, The Texas Granola Girl, has a new book on “dirty keto” coming out soon. The term means that you’re not a strict practitioner, and you bend the rules a bit—like me. I’ve signed up to be a reviewer—again. Emilie will be sharing some on Instagram soon. If they are kind enough to send me an advance copy, I’ll be doing a review and cooking some delicious food (whether he likes it or not.) But her recipes are awesome, and I’ll be buying a copy if they don’t. More details when I have them.

Blackberries

The wild blackberries are gone. I’ve picked a gallon-sized freezer bag of them like last year but should have picked more. (I still have last year’s harvest in the freezer.) Buddy, aka, Broccoli Stir-Fry, discovered their deliciousness when I took him outside and fed him some by hand. The pit bull doesn’t seem to care for them anymore. We’ve had little rain this spring, leading to the vines shriveling up early. Then a deluge followed.

BF requested a “real” dessert using our blackberries, “with flour and sugar.” While I was looking for something to make, a perfect recipe arrived in the mailbox. If you’re a subscriber to The Pioneer Woman Magazine, you’ve probably seen this galette already.

Baked blackberry galette on a baking rack

Isn’t it beautiful?

Guess what? He loved it. I’m planning to make another for him as soon as I get more ingredients. It’s easy, fast, and bakes up nicely. The second go-round will be both to make him another treat and for a blog post to publish here.

Speaking of animals, both the new cat and the dog had their vet appointment with destiny a few weeks ago. Neither has figured out yet about the trip to Hammond or what happened during their naps. They’re fine.

Ready for a cuppa?

Tea’s History

Legend has it that tea came from China in 2732 B.C. when Emperor Shen Nung drank hot liquid after some leaves blew into his cup of boiling water. (Would you do that?) Odd, but that’s what I’ve found in several references. He felt invigorated after this brew (hello, caffeine!) and the Emperor began encouraging people to cultivate this incredible plant. He became known as “The Father of Tea.”

My other favorite drink, coffee, was discovered around the 5th Century in Africa and the Middle East. Coffee reached Europe first, and tea shortly thereafter. So, tea is the elder statesman here, although coffee became the American favorite after The Boston Tea Party.

Leaf tea was the norm, until one day, tea bags happened. Legend on the Internet credits New York vendor Thomas Sullivan as the inventor in 1904 (or 1908, depending on your source.)

The story goes that he sent out his tea samples in little silk bags. People just brewed the tea with them because they thought that’s what you did. However, the first patent for a tea bag apparatus was filed in 1897, with another mesh-bag invention patent in 1901, so someone else got there first.

Eventually, tea manufacturing expanded, and American tea became primarily bagged. The British didn’t take to tea bags until the 1950s, although Tetley did bring the idea back to the UK.

Our Brit friend WF, a UK ex-pat in the country of Turkey (officially, the Republic of Turkiye) wants you to know that her resident land is one of the biggest tea drinkers in the world.

Today about 96% of tea is in a bag, with loose tea being the outlier.

Pekoe And Black Teas

Black tea is from the Camellia sinensis plant. Once picked, it’s allowed to dry and oxidize. This tea is grown in Sri Lanka, India, and Africa, and was discovered in China in the mid-17th Century. This type of tea is most of what’s consumed in the US as iced tea. It’s a stronger flavor than most others.

You’ve probably seen the term “orange pekoe” for years. I didn’t pay attention until recently. But “orange pekoe” is tea grown in Sri Lanka and India, distinguished by its orange tips.

“Orange pekoe” is also part of the grading system for tea. It’s the lowest grade of tea, indicating that the tea is comprised of whole leaves, not bits and dust like some commercially produced types. But it’s a high grade of tea, meaning that it’s produced from the prime leaves. This tea doesn’t taste like orange, either.

Lipton Tea

Did you know that Lipton Tea is a British brand?

Lipton tea on a bottom shelf in Walmart

In our local Walmart

I didn’t, either. Still, it’s just regular tea in the US, available in every grocery store in America.

Like most people in the US, Lipton is just what you bought. Here in Louisiana people also buy Community Coffee’s brand of tea, or the store brands.

Community Peach Breeze Iced Tea

One of their many varieties.

That’s what we had. As kids, we had Lipton tea every night with dinner, freshly made with lemon and sugar by the pitcher.

Nobody considered decaffeinated tea. We just drank it and rarely had soft drinks. My mother believed every urban legend around, such as kids weren’t “old enough” for coffee. The old wives’ tale said not to give your kids coffee, “because caffeine stunts their growth.”

My siblings and I are all over five feet. I don’t know how it would “stunt growth,” since caffeine is a stimulant. And how many kids since then grew up with caffeinated soft drinks and Frappuccino?

Lipton’s website has more information on tea, including this primer on British tea time. I just can’t see Buckingham Palace staff serving Lipton to the Queen.

Hot Tea In A Cup

My Grandmother introduced me to hot tea when I was a teenager, but it was more of a treat. When I got older, I drank tea because that’s what I was used to having.

Tea cup with a bag and hot water

Green tea in a Texas cup.

Before coffee shops were everywhere, I’d have a cup of tea in the morning, whether at home or at the workplace. Coffee and tea were also available in the offices where I worked, or I just brought some as I did at Boeing.

Never mind that the tea had more caffeine than coffee. We didn’t have Google back then to find out these things. I started drinking coffee when I was about 22 after I’d married and moved away.

But I always kept Lipton around and sometimes had Twinings. Lipton was the standard, as well as store brand teas. Later I used decaf for iced tea so I could drink it all the time.

Then I discovered British tea, and that was the end of the relationship. I’ll explain that in the next blog post.

Yerba Mate

I’ve tried this a few times, and it’s quite caffeinated. It’s considered an herbal tea and is made from Ilex paraguariensis, a plant in the family of holly. Yes, as in the holly berries you see at Christmas.

Fans of Yerba Mate make multiple claims about it, including easing depression, relieving fatigue, helping weight loss, and other conditions. If it works for you, great. But there’s a simple explanation.

Hello!! Caffeine!!

Exactly—and if you have high blood pressure or another condition that caffeine aggravates, avoid Yerba Mate. (NOTE: I’m not a doctor, nurse, scientist, or medical professional, just someone who reads and speaks from experience.)

I tried it once or twice, and I think this is the brand I bought in Houston. Honestly, it didn’t do anything but give me plenty of heart-racing, no handsome guy in sight. Caffeine can also make me very hungry, grouchy, and jittery in large amounts, so it invalidates any other potential benefits. That’s OK, I’ll just have some PG Tips if I need that much of a jolt; it tastes much better. (More on that in the next blog post.)

The Mayo Clinic has more information on Yerba Mate on their website, as does WebMD. Use caution if you are so inclined. Don’t say I didn’t warn you.

Tisane: What Is Rooibos Tea?

One tea I do not like is Rooibos. It just doesn’t taste good to me. I’ve tried the Celestial Seasonings brand as well as one or two other brands. I tried to like it, but I don’t. Rooibos is a tisane, a fruit or herbal type of tea.

Turns out rooibos isn’t a true tea at all. It comes from a South African herb plant, the Fabaceae plant family. When the leaves are harvested and dried, they are brewed into a reddish-brown herbal infusion. It’s also called “African red tea” or “red bush tea” by the tea industry. It’s sometimes made with vanilla, as with the Celestial Seasonings variety. But it’s not enough to kill the awful taste. You can read more about rooibos here.

Orleans Coffee sells some very nice tisanes that are not Rooibos. This includes my favorite, called Blue Eyes. I have some in the pantry and make it now and again; I should get some more soon. It’s sweet and fruity but not overwhelming. I make it by the cup occasionally for iced tea.

Bonus: Cooling Off

I used to drink iced tea all the time. Period. I made it in great big plastic pitchers of decaf. I just let the tea bags sit out overnight in the water, and it was ready in the morning.

When I used to see Dr. Davis in the Woodlands, they always had a large pitcher of cucumber-infused water in the lobby. I loved it. But when I made a pitcher of it at home on a Friday afternoon, I couldn’t stand it on Sunday. I never made it again, but I will drink infused water if I’m out somewhere and it’s available.

One day, about 10 years ago, I just didn’t want iced tea anymore, and I haven’t had it since. After that, I simply added lime juice and Sweet N’ Low to a cup of ice water. Not lemons, just limes. That’s what I’ve been drinking since June of 2012, right after the Boeing layoff. I still have three unopened, plastic-wrapped boxes of H-E-B decaf cold brew iced tea in the pantry, because I’m too cheap to throw them away.

Three boxes of decaf cold brew iced tea bags from HEB

Still cello-wrapped and ready to use.

When limes recently became as much as $0.75 each, I went looking for something else to drink. I’m not accustomed to paying that much for limes. Then again, I’m not accustomed to paying $15 for a box of five dozen eggs, either. But that’s what they sometimes cost now. I wondered about a temporary replacement for limes in my water.

On a trip to our local Winn-Dixie, I was looking for my usual Community Coffee and Tazo Awake tea. They have a nice section with a good selection of local coffees and different teas, including Bigelow. But sitting there, on the shelf, were two boxes that caught my attention:

Two boxes of Bigelow Cold Infusions

This picture is actually from Walmart, taken May 23rd.

Hello, What’s this? Bigelow’s new Cold Water Infusions! It looked too interesting to pass up, so I didn’t. Winn-Dixie only had two flavors, as did Walmart. Didn’t take long for inflation to strike a new favorite:

Two boxes of Bigleow cold infusions at $3.48 a box

I took this picture at the same Walmart on June 27th.

When I went back to Winn-Dixie to buy more, I found more flavors. As it turns out, there are six flavors in all:

  • Watermelon Cucumber Mint
  • Cranberry Lime Honeysuckle
  • Blackberry Raspberry Hibiscus
  • Blueberry Citrus Basil
  • Strawberry Lemon Orange Blossom
  • Peach Lemonade Acai

That Amazon link takes you to bundles of packages, not individual boxes like you get in the grocery. Subscribe and save? Don’t tempt me.

These are caffeine-free cold-water infusions that you just add to ice water and let it infuse. If you leave the bags in the water longer than 10 minutes. . .nothing else happens. Tea, on the other hand, will get bitter.

Walmart had a couple of boxes of the Peach Lemonade Acai flavor, and I bought them. I think that was an accident that they had them. I finished that flavor first because. . .I don’t like that flavor much and just wanted to use up the bags. Much as I like peaches, this one just tastes funny.

As it turns out, there are multiple brands of these cold-water infusions. I’ll try them as I find them. Remember that I’m not in Texas anymore. Anything new on the market takes months if not years before it’s available on this side of the Sabine River.

Acai

If you’re not familiar with it (and I’m not, but it’s pronounced “AH-sigh-YEE”) it’s a berry native to Central and South America. It’s been promoted as a “superfood” here in the US, and sold as frozen puree or powder because they spoil quickly once they’re picked. No, I’m not jumping on that bandwagon, nor the one around goji berries.

Irony: my favorites are the first two, Watermelon Cucumber Mint and Cranberry Lime Honeysuckle. Those are the first two I found, and the two that our Walmart normally carries. Chances are I’ll be sticking with those going forward. But I have something to drink that isn’t as expensive as limes and is ready almost immediately.

Woo Hoo!

Is it any good?

It is, but it’s not heavily flavored like, say, Hawaiian Punch. It’s an infusion, which is probably a $20 word for tea, but you don’t need hot water. Just add it to ice water and leave it to sit for eight to ten minutes.

It’s a bit like that cucumber water at Dr. Davis’ office, but a tad bit fruitier. In my steel Starbucks venti (24 ounces) cold tumbler, I use two of the bags, along with a single packet of Sweet ‘N Low. But that’s just me.

It’s tasty and less expensive than the limes right now, so that helps. But people are buying those limes in Walmart and Winn-Dixie because I see the supply decrease. I also hear Spanish here, which was unusual a few years ago.

I do need to make a trip back to Los Primos in Hammond one of these days to get more chorizo and a few other things. Time to make more Salsa Macha, too.

Until Next Time

The next blog post will discuss my full introduction to British tea. It includes a very nice gift of British tea and other goodies from the UK that LH sent from California. She sent them in April, and delays mean I still haven’t finished the blog and uploaded the pictures.

Our friend Beverly is also working on another blog post for us.

Also in the queue are blog posts that are a little more serious. Yes, they’re food related, but I haven’t finished them yet.

Stay cool and Enjoy!

Ming and parsley pesto in freezer container
Mint & Parsley Pesto

Did you know that pesto isn’t always made from basil? Many fresh green herbs can be turned into a delicious addition to your meals. Come see what I made with what I had in the garden.

Find me on Bloglovin’

Hi, Again, Dear Readers:

My apologies, I’ve been away. After the last post from Beverly, I’ve been busy with a new client who gives me a chunk of work every week. I’ve been concentrating so much there that I haven’t had much time to do everything else. The only sewing I’ve been able to do is minor repair work.

Before I forget: I updated last month’s Spicy Calabrian Shrimp. I found the missing pictures and they’re now in the blog post.

Current Events

Speaking of work: don’t get me started on Depp V. Heard. I’ve been paid to write two blog posts on the subject, and like a lot of people, I’m anxiously awaiting the verdict. That case has captured my attention but not for the reasons you might think. It’s extremely interesting, especially with my legal background. Livestreamed online, it’s real life, not a movie or TV show. I’m not a big “Depp fan,” but the case is intriguing. Then again, I do a lot of research and writing for the legal industry, so you understand why I’m so interested.

You probably don’t want to know about the insanely X-rated language, or the distinguished attorneys on both sides reading it all aloud in front of the judge and jury. Scriptwriters couldn’t write that kind of thing on purpose, but will probably try now. The court reporter–who has to record every filthy, nasty word of it–got a standing ovation from Depp, his legal team, and the people in the public gallery. I’ll say this for him–Depp is certainly a creative writer when he’s fired up.

Enough of that.

Downton Abbey

As for our wonderful friend Beverly, she is planning to write another guest post, this time on the Unofficial Downton Abbey Cookbook, which, she says has food you can actually cook. The Official Downton Abbey Cookbook series is more pictures and stories from the show, rather than recipes you’d want to make. Like me, Beverly reads cookbooks the way others read novels. So that’s coming up soon.

BF and I went to see a matinee of Downton Abbey: A New Era last week, and let me tell you—if you loved the series, you’ll love this movie. It ties a bow around the entire Crawley family saga, I think. Not sure if there will be any more from the DA saga or if this is the conclusion, I haven’t heard. I won’t give away any secrets that weren’t in the trailers, but there are a couple of things I didn’t see coming. Maybe I wasn’t paying attention. If you go—BRING TISSUES. Trust me.

On the way home, BF reminded me: “Never forget how much I love you.” In other words, if he didn’t, there would be no way he’d be going to see that film. Ever. Next up we’re planning to see Top Gun: Maverick. I hear it’s as good as the original, and I’ll need to re-watch the original because I haven’t seen it since 1986. Fortunately, BF has the DVD.

But today I’ve got a post on a discovery that you might be interested in trying even if you don’t like basil.

Berry Picking Season

The wild blackberries that grow here are ripening a few at a time, so I’ve started picking them around the property.

Berries growing on vines

Look!! Berries!!

I showed these pictures to Neighbor E this past weekend, too.

More berries on vines

These are ripening bit by bit

These, of course, are not yet ripe, but they ripen individually. There are occasions when I walk outside with this beast.

Buddy The Dog outside in grass

He’s always around, looking for food. He’s taller than the pit bull now.

And pick a handful or two for us. (BF doesn’t much care unless I bake the berries into something.) Broccoli Stirfry and I eat berries together, and he loves them. The pit bull doesn’t seem to get as excited about them anymore.

But when I go out to pick for the freezer, I’m wearing a pair of these gloves, a pair of knee-high Muck Boots, jeans, sunglasses, and a hat. I can reach more ripe berries that way unless I’ve been out with the silly dog and we’ve had the “low-hanging fruit.”

Even more berries growing on vines

I pick as many as I can reasonably reach.

But I still get scratches and mosquito bites.

So far, I’ve nearly filled a gallon freezer bag with this year’s pickings, and BF is asking me to make something for him with them. I moved last year’s crop into the kitchen freezer so I can do just that for him. I just received the new edition of The Pioneer Woman magazine today. There’s a blackberry cheesecake galette recipe that I’ll be trying soon. Unfortunately, it’s not on the website. (Blog post?) I’ll also be making my favorite keto blackberry cobbler again, too.

Making Pesto Out Of Anything

Last week on Facebook, Giada de Laurentiis’ Giadzy online magazine re-published an article from 2020 called How To Make Pesto Out Of Anything.

Anything? As in chocolate and raspberry anything? No, not that anything, but fresh herbs and greens that you may have on hand, like I do.

The point of the article is that, although it’s traditional in Genoa, pesto isn’t necessarily made from basil. Pesto is not an exact science, nor is it rocket science. “The true beauty of pesto,” the article states, “is that it’s greater than the sum of all of its parts.” In other words, the combination of all the ingredients is what makes it so delicious, not just one specific ingredient.

It’s a bit like a puzzle really—one piece is just that, but when you put together 10 pieces of the puzzle, then 100 pieces, then more, you get the entire picture.

Well, that’s how I think of it anyway. I hope that makes sense.

No Basil, But Lots Of Mint

So I recently planted the two little basil clippings that I rescued from last year’s crop. I kept them in the kitchen window for months, and I recently planted them outside along with a packet of basil seeds in the same pot. Those seeds have started to grow, and the rescued clippings are doing just fine.

Basil growing in pot

More pesto this year!

Additionally, I planted two packets of lettuce seeds in a different pot, and they’re coming along just nicely.

Lettuce in pot

The return of salad days

Not ready to cut yet, but I’m looking forward to having some with a tomato or two.

But the mint plant that I’ve had for quite some time became overgrown.

Giant mint plant in white bucket

That’s mint. Mojito, anyone?

I had plenty, but just didn’t know what to do with it. The stuff just grows, and I don’t want to make that many Corsican Omelets with goat cheese and Mojito cocktails. Keep it watered and you’ll have more than you know what to do with. Every time I went outside, I told myself to cut it and do something with it, but I didn’t know what. Thanks to Giada, I now have the answer.

Her standard pesto recipe that I’ve used for many years is

  • 2 cups of fresh basil leaves, tightly packed
  • 1 clove of garlic
  • ¼ cup of toasted pine nuts
  • 1½  teaspoons kosher salt
  • ½ teaspoon freshly grated black pepper
  • About 2/3 of a cup of extra virgin olive oil

Once you blend that all up, mix in a half-cup of grated parmesan cheese. Use it, refrigerate it for a week or so, or do what I do and freeze it as long as you want. Right now I think I have frozen pesto going back to 2018 or 2019. It’s still fantastic.

Using that as a guide, and then taking the information from the article, I went on to make pesto in a new form.

How It’s Made

So, it started out with walking outside and clipping what seems to be a mountain of mint growing. You always keep mint in a container. Otherwise, you’ll find out what happens, as Banana Rat did many years ago when he planted it in his backyard.

Mint takes over wherever you plant it. A few years ago, he posted it on Facebook one day with a question: “Can you say endless mojitos?” He literally had mint growing in about half of the yard. I don’t know if he still has mint growing everywhere, but it is pretty difficult to tame and remove. So, if you like mint, keep it in a container, or you better really, really love mint with all your heart.

Next, I gathered up all the ingredients I had.

Setup for pesto ingredients

The Setup.

I didn’t have any Parmesan cheese because I hadn’t been to the grocery yet. I also took Giada’s suggestion to use walnuts instead of pine nuts.

So I clipped and I clipped and I clipped, filling up the salad spinner inner basket.

Mint in basket

Yes, that’s all fresh mint.

Buddy doesn’t care for the mint

Buddy and mint

He tried it, though.

Then I washed the leaves well, spun them, and began picking the leaves from the stems.

Check out the water that comes out after you spin it. You don’t want this in your pesto.

Water in bowl

That’s a lot, but you know the leaves are clean.

All told, I had about three cups of mint once I finished de-stemming. Perfect.

Making Pesto

Then everything went into the blender just as you would with basil pesto.

Mint In Blender

Don’t forget the salt and pepper

I like walnuts, so I figured I’d try them this time. Yes, pine nuts are delicious, but they are also pricey. Just for once, I figured walnuts would be OK. And you know what? They worked quite well. Plus, I could snack on them and not feel guilty. Toast them first, don’t burn them:

Toasting walnuts in the pan

Watch them, they can burn, but they do take longer than pine nuts.

And put them in a cold bowl to stop the cooking and cool them off.

Walnuts cooled in bowl

Ready to go

Next, add them to the blender:

ADding walnuts into blender

Just like the pine nuts

And blend!

Blending mint into pesto

Just like that.

I tasted the finished product, and it was quite minty. The garlic and the olive oil sort of tame the extreme mint flavor, but you could still taste the inherent “mintiness.” I decided to put it in the freezer until I could figure out what else to do with it. I still needed to add Parmesan cheese, but I wanted to give some more thought to what else I would add.

The Next Step–Parsley

I needed to go to the grocery anyway, and we were indeed out of Parmesan cheese. So, after giving it some thought, I decided to add some Italian flat-leaf parsley.

Chopping parsley on chopping board

I think that was half a cup

Then I got on with it.

Blender with olive oil

Add a little at a time until you get the consistency you want.

First, I had to thaw the pesto because it froze quickly. I ended up having to microwave it for about 30 seconds just to soften it up. Even then, it was cold, and it was still kind of like a sludge.

Pesto in freezer container

Still frozen

Once I got it out of there I started with the parsley.

Adding parsley into pesto

It was a bit easier this time.

But I managed to get it into the blender just fine after adding the requisite Parmesan cheese.

I just sliced the parsley leaves clean from the bundle at an angle with the blade of the knife. I didn’t take the bundle apart. Pulled the stems out to make sure it was just leaves and I added it all in after washing and spinning.

Because it was much thicker now I had to add a little more olive oil a couple of times. I also added in a couple more cloves of garlic, too.

I blended, and I blended, and I blended, stopping the motor to move it around with the blender spatula to make it catch everything. Finally. I had a nice emulsion.

I removed it from the blender, very carefully, as much as I could get out of it, and then added a little more of the Parmesan cheese.

Adding Parm Cheese To Pesto

This was the second addition of cheese, about a third of a cup I think.

Then mixed it well, and tasted it. I think I’ve got four cups of this stuff, which is great, I’ll have it for a while.

Mixing parm cheese into pesto

Take your time or you’ll make a big mess

And then you have this, in a larger container than the usual one-cup or two-cup containers I use:

Finished pesto

Done!

Verdict: incredibly delicious, and the parsley tames the mint flavor.

Where has this been all my life?

The Recipe

OK, so I can’t say I was trying to create a new recipe. But guided by the article and my previous experience making standard pesto from basil, here is my recipe for mint and parsley pesto.

Ming and parsley pesto in freezer container
Amy

Mint & Parsley Pesto

A fresh take on the Italian favorite with herbs that aren't basil
Prep Time 30 minutes
Course: Condiment
Cuisine: Italian

Ingredients
  

  • 3 cups Fresh mint
  • 1 bunch Italian flat-leaf parsley
  • 2 to 3 cloves Garlic
  • 1 cup Extra virgin olive oil
  • ° Salt & Pepper to taste
  • ¾ cup Walnuts (increase or decrease as you like)
  • ¾ cup Parmesan Cheese (increase or decrease as you like)

Equipment

  • Blender Essential when you're making pesto
  • Salad spinner This takes much of the water off the herbs after washing

Method
 

  1. Toast the walnuts (or other nuts) until they are warm and fragrant. Do not burn. Add to a cold bowl and set aside.
  2. Remove mint leaves from the stems. Wash and spin in the salad spinner to remove excess water.
  3. Chop parsley leaves off the bunch, then repeat in the salad spinner to remove excess water.
  4. Add the herbs to the blender, along with the garlic, toasted nuts, and a little kosher salt and freshly ground pepper. Add the lid to the blender with the center part removed.
  5. Measure out 3/4 cup of the extra virgin olive oil. Slowly pour into the running blender through the open top until the cup is empty. If the contents don't seem to be chopping and mixing, turn OFF the mixer and use a spatula to move things around in the bottom. Remove the spatula, replace the lid, and try again. Add more olive oil a little at a time until the blender moves and you get the right consistency.
  6. Pour the pesto into a bowl, and add the Parmesan cheese. Stir until completely blended. Add to a storage container and either refrigerate for a week or freeze for later.
    Makes about 3 to 4 cups of pesto.

It’s as simple as making standard pesto, and the flavor is outstanding. I’ve got the finished product in the freezer, marked for identification. Of course, I did, so that there’s no question about what’s in it. I recommend using square or rectangular glass containers to freeze the pesto because they’ll fit better in your freezer and there’s no loss of flavor. I speak from experience on this one.

OXO makes some good ones, as does Target. I think I found a few at Ollie’s Bargain Outlet in Denham Springs, too. But I do miss the Pro Glass squares I used to get at Bed, Bath And Beyond, they don’t seem to have them anymore.

Uses

What am I going to do with this new version of fresh pesto? Well, my first thought is to add a small amount on top of a grilled or a roasted chicken breast, chicken thigh, grilled shrimp, or baked fish. One could also add it to some freshly cooked pasta (gluten-free for me.) Granted, BF insists on frying all fish in the house, so I would have to do this when he wasn’t around.

I also think it would be good in or as a dip. So if I was in the mood for some cut vegetables, a little bit of this pesto would be good for dipping. Maybe I could mix some in homemade mayonnaise, or some sour cream, or something else that would work as a base. Or I could turn it into salad dressing—I’ll think about that one too.

Note that it tastes like a pesto, not specifically like mint and parsley, so you could probably use it as you would basil pesto if you wanted.

Cause And Effect

I was quite happy to tell BF about this discovery. However, he was not as happy about hearing about the new recipe, as usual.

I described to him the process of cutting down all that mint, then blending it together. In between sentences, he gave me his requisite verbal retching sounds. This is the same guy who is very particular about his toothpaste and the type of minty-fresh Listerine mouthwash he buys.

While he was at work, I told him via text that I’d finished making it.

Text messaes between Amy and BF

Thanks, Honey.

Well, more for me, I guess. I marked it so there’s no question about what’s frozen in the container. Of course, BF won’t touch it, because he’s been around my pesto-making for more than five years and declares it an abomination or something.

Still, I’m glad I made it, and I can’t wait to try it in or on something. It’s not the strong basil flavor, but it sure is tasty.

If you’ve got a good amount of herbs growing, a combination of the herbs would also work, given the garlic or other aromatic Giada recommended in the article. You could use any type of oil, but extra-virgin olive oil is the best for this. Walnuts—well, they’re tasty roasted in the pan, that’s all I’m saying. But you could use almonds, or leave the nuts out entirely.

Until Next Time

It’s pretty much summer here, so wherever you are, enjoy summer while you can. Of course, in the south, we enjoy it six to nine months out of the year. (Winter hung on a little longer this year.) It’s a great time for grilling and enjoying the outdoors. Don’t forget the berries.

Enjoy!


Cover of Apartment Kitchen Gardening book
Book Review: Apartment Kitchen Gardening

Think you can’t garden because you live in an apartment or other small space? Well, think again—I’ve got just the book for you.

Follow me on BlogLovin’.

Hi, again, Dear Readers:

My apologies for being tardy again, it’s been a busy couple of weeks.  I just wanted to make this blog look good.

But the good news is that suddenly I have several topics to blog about. This includes a couple of recipes that will use the new Recipe Maker plugin for WordPress. Those will be coming soon.

First, I have two disclosures:

  • The publisher kindly offered me a complimentary copy of this book to review and to request my opinion; yes, I’ve read it
  • As with many of my blog posts, there are multiple Amazon links to the book and other supplies here that, if used, earn me few commissions (aka “coffee money”)

Just thought I should mention it.

Amy’s Gardening Experiences

Longtime readers have been amused by my various gardening adventures since the inception of HeatCageKitchen in 2012.

Right now, I’ve got a bunch of purchased plants in the kitchen window, along with two basil sprouts in a pot that were salvaged from last year’s crop. I’m waiting for the nighttime temps to stay above the 50-degree mark so I can start planting them. Need to start some seeds as well.

Plants in window for gardening

Tomato, basil, cilantro, and a strawberry plant

We don’t yet have a place for an outside garden. There are flowers and green berries on those blackberry vines that are all over the place, so I’m anxiously awaiting their ripening and a bumper crop for the freezer.

Blackberry vines with flowers

Berries are coming soon

Some are already forming:

Green berries on vines

The first ones of a great wild berry season.

I’m hoping we can get out there and dig up a gardening spot soon, but I think it’s still a bit too chilly.

In my urban garden in Houston. I attempted to grow as much as I could in a 5’ x 8’ plot of land that had plenty of sun most of the year. Some plants did well, like basil and the Anaheim chili peppers, while I struggled with tomatoes and other plants.

Anaheim chili pepper on a vine

Not really a “Hatch” chile, since it wasn’t grown in Hatch, NM. But close.

I relocated to rural Louisiana in 2016, and gardening here has also been a mixed bag.

Current And Future State

While BF contends that “we suck at gardening,” that’s not really the case. I did well in Houston, but that was also part experimentation and part paint bucket gardening because I knew that I would be moving out at some point. Most of my plants are currently in big white paint buckets, but we’re soon going to use a tractor to dig a garden.

Giant mint plant in white bucket

That’s mint. Mojito, anyone? (I live with a mechanic)


More plants in paint buckets with flowering onions

See the flowers on the onions? that one was over two feet high.

The 10-year-old Meyer Lemon tree that came with me from Houston with me froze over this winter. But—surprise! It’s now flowering and coming back to life. We finally planted it in a nice spot this past Saturday.

Neighbor E still does some patio gardening, although his condo has only one patio, and not a large amount of sun. His patio is mostly or all concrete slabs. He doesn’t have any vegetables like tomatoes since Houston’s heat makes it somewhat inhospitable for them. There’s always Anaheim (aka “Hatch”) chili peppers, which grew like gangbusters my last two summers in Houston. I keep saving the seeds every year and keep trying to have a bumper crop here. Only BF and another SGI member in nearby Albany know what Hatch chiles are.

From Across The Pond

So, a few weeks ago I noticed an email from someone I’d never talked to before, Christopher Crompton of Pelargonium Press. I didn’t realize at first that he is in the UK, not the US. Somehow, he found me and my humble blog, and asked if I would review their new book, Apartment Kitchen Gardening by James Jacques.

Cover of Apartment Kitchen Gardening book

The cover (may be different than the one on Amazon)

And why not? Of course, I said yes. Spoiler alert: it’s a pretty good book.

Christopher was even kind enough to send me a physical copy of the book as well as the digital. It’s not a long book, but it’s quite informative and, I have to say, interesting.

The book is geared to a UK audience, but most of it is relevant to US readers as well. Plenty of folks live in apartments, like the one I lived in for 7.5 years before I moved to Houston in 1998. It was a whopping 400 square feet, making the Houston place look like a small house. Somehow, I lived there with two cats, finished five years at Tulane University and graduated twice, cooked, sewed, and got married, all while working 40 hours a week. Then we moved all that to a larger Houston apartment. The best I ever did in Metairie was a few herbs in the windows, and unfortunately, killed an aloe vera with insufficient sunlight. This book would have been a great help.

I did give Christopher the business about the “incorrect spellings,” such as “colour.” But I’m used to those after 25+ years of watching British TV on PBS (now Britbox too) and reading overseas news.

Apartment Kitchen Gardening

This book packs a lot of information into the 133 pages of this 5” x 8” paperback. If reading more than 100 pages seems intimidating, it shouldn’t be—some pages have very nice hand-drawn illustrations, and not all the pages are full of text. The book is specific to people who live in apartments, not houses with nice-sized plots. But any gardener can benefit from the book. Author James Jacques gets straight to the point.

The book is divided into five chapters:

  • Growing in an apartment
  • Choosing your plants
  • Growing places
  • Taking things further
  • Conclusion

In these chapters, Jacques describes everything you need for a successful indoor garden. And no, you don’t need to spend lots of money doing it, because he offers suggestions for repurposing household items for low-cost equipment, such as empty yogurt containers. Clear clamshell containers used for lettuces and berries are also good for starting seeds.

Gardening In Your Apartment

Yes, it is possible. But it takes some thinking on your part to figure out how you’re going to go about creating and growing your indoor garden.

Consider what you have available. Is it just a single windowsill, can you use a window box, or do you have a small patio/balcony available? Even a small balcony can grow quite a bit.

The most important factor is sunlight. The Metairie apartment had four windows because I was in the corner of a small apartment building. There were two windows in the bedroom that got good sunlight, and two in the living area, but only one with sunlight. In my first place in Houston, I had two large windows but none in the kitchen. When I moved to an El Dorado Trace condo in 2004, there were two large glass patio doors on either side of the unit to the fenced-in patios, plus the front door.

The back patio in El Dorado Trace had the sunlight that was good for growing, so that’s what I used. I was only able to grow a few houseplants on the front patio, and those were gifted houseplants on an old washer and dryer covered in a tarp. I tried growing tomatoes and rosemary out there, but nothing happened.

Here’s one suggestion I never would have considered—growing in the bathroom. And why not? It’s usually warmer and more humid than the rest of the house, right? Pineapples, vanilla orchid, figs, and mint love this kind of environment, Jacques says. So, take advantage of it if you have a sun-lit window in yours.

What You Can Grow

Ask yourself what you want to grow and go from there. Do you love fresh pesto (like me) and want to make it yourself? Obviously, sweet basil is on your list—buy one nice plant, cut it, and start rooting them in water so you’ll have plenty. Alternately, start growing your basil from seeds.

Depending on how much room you have and the incoming sunlight, you can grow a nice variety of plants inside. Jacques explains the need for sunlight, how much, and what you’ll need for different types of plants. And if your place doesn’t have enough light, there’s always the option of grow lights.

Salad Days

If you like salad the way I do, Jacques suggests what he calls “cut and come again” lettuce. I’ve only heard that term once before, from cookbook author Nigella Lawson, who used it to describe a cake in one of her earlier books. You bake the cake and keep it for company, then put it away until the next company visit. Jacques uses this description for lettuces that grow quickly and need to be cut frequently. Otherwise, you have the mess I’ve created in a paint bucket:

Assortment of plants in white buckets

That is, or was, a Romaine lettuce plant

I didn’t cut it before because it attracted honeybees and gave them something to eat. One of BF’s car-guy friends has a bee box at the back of the property. When the plant flowers, we see the bees. I don’t think he’s getting the “bee action” he thought he would get. The flowers are gone, the plant dried up, and I pulled all the roots out a few days ago.

Recently, I bought a few more seed packets of different lettuces to plant. Hopefully I’ll I hope to have more “cut and come again” lettuce soon, even if it is in a paint bucket.

Hydroponic Gardening Systems

If you’ve ever seen grocery store produce called “hydroponic,” it means simply that it was grown in water. No kidding. Some plants can be grown only in water with added nutrients. I haven’t done hydroponics myself, although the author does discuss it at length for the indoor gardener. It’s ideal for the “cut and come again” lettuce.

You’re probably familiar with the hydroponic gardening setups by AeroGarden and the like.

Photo of countertop growing system

You’ve probably seen these, but no, I don’t have one.

There are many brands of them now, and they’re also expensive. The cheapest model is under $100 but doesn’t grow as much. One of the top models sells for nearly $900. If you have the means and the room, and really want one, go for it. I considered buying one when I lived in Houston.

Jacques points out the differences between all the different types of kits, and that they may be a bit overwhelming at first. Some kits are basics that you can build upon, and others have more bells and whistles. Mostly, it’s dictated by budget. Like most endeavors, don’t spend more than you can afford.

Caveat

Understand that even when you buy one of these units, you’ll also have to buy the seed pods to replant. You can’t just drop by Walmart, Tractor Supply, or your local gardening spot and buy seeds. It’s a bit like the Keurig or Nespresso coffee makers—you must buy the pods to make more coffee because it’s not like making coffee in a French press. If this works for you—and I know folks with these kinds of coffee makers—go for it. I’m not criticizing anyone for buying either, just pointing out that the pod thing is a consideration if you’re thinking about buying one.

The author addresses these setups, but in the last chapter. Guess what? These systems aren’t necessary for you to garden in your apartment. From recycled milk and yogurt containers to fancy pots with grow lights, there is a way for nearly anyone to garden indoors.

Why Garden?

You’re probably thinking, “Amy, gardening books aren’t really interesting.” If you’re not into gardening and don’t think it’s worthwhile, chances are NO gardening book is going to catch your interest no matter how well it’s written.

But understand that people have an interest in gardening for different reasons:

  • Supplement their grocery shopping and cooking with fresh produce
  • Include more organic foods in their diet
  • Get outdoors more and get some exercise
  • Become more self-sufficient and secure their own food supply
  • Learn a new hobby
  • Increase their own food security in an insecure time (like right now)
  • They grew up gardening and want to continue for the enjoyment and the harvest

My interests are a little of all these reasons. I started my little urban garden in 2008 or 2009. The GER offered advice, and he still gardens in his backyard next to the fence. The man I was dating at the time also had some gardening experience and helped when he visited.

You’ve seen the unusual gardening results BF and I had in the blog—like the septic tank tomatoes. We didn’t plan those. But I’m hoping we can dig up a garden plot in the next few weeks.

Re-Growing Veg

Jacques also discusses re-growing vegetables, which I’ve also done and blogged about. Right now, I’ve got several green onions re-growing outside, and three have flowered. I cut the flowers off and added them to the soil, so I hope they’ll grow more onions. I recently planted a sprouted celery base. There are two basil sprouts from last year’s plants that are also re-growing in the kitchen window. However, I had to cut that for dinner last week for a recipe that I’ll show in an upcoming blog.

Celery growing illustration

One of the nice illustrations from the book

On page 25, Jacques talks about growing pea shoots from “cheap, dried supermarket peas.” I haven’t tried that yet, but darn it, now I want to! (When I do, the next comment I hear from BF will be, “is this another one of your science experiments?”)

Jacques also talks about the science of soil, including mixing your own. There’s even a chapter on compositing and even a wormery! In an apartment? Well. . .I don’t know if I’d go that far. Depends on how into gardening you are.

Gardening can also yield a few flops, like when BF staked the weeds instead of the green bean vines. But it can also be a great activity that leads to a delicious meal, too.

Stretching The Limited Food Budget

With inflation getting worse, chances are you’ll see more people gardening again as they did during the last economic downturn. Who can blame them? They’ll also see the benefits in freshly grown produce that’s readily available. But the people who need it the most may not realize that they have the ability, and just need some guidance.

If you know someone who is on SNAP (Supplemental Nutrition Assistance Program, the government assistance program formerly known as “food stamps”) let them know that they can also buy seeds and plants to grow foodstuffs with their benefits. I bet you didn’t know that, but it’s true.

Anything that grows and produces food can be purchased with SNAP benefits. Planting seeds and plants along with re-growing purchased produce like green onions, celery, and potatoes, and saving seeds from peppers, tomatoes, and other fresh vegetables can help a limited food budget go further.

Gardening is also a great project to do with children and will teach them where food comes from at the same time.

Further Reading

Apartment Kitchen Gardening is not only a great little book but also an easy read, too. Not everyone is up for 1,100 pages of War And Peace anymore, including me.

While Jacques touches on re-growing vegetables from purchased produce, several years ago I found a book called Don’t Throw It—Grow It! by Deborah Peterson and Millicent Selsam. The authors describe 68 different types of grocery-store bought food plants that can be re-grown on a windowsill and eventually grown in pots or even turned into a full-fledged crop.

Successes & Failures

I’ve tried to grow avocados three ways—with the toothpicks in water, with the sphagnum moss they suggest, and then just planting the seeds. I’ve had little luck here because it’s just not warm enough and does get cold in the winter. The seeds eventually sprout when you bury them in the soil. But once it gets cold, that’s the end of it. Avocados are also good for houseplants—if you can keep pets from destroying them.

I have some organic dried chickpeas I bought so many years ago to plant, and they’re still in the pantry. They might be viable, but I’ll have to plant them to find out.

Because I love pomegranates, I have some from last fall still in the fridge. Time to harvest those seeds and plant them, along with garlic, bulb onions, and other frequently used things. I also saved the top of a purchased pineapple, too. The last one I grew in a paint bucket got to be quite large:

Pineapplel plant in orange paint bucket

The monster pineapple plant.

Let’s see if I have better luck this time, and maybe get to have some fresh pineapple, eventually. Jacques says it will take about two years before you’ll be able to “harvest” the fresh pineapple.

Until Next Time

I’m always looking for new topics for blog posts. I do have a few in the queue, including a couple of recipe updates and one recipe that I finally made for BF. Amazingly, he was quite happy with it, despite not understanding what was in it beforehand.

Coming soon is also a guest post! A fellow copywriter and a friend of the blog asked about doing a guest post, and I accepted her offer. We’ll be talking about it in the next week or so, and I’m sure it will be fantastic. She understands the blog’s tone but has a different idea on a blog post, so that’s in the works. Plus, she gave me another topic idea.

Springtime is here, so don’t procrastinate. Plants are in the stores now, so grab them while you can. Whether you’re an avid gardener or just thinking about a garden, get started so you can enjoy fresh vegetables, fruits, and herbs from your apartment.

Enjoy!

think! Chocolate Mousse Pie Keto Bar box
think! Keto Chocolate Mousse Pie Bars

Keto and chocolate do go together!

Follow me on BlogLovin’.

Hello again, Dear Readers:

Spring is here, and I’ve got a sweet treat that you may like. It’s especially important if you like chocolate, you’re doing keto, or just want to avoid sugar for whatever reason.

It’s a short post today, with just one or two updates, but I’m working on a couple of longer pieces for upcoming blogs.

Misfits Market Update

Well, after last week’s post on the meat box from Misfits Market, I finally got BF to sit down with me right before the deadline and look at what was being offered. His eyes glazed over, and he said, “this is all for you. There’s nothing really here that I would want. Just order whatever you like.” I didn’t see anything we needed immediately, so I canceled the order, and put my account on hold for a month. Chances are, I’m going to cancel it, but we’ll see in a month. I tried.

Buddy Update

Buddy, AKA “Broccoli, Stir-Fry”, is growing quickly and he’s not getting any better. The weather has been good so I’ve had the windows open to blow out the “aroma.” He still continues to ignore his “puppy” training, so I guess I’ll be spending more time on YouTube.

Buddy the puppy

There he is, the little monster.

One solution that’s been offered I’ll be trying this week. There’s something called Angry Orange, a citrus concentrate that is designed to knockout pet odors quickly. Scented candles are just not working, and even the old reliable BioKleen Isn’t doing the job with this guy. Plus, he’s fast as lightning and doesn’t seem to be getting the hint.

A project manager with one of my agency clients told me about it, and I’ve ordered a bottle of the concentrate type, so that I can make it in a squirt bottle, rather than buying it ready to use. I’ll let you know what happens in a future blog post.

think! Bars

A few years ago, BFF’s sister and brother-in-law, who live in Atlanta, had some of these protein bars called think! (and yes, the spelling is correct.) That’s the company name and the brand name. You may have even seen them and not noticed them. The company make a series of protein bars, that are low in sugar, and are healthier than granola, candy bars, etc. I never noticed them before until I tried one on their weekend visits. The white chocolate berry flavor was also good, but they don’t seem to make it anymore.

think! High Protein Bar, Brownie Crunch packaging

I liked these, too, and I bought them myself for a while until I got a bad one. It was so bad that I never bought them again.

The company makes a variety of different types of protein bars. They also make healthy oatmeal, which I’ve never seen anywhere except on their website, where you can order it yourself.

Even after the hurricane was over, I still referred to them as “hurricane snacks.” Maybe it’s just my dislike for many things, but I just never touched them again after a bad one, and never contacted the company, either. I remember them being about six dollars a box at that time.

Keto Chocolate Mousse

During my last trip to Target, when I saw shortages of cat food, I was walking around in the back of the store where they keep these kinds of things. I wasn’t looking for think! Bars, but there they were. Then I saw something magical:

think! Chocolate Mousse Pie Keto Bar box

These are keto?

Keto. Chocolate. Mousse. What?

These were more expensive, at $6.79 a box. (The price has since increased, which I’ll explain in a minute.) But being the chocolate lover that I am, I bought a box.

I tried one. . .and it was delicious!!

Keto chocolate mousse pie bar from think! in wrapper

Not terribly big

Ruler measuring three inch Keto think! chocolate mousse pie bar

Three inches of tasty

There’s a lot of chocolate flavor in this little bar.

keto chocolate mousse pie bar cut open

Ok, so I didn’t cut it exactly right

The bar has a lightly crunchy texture that bridges the gap between. “diet” and regular candy bars. And it’s really well-made piece of confectionery, in this food blogger’s considered opinion.

What’s it for? A snack, a meal replacement, or something with your coffee, morning or afternoon. I call it a chocolate craving satisfied. It’s sweetened with erythritol, too:

think! keto chocolate mousse bar box list of ingredients

No sugar here.

Where have they been all this time? Apparently think! Keto Chocolate Mousse Bars have been around for quite a while, just not in Louisiana. Maybe because I haven’t bothered to look for them in a couple of years, I never really noticed them. But if you look at the Amazon reviews, you’ll see reviews going back to 2019. My guess is like everything else in Louisiana, it was very slow to get here.

Cost

As I mentioned earlier, I paid $6.79 for a box of these in our Hammond Target. However, when I checked to see if our local Walmart had them, they did. But the cost was considerably more, at $8.06 a box—ouch! Quite a jump from Target. But checking Target’s website now, they have also gone up to $7.99 a box In the week since I’ve been there. Albertsons also carries them at $8.99 a box. I haven’t been to Rouses to check for them.

Yes, inflation.

Once the price of fuel went up, everything else followed because it costs more to ship.

Now I wish I’d bought an extra box at Target, but whatever.

They are always available for order, both from the company’s website, as well as from Amazon. However, because they are chocolate there is the risk of them melting on the trip. If you’re going to order some from either place, it’s probably a good idea to make sure you’ll be home when they’re delivered so that they aren’t left out in the sun for a long period of time.

In the Houston area, Kroger Has these chocolate mousse bars, at a cost of $9.99 a box. Randall’s has them for either $8.99, or $11.99, depending on whether you belong to their membership program. (I’m guessing that’s like. Winn-Dixie’s Rewards program; it’s been a while since I’ve been to Randall’s.) Texas’ favorite H-E-B carries the think! protein bars, but not the keto brand. But you can always make a request to your grocery store to carry them if they don’t already.

Amazon has an entire store of think! Products if you’re interested in researching them there, or buying a case.

Another Treat

Delicious as they are, think! Keto Chocolate Mouse Bars are a pricey treat. They’re probably not something you should add to your regular grocery list, just for an occasional splurge. Unless, of course, you’re trying to impress someone who’s doing keto.

Solution? Start making keto fat bombs and seek out good recipes for them. If you’re not already on Pinterest, you can do a search for fat bomb recipes, or get started here with 50 fat bomb recipes from The Keto Queens. Most are made from basic ingredients and can be customized to your individual taste. I should try making some chocolate raspberry fat bombs one of these days.

Geez, I hope my mention of these homemade treats doesn’t get me on a “watch list” somewhere!

More Healthier Alternatives

As consumers move to keto, they’re looking for more sugar-free and otherwise healthy items. Companies are stepping up to the plate and delivering. And now that barbecue season is here (it never really went away for most of us), you can have your BBQ, stay keto and eat it too.

For a long time, I made my own barbecue sauce from one of Suzanne Somers’s recipes, and it was just grand, but BF wouldn’t eat it. Much as I love BBQ, I had to ask him not to put sauce on mine because of what he used. But one day after I moved here, I discovered that you could buy sugar-free barbecue sauce already made. Then it became a staple at the Casa de Rurale:

G. Hughes Sugarfree Barbecue sauce for keto

Amazingly, I never saw this in Houston, or maybe I never looked.

BF used Sweet Baby Ray’s for many years in his barbecue. This particular concoction is extremely sweet. That’s because the first ingredient is high fructose corn syrup, the extremely cheap and caloric version of refined sugar that hides in nearly everything Americans eat.

SBR's ingredient list

In fact, most people around here use this and nothing else. I always request that he keep SBRs far away from anything I’m planning to eat, and he does or uses the sugar-free stuff for mine. Eventually, he got used to G. Hughes.

We’ve been buying the G. Hughes Sugar-free Barbecue Sauce for a while, and BF actually likes it. In fact, one day when we were somewhere else having BBQ, the host used Sweet Baby Ray’s.

After having SBR’s for the first time in a while, BF declared that it was “way too sweet.” That was a surprise because he always fussed about using sugar-free barbecue sauce until he discovered it was pretty good. He’s now a convert, and the G. Hughes Smokehouse sugar-free version is our preferred barbecue sauce. We like the Hickory and Mesquite the best, but we’ll buy any of them. They don’t taste “sugar-free,” either. We try to keep at least one or two bottles in the pantry.


I discovered the other day in Walmart that the company also has other types of G. Hughes sugar-free condiments that are now available in our little neck of the woods.

sugar-free keto condiments

OOOhhh!!!!

I haven’t tried these but probably will soon.

more sugar-free condiments for keto

Oh, BOY!!

There is also an Amazon store for G. Hughes Sugar-Free products. If I suddenly found myself with a large Amazon gift card, chances are that’s one of the stores I’d visit.

Until Next Time

I know this is a shorter blog post and I normally write, but I’m still working on several ideas for future blog posts. One of them is a “spillover” from my regular client work, and you’ll see what that means when I publish it. Don’t worry, this one isn’t a heavy legal subject, and will be quite tasty as well as interesting (I hope.)

And now that you know that you can find a few more tasty sugar-free treats, your weekend barbecue just got a little bit better.

Happy Dining!


Skip to toolbar
Verified by MonsterInsights