Namecheap.com
Front cover of Easy Dirty Keto book by Emilie Bailey
Cookbook Review: Easy Dirty Keto

Easy Dirty Keto is the latest cookbook by Emilie Bailey. Today I’ll review it and tell you why it’s a good book to have in your collection, whether or not you eat keto.

Find me on Bloglovin’

Hello, again, Dear Readers:

Apologies for my tardiness, it’s been a busy few weeks. We watched as Hurricane Ian went through Florida doing pretty much the same thing Hurricane Ida did in Louisiana last year. One of my project managers lives right in the strike zone, and she finally got power and Internet back a few days ago. Don’t we know about that! 

Others have checked in from the area on social media. Keep these folks in your thoughts and prayers, although I think the good Governor DeSantis has everything well in hand. We’ve been through it, and we know some folks who are still not back in their homes more than a year later. Everything moves VERY slowly here, but Florida’s working it.

We’ve had a few lovely cool fronts come through, and another brief one graces Texas and Louisiana tomorrow. There’s been scant rain for over a month. Autumn came early this year, and we’re thankful. I can open the windows some days and clear the air (especially after BF has been cooking.)

As promised, I’ve got a delicious new cookbook to tell you about, and five delicious recipes you can enjoy this week.

Get Ready For Dirty Keto

Are you looking for new and delicious keto recipes or just delicious food that’s easy to make? Well, aren’t we all? Today I’ll tell you all about the newest—and possibly final—book from The Texas Granola Girl, Emilie Bailey. This book covers both bases.

Front cover of Easy Dirty Keto book by Emilie Bailey

The book.

Let me say at the outset that I was fortunate to get a review copy of Easy Dirty Keto before its release on August 25th. Thank you, Emilie! (I feel special when that happens.) I’ve already left a five-star review on Amazon, because, well it deserves five stars, in my opinion. But that’s because the food is good.

Honestly, if the recipes weren’t any good, I wouldn’t be writing an entire blog post—it would be a short “news item” with my polite opinion. But this is Emilie, and the food is really, really, good—as usual.

Let’s get cooking.

What Is Dirty Keto?

No, it’s not something you get into trouble for, should be embarrassed about, or risk arrest. Nothing like that. It’s a form of keto that stays within the parameters but isn’t exact.

There are two types of keto:

  • Clean keto, where you eat “clean,” no processed foods, artificial sweeteners, and the like
  • Dirty keto, where the rules are a little looser, but still help you meet macros and stay in ketosis

Ingredients like these might be considered “dirty keto”:

Remember that this is non-dairy. Definitely dirty keto but I haven’t tried it myself.


Walmart’s own version and I haven’t tried this one either.

Or this one:

I haven’t tried this one yet, but will one day.

And if you wanted to classify my keto, it would be called “filthy dirty keto.” Because I can’t say I eat keto every day—especially when BF makes jambalaya or one of his other “specialties.”

The rule is to stay in ketosis. I can’t say I’ve ever checked that. Still, dirty keto isn’t as strict, and the variety of foods is wider because you can include some things that you wouldn’t under “clean keto.” You’ll see what I mean in the recipes.

Many people find clean keto to be difficult to sustain, or they just get bored with the same types of foods. With dirty keto, there’s a little more to enjoy that’s still “keto.” Emilie explains in the intro–she’s busy, like most people, and needed to loosen the rules a bit. One example is the sugar-free version of Cool Whip.

I’ve tried these five recipes myself and give my opinion on each. (Spoiler alert: they’re delicious!) I’ll be trying more of them in the future, and I may include them in a future blog post. So, here they are for your information and enjoyment.

Chorizo and Spaghetti Squash, Page 125

Let me say right up front that this is the recipe I really wanted to make first but had to wait until BF wasn’t home. I don’t want to listen to the retching.

It’s simple and straightforward. You might not believe it was really keto. The setup:

Ingredients

Just a few ingredients for this one.


First, start with the spaghetti squash:

Spaghetti squash with ends cut off an standing on end

This makes cutting easier.

Cut in half and scrape out the seeds:

Scraping seeds out of the spaghetti squash

Right into the trash, or elsewhere if you plan to save the seeds. One of these days I’ll do just that.

They should look like this:

Spaghetti Squash cut in half

Just like this.

Put them face down onto a microwave-safe plate and cook on high for ten minutes, until it’s fork-tender.

Spaghetti squash halves in microwave

Just like that.

When it’s done, it looks like this:

Bowl of cooked spaghetti squash

This is tasty all on its own

While that’s cooking, measure out your spices and things:

Measured ingredients in cups

Easy!

Then remove the chorizo from the casings and add it to the pan.

Chorizo in casing

Just like browning ground meat.

You won’t need oil, because the chorizo gives off plenty once it starts cooking. Remember, it’s a highly seasoned pork sausage.

Browning chorizo in a large stainless steel pan

Doesn’t take long.

Once the chorizo is cooked, add in the pico de gallo:

Adding salsa to the pan

It’s salsa, but I’ll explain in a minute.

Mix that around, then add the salt and the spaghetti squash:

Salt and spaghetti squash added into pan

Just like that

Toss that all around to distribute:

Tossing spaghetti squash into mixture

Just like that.

Then sprinkle the half-cup cheese on top:

Sprinkling cheese on top of pan

Just like that.

And dinner is ready!

It takes about 30 minutes or so, but it’s really fast and easy. If you want, you can cook the spaghetti squash ahead of time (keep reading), refrigerate it, and add it to the pan when the chorizo is cooked. If the spaghetti squash is cold, you may need a few more minutes to let it reheat in the pan before topping it with the cheese.

When I finished, I posted this picture on Instagram:

Chorizo spaghetti squash toss in a bowl with a Splayd

Dinner!

And I tagged Emilie. She saw it and responded that it was one of her favorite recipes from this book. Well, yeah! But really—chorizo. Do we need anything else?

What I Did Wrong

I bet you weren’t expecting to read that. Let me explain.

The recipe was made according to Emilie’s directions. But because we were on a rushed trip to Winn-Dixie, two things were different:

  • I bought salsa, not pico de gallo because that’s what I could find quickly
  • I also couldn’t find the queso fresco quickly so I relied on the Cotija cheese I had in the freezer

Guess what? Both were wrong for this recipe—but it was still delicious!

The salsa I bought:


And the magic secret ingredient:

Ingredients of salsa including sugar

See it?

That’s right, sugar. They call it “cane sugar” so they can show that it’s “natural,” and not from high fructose corn syrup. It’s still sugar, though, and it matters if you’re a diabetic watching sugar or you’re just trying to cut down or eliminate your sugar consumption.

The Cotija cheese is tasty but has a stronger taste, similar to Manchego, but not as potent as Feta. Just not the same as Queso Fresco, which has a salty, mild taste. I love Queso Fresco, and BF won’t touch it, so it doesn’t last long when I buy some. Fortunately, the recipe only calls for a half-cup of cheese as a topping, so it doesn’t overwhelm. I was looking forward to the milder cheese taste.

A subsequent trip revealed that our local Winn-Dixie simply doesn’t carry Queso Fresco, but Walmart does, along with pico de gallo. Good thing, because there’s suddenly a lot more Spanish spoken in Walmart here than before. No kidding.

Because BF was gone on a recent weekend, I made it again with the “right” ingredients. (He still won’t touch it.) I made my own chorizo because I didn’t have any but did have ground pork in the freezer. Really good both ways, but I’ll stick with the recipe next time.

Here’s the printable recipe:

Chorizo & Spaghetti Squash Toss in Large pan on stove

Chorizo & Spaghetti Squash Toss

Amy
From Easy Dirty Keto by Emilie Bailey, Page 125 (c. 2022)
Prep Time 10 minutes
Cook Time 10 minutes
Course Main Course
Cuisine Tex-Mex
Servings 4

Ingredients
  

  • 1 medium spaghetti squash, about 2½ to 3 pounds, or four cups cooked spaghetti squash
  • 1 pound Mexican chorizo, casings removed
  • 1 cup pico de gallo
  • ½ tsp Kosher salt
  • ½ cup Queso Fresco (fresh Mexican crumbling cheese)

Instructions
 

  • Carefully cut the ends off the squash, then slice it in half lengthwise. Remove the seeds, then place the squash halves cut side down on a microwave-safe plate. Microwave on high for ten minutes, or until the squash is soft and fork-tender.
  • While the squash is cooking, preheat a large skillet over medium-high heat and add the chorizo to the skillet. Break apart the chorizo with a spoon and cook until lightly browned, about 5 to 7 minutes. Add the pico de gallo and cook for another 2 to 3 minutes, until the onions begin to soften.
  • When the squash is cool enough to handle, remove the strands with a fork, and add them to the skillet. Season with the salt, and toss with the chorizo mixture until warmed through.
  • Remove the skillet from the heat, top the mixture with queso fresco, and serve.

I have updated the chorizo blog post with a printable recipe for that, too.

Notes About Spaghetti Squash

Emilie calls for microwaving the spaghetti squash here. And for this recipe, it works great. But there are other ways to cook this wonderful vegetable if you like it and want to make it for something else.

It’s low-carb and keto and tastes good when cooked correctly. It’s an ideal substitute for wheat-flour spaghetti, and tasty with any kind of spaghetti sauce. But of course, it’s called “squash,” and that puts BF right off eating any. His comment, “I’ll try anything you make” is rendered null and void when anything contains the word or ingredient “squash.”

My first encounter was some 20 years ago with one of Suzanne Somers’s many low-carb cookbooks. Her recipes called for the same prep: cut in half and remove the seeds. But then the recipe called for:

  • Rubbing both cut sides with olive oil
  • Putting them cut side down on a sheet pan
  • Roasting in a 350F oven for an hour

You must wait for the squash to cool before handling it. Or use a thick potholder to hold the halves and scrape out the stringy flesh into a bowl. I can roast a smaller one in the countertop oven easily.

I think the recipe I tried first called for a little salt and pepper with a pat of butter, which is probably my favorite way to eat this squash. If you’re not going to use it or eat it immediately, just put it into a dish and refrigerate it until you’re ready.

Slow Cooking Spaghetti Squash

Another way I found to cook spaghetti squash is in the slow cooker. No kidding, you can totally put your spaghetti squash into your slow cooker—whole—and let it cook on “low” while you’re at work or doing other things. You must poke it with a fork in a few places like a potato, but it cooks up nicely. It’s hot, of course, so be careful cutting it open and scraping out the seeds.

Why would you do that if this recipe calls for microwaving? It’s your choice, really. You can also use the countertop oven to cook one in advance if you wanted. But using the slow cooker also means it’s hands-off and ready when you are, although it does come out softer this way. Again, use immediately or refrigerate.

If you’re making this dish on a busy weeknight, the ready-to-use spaghetti squash can make it a little easier.

However you cook this, it’s delicious in a fantastic Tex-Mex sort of way.

Barbecue Glazed Chicken Tenders, Page 95

This is so easy and tasty with just a few ingredients. Here’s the recipe:

Barbecue Glazed Chicken Tenders

From Dirty Easy Keto, Emilie Bailey, Page 95
Prep Time 5 minutes
Cook Time 25 minutes
Course Main Course
Cuisine American
Servings 4 servings

Ingredients
  

  • ½ cup Sugar-free barbecue sauce
  • ¼ cup Sugar-free peach jam I couldn't find peach, but apricot worked well here.
  • tbsp Sugar-free barbecue rub or seasoning
  • 1 pound chicken tenders

Instructions
 

  • Preheat the oven to 400°F. Line a baking sheet with parchment paper and set it aside.
  • In a bowl, stir together the barbecue sauce, peach jam, and seasoning. Reserve three tablespoons of this mixture for later.
  • Dip each chicken tender in the sauce mixture and place it on the prepared baking sheet. Place the tenders in the oven and cook for about 20 minutes, or until the internal temperature of the chicken reaches 165°F. Base the tenders with the reserved sauce and bake for another 5 minutes.
  • Serve as desired or store in an airtight container in the refrigerator for up to 4 days.
Keyword keto, low carb

The setup:

Ingredients for barbecue chicken tenders

Again, you don’t need much, and the salt was just sitting there for some reason.

See that sugar-free apricot jam over there? It’s supposed to be peach, but that’s all I could get in Winn-Dixie. It’s close, so I bought some, and it worked just fine. On sale, 2 for $6, with a jar of red raspberry. Because let’s face it, all you need is a spoon, and you have an instant keto dessert.

So. . . .

Preheat the oven to 400F, then line a sheet pan with parchment. I measured out the barbecue sauce in a measuring cup and then kept using it because it was just easier for mixing.


Mix the barbecue sauce, jam, and either some BBQ rub or other seasoning. I used a seasoned salt mix I like to make from another book.

One

Two

Mix well

Done!

And take out three tablespoons for later. I can’t find that picture, though. But it gets easier from here.

Barbecue sauce in measuring cup

And you have just enough.

Dip the chicken tenders into the remaining mixture, just like you were breading them:

chicken dipped in sauce

This worked for me really well.

Drop onto the baking sheet:

Then bake it at 400F for about twenty minutes.

Once done, brush with the reserved sauce and give it another five minutes or so.

So what should you serve this with?

Balsamic Brussels Sprouts, Page 64

Make this while the chicken is in the oven. I started heating the oil first, took care of the chicken, then went on to make this one.

And if I’d read the directions ahead of time, I would have passed. Why? You’re FRYING them in hot oil on the stove. I’m not saying it’s not tasty—it is. However, I quit frying back in the ’80s, I think. Big mess, dangerous, and all that.

But. . .these little babies are SO GOOD!!!! So if you’re up to it, and you can do it safely, I highly suggest making this recipe—as is.

I can see Aunt Kathy in Texas reading this and saying to herself, “Frying? Yeah, right.” Well, here’s how it went.

The setup

Admittedly, I didn’t realize I’d need so much oil. And the big chili pot I was planning to use would have required several bottles of olive oil, so I used the smaller, 3-quart Dutch oven. Lucky me, I bought it years ago and I’m very happy I did because it’s super handy. I also didn’t have a lot of olive oil, so I used coconut oil with some olive oil, which worked just fine.

Before I started with the chicken, I put the oil in the pot and put the thermometer in with it:

This becomes bubbling hot oil, so be extra careful

You can’t see it in the picture because the inside is so faded, but 400 degrees is at the top.

I bought pre-washed Brussels sprouts, so that was a good thing:

No prep work here

I dropped them into the very hot oil slowly and carefully, half the bag at a time.

Don’t rush this!

And this happened:

They’re frying!

Use your “splatter screen,” not the pot lid, because condensation will drip water back into the hot oil and cause popping and splattering. No.

Saves a lot of mess too

Let them cook for 3 to 5 minutes, the book says. I think the second batch cooked a bit longer, maybe 6 minutes, and they came out a little better.

When you take them out of the oil, put them on a sheet pan lined with paper toweling:

Repeat with a second batch if you need to.

After the frying is completed, sprinkle on a bit of salt:

Not too much

Transfer to your serving dish and sprinkle on a quarter-cup of Parmesan cheese:

A bit more salt:

Then drizzle over the tablespoon of the balsamic reduction:


If the chicken isn’t ready, keep this dish warm until it is. But the chicken should be about ready by this time. I stuck the dish into the toaster oven to keep it warm until the chicken was done.

Perfect!

This is a seriously good keto dinner:

Dinner is served!

I admit I was just going to use my default keto recipe, cauliflower rice. And it wouldn’t be bad, either. But Emilie suggests this recipe as an accompaniment, so I made it. I’m glad I did, frying mess and all.

This balsamic reduction is a syrupy condiment based on balsamic vinegar.

Find it with the fancy vinegars

It’s not totally keto, but then, you don’t need much to add a really nice extra touch of sweetness to any dish.

Here’s the printable recipe:

Carmelized Brussels Sprouts with Balsamic Glaze

Carmelized Brussels Sprouts with Balsamic Glaze

Amy
From Easy Dirty Keto by Emilie Bailey, page 64 (c. 2022)
Prep Time 5 minutes
Cook Time 10 minutes
Course Side Dish
Cuisine American
Servings 4 servings

Ingredients
  

  • Olive oil, for frying I used olive and coconut because I was nearly out of olive
  • 1 pound prewashed fresh Brussels sprouts, cut in half, dry, and at room temperature
  • ½ teaspoon kosher salt, divided
  • ¼ cup grated Parmesan cheese
  • 1 tablespoon Balsamic glaze

Instructions
 

  • Line a baking sheet with a layer of paper towels for draining. Into a Dutch oven, pour about 1½ inches of oil and heat the oil to 400°F over medium heat.
  • Put half the Brussels sprouts and any leaves that have fallen off into the hot oil. Turn the heat up to medium-high and cook for 3 to 5 minutes, stirring them often until they are dark golden brown and crisp. Remove with a slotted spoon to the prepared baking sheet to drain. Immediately season with ¼ teaspoon of salt.
  • Bring the oil back up to temperature, add the remaining Brussels sprouts to the oil and repeat step 2.
  • Place the crispy sprouts on a serving plate, sprinkle with the Parmesan cheese, and drizzle with the balsamic glaze. Serve immediately.
  • NOTE: Emilie says that to ensure that the sprouts come out crispy, and to reduce any splattering, make sure that they are dry and at room temperature prior to frying. Don't use frozen sprouts, since they have much more moisture. Use a screen to control the splattering but don't use a lid, which will make the splattering worse.
Keyword dirty keto, keto, low carb

Guess what? I made this dinner again, this time for BF, along with the Mint Chocolate Chip Ice Cream Whip (keep reading) a couple of weeks ago. I managed to find sugar-free peach preserves, too. He was looking forward to trying this menu and really enjoyed his dinner with dessert. So we have one more “acceptable” keto dinner for BF, thanks to Emilie’s great recipes. We’ll definitely be having this again sometime.

Boogie Cheeseburger Skillet, Page 117

What led me to try this, knowing BF wouldn’t eat it? Well, there’s a lot he doesn’t eat, so there’s that. A couple of other things, too:

  • A lady I’ve known for a long time in nearby Albany calls everyone “Boogie” as a term of endearment. So naturally, the title caught my attention.
  • One recipe called for chipotle mayo, but I wondered where I would find it here. I mean, soy sauce is considered “international food” in our local stores. Walking through our newly renovated Winn-Dixie, I found not only the chipotle mayo, but it was also on sale, so I bought a bottle. It is SO GOOD! Then I went back and found the recipe in the digital book. Warning: it’s got a strong bite. So if peppery is not something you’d like, Emilie says to substitute regular mayo in the sauce and the milder Monterey Jack cheese for the topping.
  • And one recipe called for a poblano pepper, which happened to be growing outside in the paint bucket garden. It was the same recipe, so that was my chance to use it in a recipe before it went bad. I’ve got a couple more growing this late in the year, but I can get poblanos in both Winn-Dixie and Walmart, too.

Then it was a matter of getting a few more ingredients and cooking it.

The Setup

Yes, this is sugar-free ketchup by the same company that makes our favorite barbecue sauce.

Real sugar-free ketchup, and it’s good, too.

Start by preheating the oven to 400F, mix up your mayo, ketchup, and Worcestershire sauce, and set aside.

Just like that.

If you haven’t chopped anything yet, let me give you a tip: wear gloves for nearly any type of pepper but bells:

My prized poblano

You’ll seed it and cut it into two-inch strips:


That’s where the majority of the heat is, the seeds and ribs.

You’ll need a large, oven-safe skillet for this. A cast-iron skillet or stainless one like mine is perfect. Melt the butter, then add the chopped onion and Poblano pepper. Cook for 7 to 8 minutes, stirring often until the onion is translucent and starts to carmelize.

Remove this from the pan and set it aside. Now start with the ground beef, along with the salt, pepper and garlic powder:

You’re halfway there!

Brown it up really nicely, and break it up into small pieces, which will take about ten minutes:

Then add the requisite cauliflower rice:

The magic ingredient–cauliflower rice! You knew this was coming, right?

Cook until the cauli-rice is no longer frozen, just a few minutes. Then add the onion and pepper back into the pan and stir:

Take the pan off the heat, and stir in about two-thirds of the mayo mixture we made first:

Sprinkle with the cheese:

Put the pan into the oven for five to seven minutes:

The pizza pan on the bottom rack is not needed for this recipe. It just stays in there for storage. There’s no place else to put it, so if we need the bottom rack, we just remove it and put it elsewhere until we’re done.

Done!

Drizzle the reserved sauce on top and dig in.

No, BF wouldn’t eat this either, he told me at the outset. I’ll make it again when he’s working late or I decide he can have his favorite frozen pizza for dinner.

Here’s the printable recipe:

Boogie cheeseburger skillet with Syllabub dessert

Boogie Cheeseburger Skillet

Amy
From Easy Dirty Keto by Emilie Bailey, page 117 (c. 2022). If you like fancy burgers, this one will hit the spot.
Prep Time 5 minutes
Cook Time 25 minutes
Course Main Course
Cuisine Tex-Mex
Servings 4 servings

Ingredients
  

  • ½ cup chipotle mayonnaise, plus more for serving You can use plain mayo here if you can't find chipotle mayo or prefer less or no spice
  • 2 tbsp sugar-free ketchup
  • 1 tbsp Worcestershire sauce
  • 2 tbsp butter
  • ½ onion, cut into ¼" wedges
  • 1 poblano pepper
  • 1 pound ground beef
  • 1 tsp kosher salt
  • ½ tsp ground black pepper
  • ½ tsp garlic powder
  • 1 12-ounce bag frozen cauliflower rice
  • 1 cup shredded Pepper Jack cheese If you'd like to cut down on the spiciness, use Monterrey Jack instead

Instructions
 

  • Preheat the oven to 400°F.
  • In a small bowl, stir together the mayonnaise,ketchup, and Worchestershire sauce and set aside.
  • Heat a large oven-safe skillet over medium-high heat. Melt the butter, then add onion and pepper; cook for 7 to 8 minutes, stirring often, until the onion is translucent and beginning to carmelize. Remove from the pan and set aside.
  • Add the beef to the pan, and season with salt, pepper, and garlic powder. Cook for about 10 minutes or until browned, breaking it apart as it cooks. Add the frozen cauliflower rice and cook for another 2 to 3 minutes, until there is no liquid left in the pan and the cauliflower rice is tender. Stir the pepper and onion into the beef mixture.
  • Remove the skillet from the heat and stir in two-thirds of the mayonnaise mixutre. Top with the shredded cheese. Put the skillet into the oven and bake for 5 to 7 minutes or until the cheese melts. Carefully remove the skillet from the oven and drizzle with the remaining sauce.

Mint-Chip Ice Cream Whip, Page 137

Let me just say that this is a total “cheat” of a recipe. It’s a prime example of “dirty keto,” since it’s not what you’d call “clean eating” under any circumstances. And I wouldn’t have considered it unless Emilie or another keto writer suggested it.

I’m talking about Cool Whip. It now comes in a version called Zero Sugar.

If you serve this dessert in fancy little dessert cups or glasses, I suggest calling it Syllabub.” Chances are no one will know what that means, and it will sound posh. Maybe even French posh.

I’m not a fan of frozen non-dairy dessert toppings, even if it’s sugar-free. But now and again, this might just be what you need to hit the spot. As Emilie describes, it’s not really ice cream, just a little ice-cream-esque dessert that comes together quickly.

The prep for this one calls for putting the Cool Whip into the fridge for four hours to thaw. Don’t let it sit out or microwave this stuff because it will separate. Why? It’s non-dairy, and this commercial from about ten years ago (“Oil? Or Cream?” ) explains the difference. Read more on Kraft’s website.

Oh, and one more thing: I couldn’t get the white chocolate sugar-free pudding here, so I used regular chocolate sugar-free pudding. This, too, worked fine. The setup:

Once your Zero Sugar Cool Whip is sufficiently thawed to a soft texture, dump it into a bowl:

Add in the rest of the ingredients:

I did measure this into a pinch bowl that’s off-camera. I was doing this by myself with my iPhone on a tripod taking my own pictures.

Chop the mint patties up fine:

Add them:

And discover that the bowl you picked up is too small, so you switch to a larger one because it all fits in the dishwasher:

Fold carefully to mix:

Add it back to the Cool Whip container and stash it in the freezer for a couple of hours.

Mint Chip Ice Cream Whip in Cool Whip Bowl

There you are! Your fancy and posh dessert–if nobody peeks in the freezer, of course.

When it’s stiffened up a bit, it’s ready to dish out and serve.

Don’t serve it from the Cool Whip container if you’re trying to be fancy and call it syllabub. However, if you collect this fine piece of culinary Americana, here’s another reason to add to your “collection.”

And if you’re a fan of regular Cool Whip, here’s a new dessert for you, whether you’re eating keto or not. I’m sure it would work well with the regular stuff, too. If you try it, leave a comment about it.

The first time I made it, I mentioned it to BF and offered him some. He declined. Amazing, because he’s a huge fan of the power of Listerine. But with the chicken and Brussels sprouts for dinner, he was open to trying some, and he really enjoyed a dish of this fast and non-fancy keto dessert.

Here’s the printable recipe:

Mint Chip Ice Cream Whip in Cool Whip Bowl

Mint Chip Ice-Cream Whip

Amy
From Easy Dirty Keto by Emilie Bailey, page 137 (c. 2022)
Prep Time 5 minutes
Course Dessert
Cuisine American

Ingredients
  

  • 1 8-ounce Container sugar-free whipped topping, thawed Do this by leaving in the fridge for four hours--don't leave it out or microwave
  • 2 tblsp Sugar-free white chocolate pudding mix I used sugar free chocolate because I couldn't find white chocolate.
  • ½ tsp Peppermint Extract
  • 3 sugar-free peppermint patties, finely chopped

Instructions
 

  • In a medium bowl, combine the whipped topping, (save the container), pudding mix, and peppermint extract and stir together well.
  • Fold in the chopped peppermint patties and return the mixture to the whipped topping container.
  • Put the container in the freezer for at least 2 to 3 hours for an ice cream-like consistency.
Keyword dirty keto, keto, low carb, no sugar

About Peppermint Extract

Be VERY careful not to add too much. Otherwise, the finished dish will taste like toothpaste. I speak from experience here. The mint can overpower everything else, so measure carefully, and not over the bowl. Now, do you see why I prep everything beforehand? You can’t add too much when it’s already measured into a small dish or pinch bowl.

Yes, I did that, but I didn’t stage the picture right. I was by myself, as usual, and I had to stand around the tripod.

Verdict: It’s A Great Book!

Easy Dirty Keto is a really nice cookbook to have in your collection. If you aren’t looking for dirty keto, I still recommend Emilie’s book. The recipes are easy, and most of the recipes don’t need a large number of ingredients. Plus, the food is so good that even non-keto folks can still enjoy them. Even BF!

When I had the opportunity to review Emilie’s first book, The Southern Keto Book, my first thought was something along the lines of, “Keto and Southern? Oh, come ON!” Of course, you know how that went, and now I’m a total fangirl.

Keto or not, I feel like these recipes are real comfort food. At least, that’s what I felt like when I made them and then enjoyed eating them. No kidding. Even though I grew up in New Orleans, the cuisine just isn’t appealing to me anymore, plus all the excess starch of rice and potatoes and the like. I liked Tex-Mex early on, and it’s what I’ve liked since the late ’80s. Nobody understands that here, but I’m sure Emilie does.

Delicious food is the best reason for buying any cookbook, isn’t it?

Is Easy Dirty Keto The End?

Emilie and her family are on a working game ranch in Texas. That’s probably the reason you can find several venison and wild game recipes on her website. While she’s enjoyed sharing her keto journey with readers, another book may be out of the question. We hope not, of course, but we’re thankful for the four she’s published. Read her blog, you’ll see that her blog and cookbooks are a “side hustle.” Like a lot of modern authors, she has a “day job” and writes on the side.

Should this be Emilie’s last book, I would just say thank you to Emilie for four great books with delicious food to enjoy for years to come. All four have become favorites with us, and even BF likes many of the dishes I’ve made. No more canned soup if he wants something better.

Emilie didn’t say anything about discontinuing her blog. Like me, Emilie doesn’t blog regularly. That’s OK—Emilie’s website is a huge collection of delicious keto recipes that aren’t in any books, to my knowledge. Those aforementioned venison recipes will be tried next time someone brings over deer or something. (It’s happened a few times, and deer roast is quite easy in the Instant Pot.) If you’re so inclined, sign up at her website (right-hand side, scroll down a little over halfway.)

Maybe one day we can make the trip to visit Emilie’s ranch in Texas. When we do, there will be a full blog post here with lots of pictures.

Enjoy!


Cover of Vegetarian Keto In 30 Minutes
Cookbook Review: Vegetarian Keto In 30 Minutes

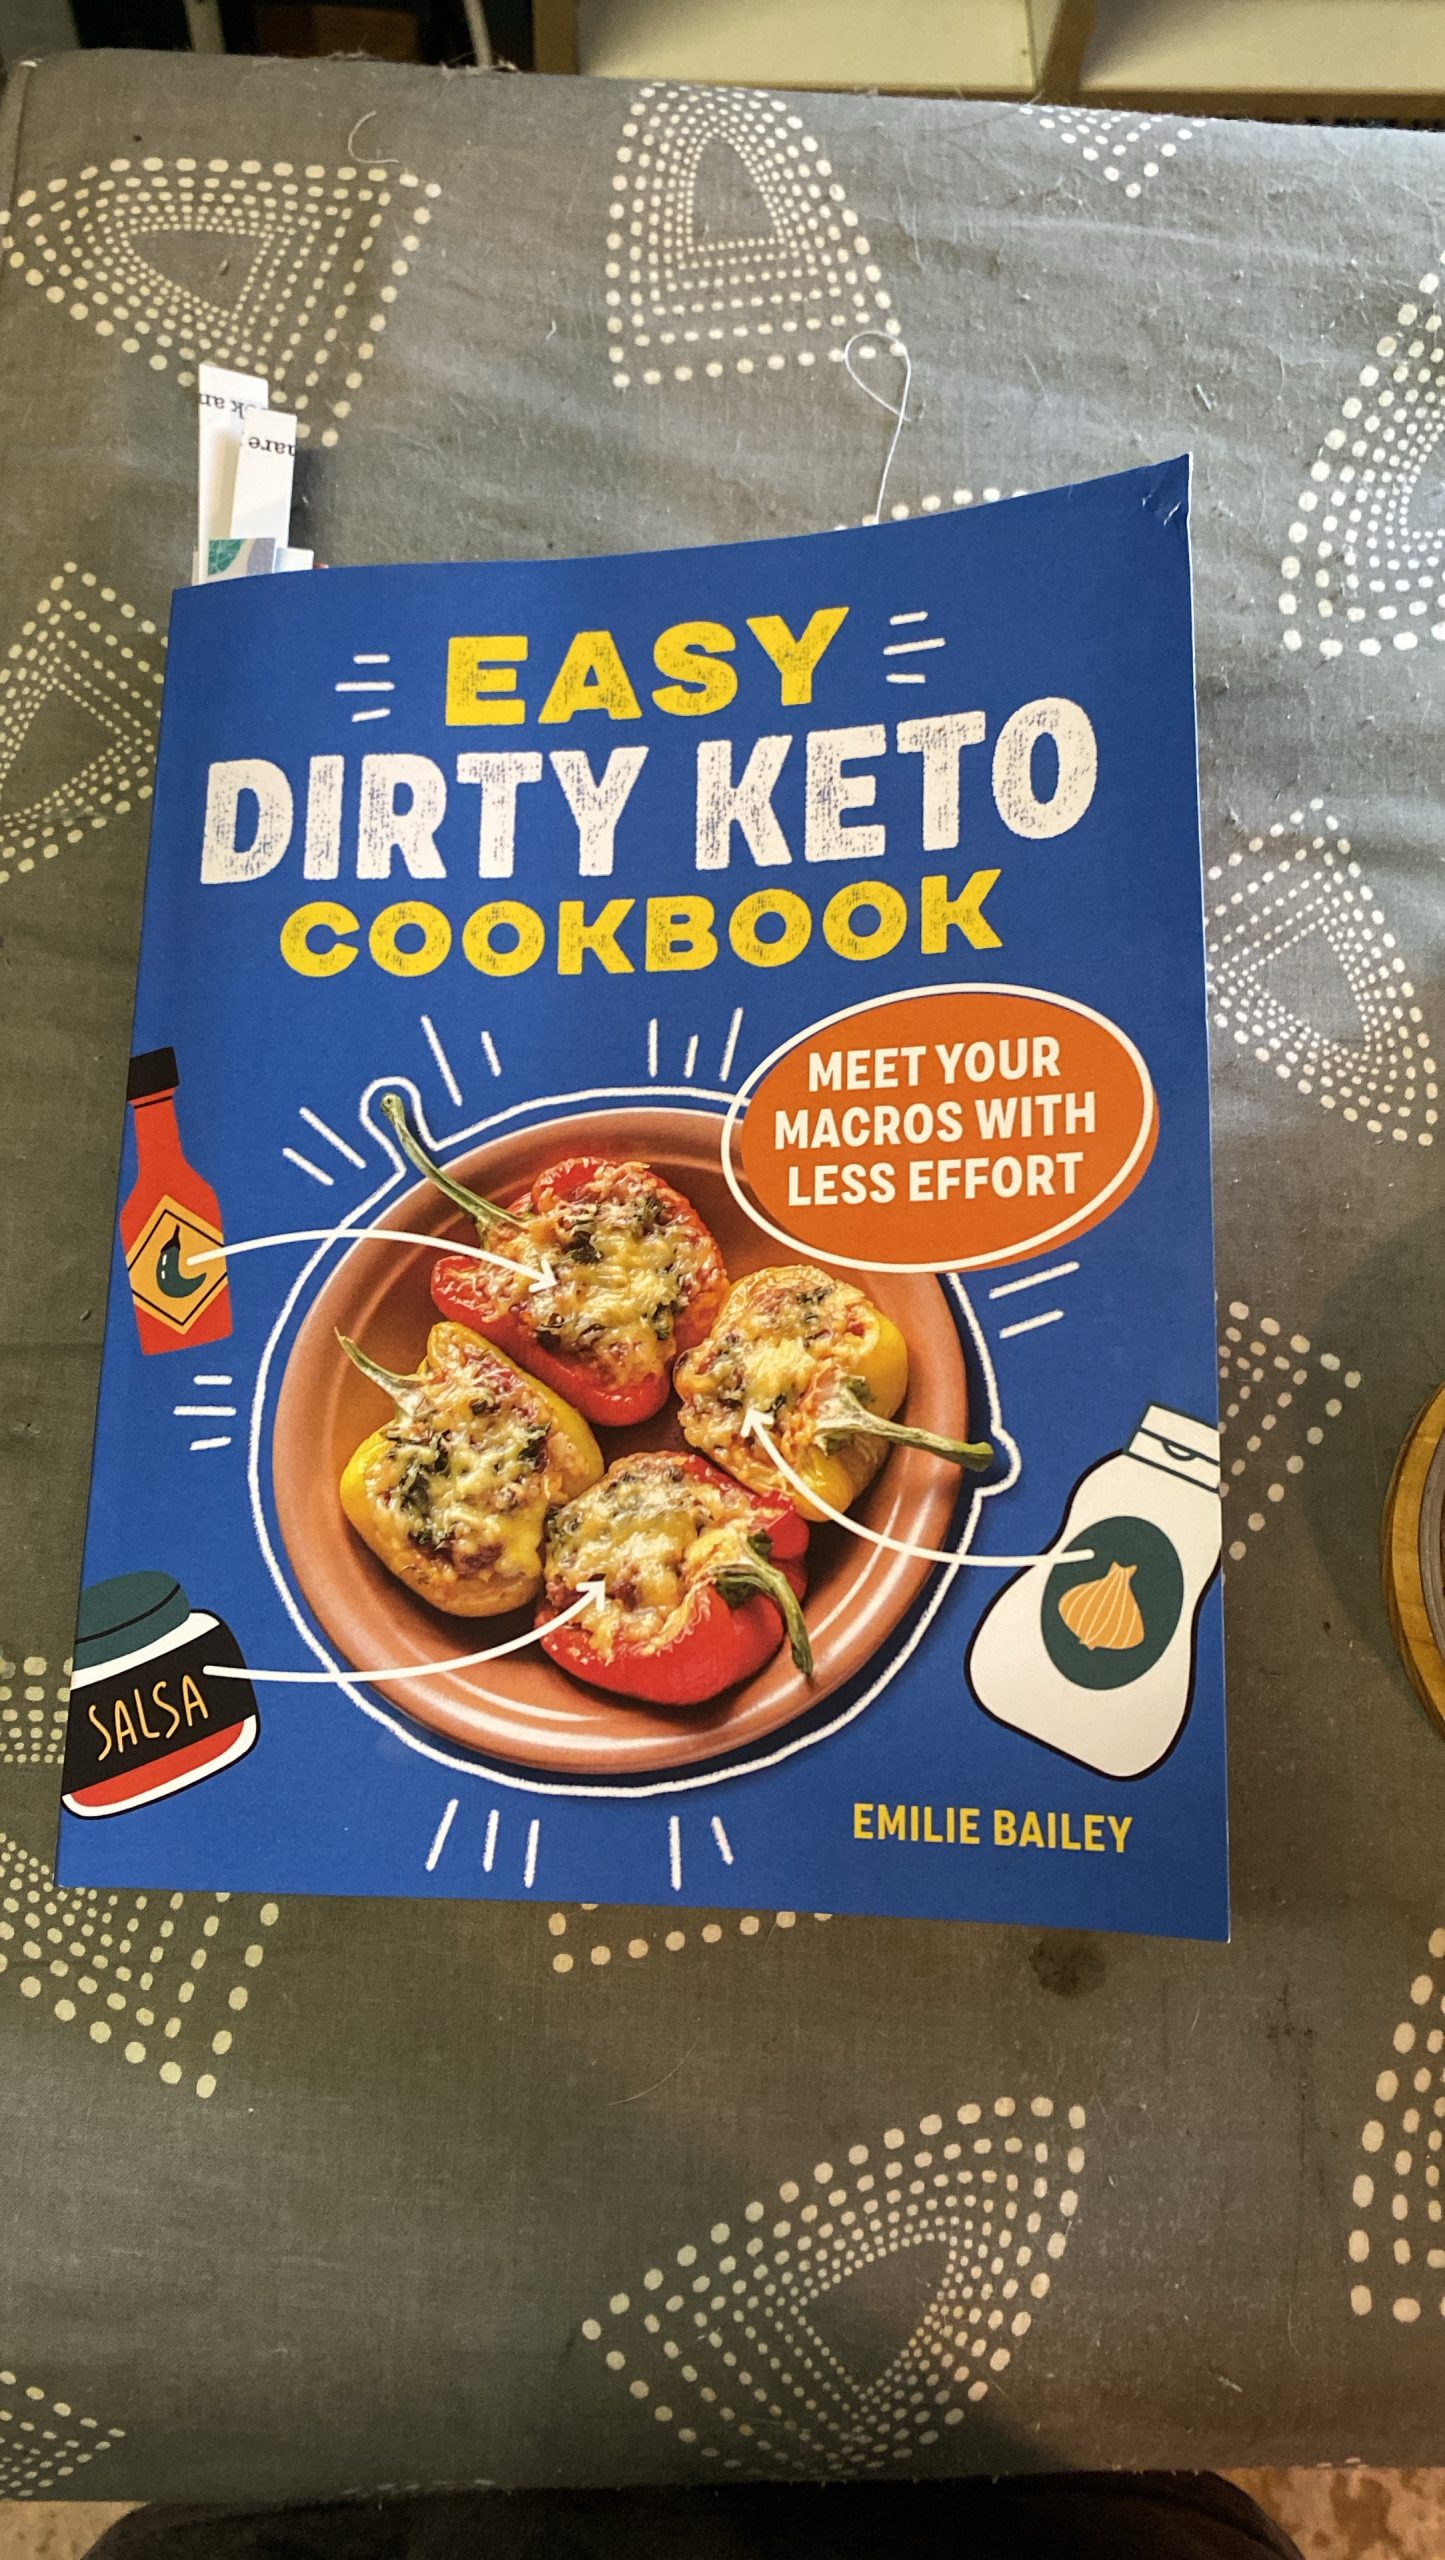
Vegetarian and keto are two words many people believe are incompatible. Emilie Bailey, a/k/a “The Texas Granola Girl,” is here to show you that they can work together.

Follow me on Bloglovin’

Hi, Again, Dear Readers:

Well, we’re a couple of weeks into 2022. Have you forgotten your resolutions already? Not me! I haven’t made any. After the last two years, who’s doing that, anyway?

Mother Nature’s bipolar weather patterns are literally having us all use our heaters at night and air conditioners during the day and then swap in a couple of days. This week we may be looking at snow in our area, and north Houston will not be spared that winter treat. (The prospect of snow does not make BF very happy.)

New Readers

I discovered recently that I have two new readers. Welcome! This humble little blog is nine years old and contains information about food, cooking, foodie trends, some health and wellness, and the occasional contrarian opinion. Also included are anecdotes and sometimes extra information that may or may not be useful, depending on your perspective. New trends (i.e., the Instant Pot and the Air Fryer) are highlighted as well as updates and features from other bloggers who write more than I do. Stick around, you might find something you like. Check out my recipe page, which I need to update soon.

So let’s jump right into 2022!

The Post-Holiday Reset

The rich food of the holidays is over, and it’s time to get back to eating healthier. Hobby Lobby had this, and, well:

Hatch chile bacon ranch dip

I couldn’t resist.

Yes, died and went to heaven. It’s fantastic with corn chips. Until I got halfway through the jar and read the ingredients. First up: sugar. I was heartbroken, but it didn’t stop me. I did buy one more, and that was the end of the dip.

Plus, I gave in to the Cranberry Bliss Bar, despite the large price increase since my first in about 2007:

Starbucks bag with cranberry bliss bar on label

I’ve never forgotten these since my first

BF was not interested in this Starbucks holiday standard, and I can’t even get him interested in trying a little bit. But copycat recipes abound, so I could conceivably make some any time of year, such as the upcoming Valentine’s Day.

But today, it’s time to re-set and get back to eating healthier. I fell off the wagon a few times, but not for the entire six weeks.

Getting A Move On

I’m exercising when I can, and bought this “resolution” back in June:


Sunny Health And Fitness Squat Assist Row-N-Ride™ Trainer for Glutes Workout with Training Video

The Sunny Health And Fitness Row & Ride (picture from Amazon)

Called the Sunny Health & Fitness Row N’ Ride, I use it less than I should. That’s probably why I end up with sore muscles. The first day I used it I was crab-walking for four or five days–my legs really hurt! When I bought mine, it was less than $100. Part of the reason was so that I could exercise without doing any more damage to my foot. I’m also conscious of possible knee problems with walking, as well as gaining good lower-body strength. So I need to make more time for this baby.

The mail lady was not happy about delivering the 25-pound package. (It does require some assembly, which BF cheerfully handled because he’s a guy.) She remembers when BF shipped home boxes of tools and things before he returned from Iraq.

If you consider buying the Row ‘N Ride, know that it has a strict 220-pound weight limit. That’s OK for me, BF, Miss Alice, and Aunt Ruth. But not for one of BF’s car-guy friends, who has himself gone keto and lost a considerable amount of weight. The man is also well over six feet and over that weight limit, so I had to stop him from hopping on my machine. The company makes a Pro model with a weight limit of 300 pounds, which would be more suited for him.

Sunny Health & Fitness has a wide range of home health equipment, from small things like ab wheels and yoga mats to elliptical bicycles, rowing machines, and the Row & Ride. The company also has a YouTube channel that’s free. They frequently post content including workout videos on Instagram and Facebook. Many of their videos don’t require exercise equipment, such as body weight routines and even yoga.

For some folks, the New Year “diet” means going to or back to keto, low carb, paleo, low-fat, or whatever way of eating you prefer. Others may be considering the non-carnivore route. And for that, I’ve got your back.

Going Vegetarian?

I know, I know–the word “vegetarian” has you turned off already. Right now, I can hear you turning your nose up. (Except you, Miss Alice.) Well, today, I’m going to change that.
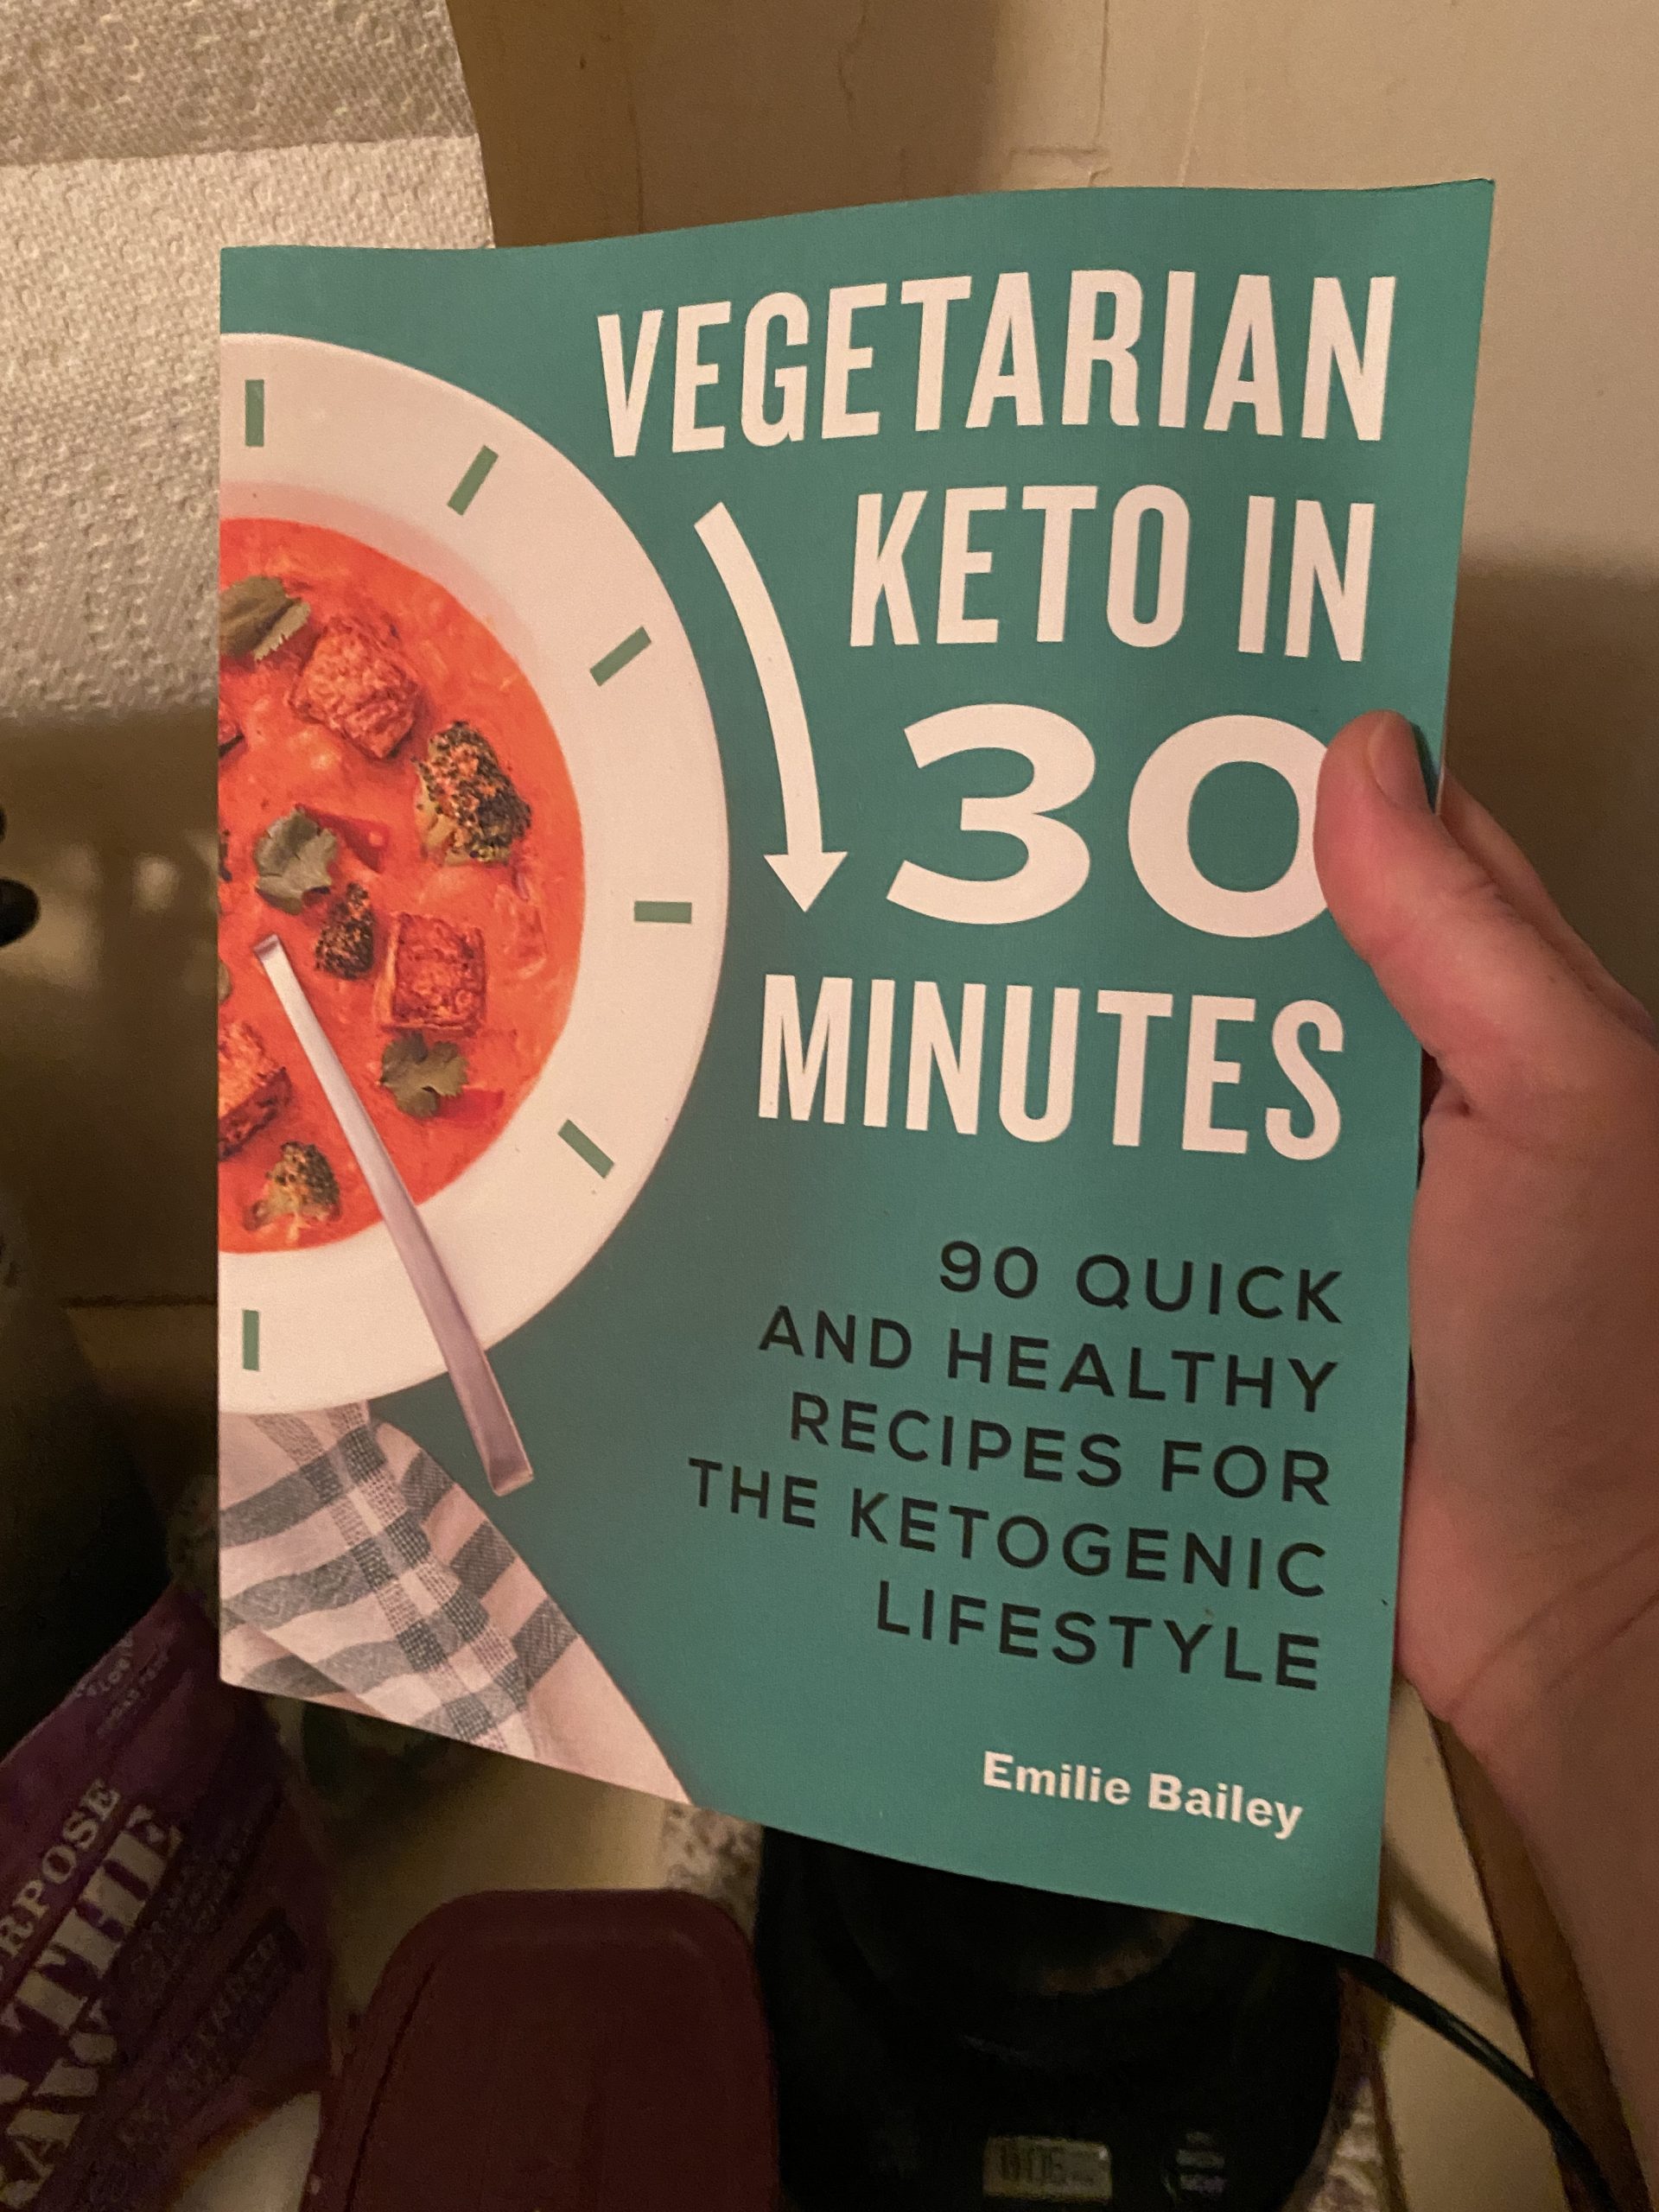
Vegetarian Keto In 30 Minutes

Tasty and fast!

Emilie Bailey’s newest book is all about vegetarian food that’s also keto-friendly. Vegetarian Keto In 30 Minutes has some wonderful recipes that both vegetarians and non-veg people alike can enjoy. Yes, even maybe BF. But we’re not converting, just eating some tasty and different recipes.

In the intro, Emilie explains that the recipes are quick, and don’t require any ingredients that are hard to get, even here, no complicated cooking methods, nor any expensive kitchen stuff. That’s appealing even to non-vegetarians like myself.

Vegetarian Keto

“Yes, but, Amy, isn’t keto all about eating lots of organic meat and dairy?” No, it isn’t, actually. Keto, as I’ve said previously, is pretty much “Low Carb 2.0.” There are macros, but not really calorie counting. The thing is, you can’t over-eat fat without upsetting or hurting your stomach. Real fats make you stop at some point, whereas you can overeat carbs all day long.

If you’ve ever polished off a bag of chips and salsa, you know what I’m talking about. Don’t get me started on chips and salsa in a Mexican restaurant. If you’re in Texas, you know very well what that means.

Emilie’s book takes keto into the vegetarian genre of cooking, because she enjoys vegetables, and had plenty of recipes to focus just on this type. When most people hear the word “vegetarian,” the words that come to mind tend to be things like “bean sprouts,” “wheatgrass” and “soybean ‘meat.'” I’m happy to tell you this is not the case in Emilie’s book. The recipes aren’t difficult, either, and there’s something for nearly everyone here.

The short review: good food to be had here, and you don’t have to be vegetarian to enjoy them. Honest.

Types Of Vegetarians

If you’re not completely familiar with the concept, there are a few “flavors” of the non-meat genre:

  • Vegetarians, who just don’t eat meat
  • Pescatarians, who are vegetarians but also eat fish
  • Lacto-vegetarians, who consume dairy but no eggs
  • Ovo-vegetarians, who consume eggs but no dairy
  • Lacto-ovo vegetarians, who consume both dairy and eggs
  • Flexitarians, who generally don’t eat meat but do once in a while or alternate between veg and carnivore
  • Vegans, who only consume plant-based foods, including plant milk and  products like almond, soy, oat, rice, and others
  • Raw vegans, who eat plant-based food that’s uncooked, or “unprocessed plant foods that have not been heated above 115 degrees Fahrenheit.” (I’ll pass–I still like sweet potato fries, thanks.)

Emilie’s book focuses on lacto-ovo recipes. There are multiple egg-based recipes in the book, one of which I’ll show you.

Why Go Vegetarian?

Everyone has a different reason for going veg. You can ask five people and you’ll get five completely different and diverse answers.

Miss Alice accidentally became vegetarian, no kidding. During Hurricane Harvey in 2017, she and her daughter were running low on things, so she just ate rice and veg and gave her daughter the protein. Discovering she liked being vegetarian, and it worked for her, Miss Alice kept up with it. Because she included fish, that actually made her a pescatarian.

Many people have a specific idea of what the word means. Walk into nearly any American grocery store, and you’ll see offerings like these:

Soyrizo

Chorizo made of soy.

I can’t say I know any Hispanic folk who would welcome that in their tamales. Or any gringos, for that matter. But there is a market, and our local Walmart carries it. I pass it up the same way I did in Texas. But there are people who buy these products, just not me.

I have tried being vegetarian a few times, I really did. Gave up quickly because was always so hungry. Well, I didn’t have a book like this. As with many things, It’s a matter of finding what works best for you and sticking with it.

So let’s try out a few of these recipes and see what’s good.

Versatile Sandwich Round, Page 31

Do you like a good English Muffin? Here you go.

Emilie says that bread is one of the first things people miss when they go to keto. She’s right–no sandwiches, which is a shame unless you have a substitute. Well, thanks to Emilie, you can make anything from an eggy breakfast sandwich to avocado toast anytime. Pretty much anything you want to put between two slices of bread will work on this little sandwich round, even bacon, egg, and cheese.

Recipe for Versatile Sandwich Round

Easy and fast to make

You’ll need a little ramekin dish that’s safe to use in the microwave and just a few ingredients.

Keto vegetarian bread

The setup

Mix up everything in the little bowl:

Egg dropping in bowl

First the egg (I know, my hands look awful)

Almond flour:

Almond flour dropping in bowl

And the rest, then mix well:

Mixing ingredients

Then microwave for 90 seconds on high, or a few seconds longer as needed.

I don’t have a picture of it cooking, but this is what comes out:

Finished keto bread round

See? A little English Muffin!

Flip it out onto a plate, carefully, because it is quite hot:

Keto bread round on plate

That’s the bottom

To make a sandwich, cut it in half lengthwise with a serrated knife:

Cutting keto bread round in half


Halved sandwich round

Ready for sandwich making

You’re probably wondering what I did next. Well, it would have been avocado toast if I’d bothered to toast the round at this point. But I didn’t. I just mashed up a ripe one:

Pouring olive oil into mashed avocado

Just a little olive oil and salt to make a nice paste.

Then spread it liberally onto the halved rounds:

Avocado toast on rounds

Like this! (The seed is saved for planting later because they do sprout.)

I didn’t bother showing this to BF, because I knew what would happen. Well, he came inside just after I finished it. He took one look at this and said, “oh, look, the cat threw up on your plate.” Thanks, Honey, I really appreciate that. Wait until you discover what *you’re* having for dinner. (Hint: it’s whatever YOU make.)

This little eggy thing is about the size of a standard English muffin. It’s useful for any manner of sandwiches you like, veg or non-veg. And if you’re missing bread at dinnertime, this is a great option, too. Cut it in half, or cut it as I did, then cut it again into quarters from the top, so you have four half-moons. Next time I’ll try to toast it too.

A few years ago I thought that Hamilton Beach’s amazing little Breakfast Sandwich Maker was the most wonderful thing ever. It makes breakfast sandwiches in five minutes or so, and you don’t have to leave your house! No drive-through window nonsense, either. Made correctly, you could use the Versatile Bread Round to make yourself a keto–and even non-vegetarian–breakfast quickly.

Emilie also offers a sweet version, but I haven’t tried it yet.

Turmeric & Avocado Egg Salad, Page 87

Ok, I’m going to issue a warning right up front: this dish is delicious, but it has a very strong tart taste. Like I wouldn’t even try it with BF. I’m not saying it’s bad, because it isn’t–this is a flavorful recipe. But the next time I may cut the lime and capers in half because I couldn’t eat it too fast. It opened up my sinuses, too. It’s that strong.

Keto egg salad recipe

It’s a different take on egg salad.

The Setup:

Ingredients for keto egg salad

Except I think I forgot cilantro, which can be hard to find here sometimes.

Although Emilie tells you how to boil eggs, you know what I used:

Dash egg cooker

And why not? Because you can plug it into the generator, too.

Once they were ready, I got started scooping out the avocado:

Pitted avocado half

I could eat this with a pinch of sea salt, and often have.

Mash it up in a bowl:

Mashing avocado

A good, soft avocado is easy, just like mashing a ripe banana.

Now add in the rest:

Adding lime zest to keto egg salad

Lime zest

Then the juice of the lime:

Adding lime juice

Love this squeezer tool, but I will be replacing it soon.

Adding mayonnaise

I made this mayo myself from an original Suzanne Somers recipe in her first cookbook.

Then the capers:

Chopped capers on a board

These are VERY strongly flavored–so it’s a no for BF.

Drop them in with the minced up onion:

Tablespoon of chopped red onion

Drop that right in

Then the turmeric

Pouring turmeric into bowl

For flavor and color

Salt:

Adding salt to bowl

Then Pepper:

Adding pepper to egg salad

That’s everything.

Then take care of the eggs and add them in:

Chopping eggs and adding in

I’ve broken that egg slicer and have had to replace it.

Stir it all up:

Stirring the keto egg salad

Make sure it’s all mixed well.

Tah-dah!

Turmeric and avocado keto egg salad

There it is.

This recipe actually made two servings:

Two servings of keto egg salad

One for today, one for tomorrow, none for BF.

But I haven’t made this pucker-your-lips recipe since! For someone who is totally vegetarian, though, it might be OK.  I’ve read that vegetarians have a higher tolerance for spicier foods, and this definitely fits that bill.

Open-Faced Pizza Omelette, Page 60

Who among us has never had leftover pizza for breakfast? Well, OK, maybe you, Aunt Kathy, but even you can love this one.

Yes, Dear Readers, I actually have had pizza for breakfast. Twelve years ago, in the middle of June, while I was working for Boeing, I got really, really sick with some kind of bug that was going around–fever, chills, coughing, the whole horrible bit. I was told by coworkers and colleagues that it was “something the Shuttle people brought back from Russia,” and I was one of the last people who became ill. Camped out on the futon, I watched a lot of TV under a wool blanket with two big, hairy cats (weight total: 40 pounds) on top. In June, of course. I didn’t want to make anyone else ill.

For about two weeks, I had pizza delivered a couple of times, because I was just too sick to cook for myself. It was also when I discovered Pea & Pesto Soup. I started making the delicious soup after I quickly got sick of delivered pizza and Taco Cabana takeout. I’d been growing basil, so the pesto took a few minutes of prep.

Fast-forward twelve years, and now pizza for breakfast is a) keto, b) vegetarian, c) easy, and d) tasty. And, really, you can have it anytime you want a delicious pizza thing. What kind of crust, you ask? Eggs!

Keto Pizza

So, this dish isn’t too far away from a normal omelet. Somehow I didn’t get a shot of the ingredients, but this is the recipe with the list:

Recipe for keto pizza omelet

Pretty standard stuff

And because I made my own pizza sauce:

Frozen homemade pizza sauce

Easy to make and tastes fantastic.

It really did taste like a well-made pizza. I’ve used this sauce on Caulipower pizza crusts, and it works great.

First, make the base by melting the butter over medium low heat.

Butter in small pan

Doesn’t take but a minute

In case you’re wondering why there’s salt in there, I’ll explain. Emilie’s recipes call for salted butter, which I never have in the fridge. So I toss in a touch of kosher salt to hopefully make up for it.

And, this little cast-iron pan is just the right size. Bought two of these as well as two small covered cast-iron cocottes at Bed Bath and Beyond a couple of years ago, thinking I could make a quick dinner with them in the countertop oven. Well, I’ve used them, just not as much as I thought.

Meantime, mix up the two eggs, a tablespoon of Parmesan cheese, a quarter-teaspoon of Italian seasoning, pepper, and salt.

Mixing eggs

For this purpose, the mixing cup works better.

Pour this egg mixture into the little pan:

Pouring egg mixture into pan

Now do you see why the mixing cup works for this?

Let it cook (no stirring) for a couple of minutes:

Eggs cooking on stove

That small pan is just right!

Cover it and let it cook another 3 or 4 minutes:

Pan covered on stove cooking eggs

Lucky me, I have this old Cranberry Corning lid that sort of fits.

Once it’s cooked, take the cover off and add the pizza (or marinara) sauce, other toppings, and of course, the cheese:

Adding cheese to pizza

Right on top–a quarter cup of mozzarella cheese, and the second tablespoon of Parm.

Cook on the stove for another minute. Next, turn on the broiler, which in this case is in the countertop oven, and put the pan on the bottom rack:

Adding pan into oven

Almost ready!

Shut the door for a minute or two:

Pizza is cooked

Breakfast is ready!

Your Pizza Omelet is ready. And what’s better for a delicious lunch or even dinner than a dessert from Emilie’s first book, some Blackberry Cobbler?

Pizza Omelet with Blackberry Cobbler

It doesn’t get any better–or keto–than this!

BF would not touch it, despite his enjoyment of bacon or sausage and eggs for breakfast and pizza when he wants to eat his way. Well, I enjoyed it, anyway. And for the record, he does like the keto blackberry cobbler, too.

Dark Chocolate-Macadamia Clusters, page 126

What would any cookbook be without dessert? Again, Emilie doesn’t disappoint with a chapter called Sweets & Treats, including 11 dessert recipes. One even has grilled peaches!

For me, though, I wanted chocolate.

Picture of chocolate macadamia clusters recipe

Not too many ingredients, either

True to her word, Emilie’s ingredient list isn’t difficult to acquire.

Ingredients for chocolate macadamia clusters

The Setup

For most recipes, I am generally limited by what I can find at Walmart and Winn-Dixie. I only get to Rouses occasionally, so when I want to get something I can’t find locally, I buy extra and stash it in the pantry or freezer. Fortunately, I could get everything at Walmart.

Lucky for us, sugar-free chocolate chips are available here, and I’ve been buying them ever since. Walmart carries other varieties, like this newcomer to the candy game.

LIly's sugar free chocolate chips

More sugar-free chocolate.

Unfortunately, I tried some of these and didn’t care for them. Well, they were clearance-marked pumpkin spice, but I wasn’t impressed. So I’ve passed on these for the Hershey’s, and because the Hershey’s bag is bigger.

Melt 1.5 cups in the microwave:

Melting chocolate chips with coconut oil

Just like that, but keep an eye on it.

Stop it and stir every 20 seconds. It should take 1 minute, 20 seconds to complete, but stir it until it’s completely melted and mixed with the oil. Then add in the half-teaspoon of vanilla.

Stir in vanilla

All nice and smooth.

Add in 1.5 cups of roasted and salted macadamia nuts:

1.5 cups macadamia nuts

I was very surprised to find these locally.

Drop them right in and mix:

Mixing macadamia nuts into melted chocolate

Maybe I should have chopped them a little first

Once they’re all coated in chocolate, start dropping them onto a baking sheet lined with parchment paper.

Dropping chocolate onto parchment paper

Almost there

Until you’ve finished:

Sheet of chocolate macadamia clusters

YUM!!

At this point, you’re supposed to sprinkle a touch of flaked sea salt on top of each one. Of course, I forgot. And I have a nearly-full box of Maldon’s Sea Salt, too.

Now stash them in the fridge for 15 to 20 minutes, and they’re ready to eat:

Chocolate Macadamia Clusters

Dessert!

The other mistake is not realizing that these macadamia nuts were raw. I should have put them into the little oven for a few minutes and then maybe salted them. I don’t normally keep macadamia nuts around, and because I didn’t care for these, I’m inclined to avoid them. On the other hand, I might check Winn-Dixie or Rouse’s to see if they have them roasted, then try this recipe again. Because, chocolate.

Store these in the fridge in an airtight container, nibble at will. Just not all at once.

Frozen Hot Chocolate, Page 129

This was actually the first recipe I tried in the book. There’s a reason for that. Besides, it was hot out, and it was just after Hurricane Ida, in the days after we had power restored.

A few weeks prior at Rouses, I saw a can of coconut milk. I bought it, because I keep seeing it in recipes but can’t remember which one. Well, darn it, that can came home with us, and I soon found a use for it.

Recipe for Frozen Hot Chocolate

Don’t be intimidated by the ingredient list.

I keep almond milk around for several reasons, including running out of milk for coffee. Intrigued by the name, I grabbed my little blender.

Hamilton Beach smoothie blender

I like having one around for small jobs, smoothie or not.

I won’t question Emilie’s naming convention, but technically it’s not “hot chocolate.” It is, however, a pretty tasty concoction. More like a dairy-free chocolate shake. Who wouldn’t like that?

I’ll admit the ingredients are not what you’d think of in a standard chocolate shake:

Ingredients for Frozen Hot Chocolate

The Setup

Note: after I took this picture, swapped out the Mexican vanilla for a different one that was actually sugar-free.

Adams Vanilla Extract

This kind, I’ve bought since I lived in Houston.

You’re probably thinking, “Amy, why is there an avocado there?” Sometimes there are ingredients in my blog pictures that are for another recipe, or just happen to be caught on camera. But this time, it is part of the recipe. Now you’re thinking, “enough with the avocado!” They’re not in *every* recipe, I promise.

I also made it when BF wasn’t around, and he only saw the finished product.

So you add the ingredients into the little blender:

blending ingredients in small blender

Including THAT:

Scooped avocado

Yes, the magic ingredient is a tablespoon of avocado

Blend it well:

Blending mixture

Pulsing rather than holding the button works best

I know you see the little green bits at the top. Just scrape down the sides with a spatula and keep blending. Then add your ice cubes:

Adding ice cubes to the blender

Makes it nice and cold, perfect on a hot day

Blitz again, and it’s ready:

Frozen hot chocolate in glass

Delicious!

It does taste a bit different, and the coconut milk is subtle but present.

I did ask BF to try it in a sweet tone of voice.  I cornered him on the sofa, where he was looking at yet another Big Foot video on YouTube, and asked him to PLLEEEEZZZE try a little sip. Reluctantly (and with a funny look on his face), he took the tiniest of sips. “It’s missing something,” he declared. And he felt like it wasn’t sweet enough.

I’ll agree, I felt like it needed to be a bit sweeter, but that’s OK, too:

Stevia in a bottle

The secret weapon!

It wasn’t until the next day that I informed him it contained a tablespoon of avocado. You actually can’t taste the avocado, even if you know it’s there. Mostly, I think, it’s for adding viscosity and healthy fat. Then he made a face and pretended to get upset at me. But that’s all in the fun of helping him try new things.

Occasionally, he likes something that he thinks he won’t (especially if I don’t tell him what’s in it.) For a recipe that works, I write in the cookbook, Winner! Make Again! That’s legally gathered evidence of his approval for future repeats, just in case.

There Is Tofu

Yes, there are several recipes for both tofu and turnips here, but not many. I’m allergic to raw soy, so I’m quick to avoid it. I’m sure they’re delicious in their own way–and I could make them with substitute ingredients, like meat. In fact, I might actually do that one day.

For instance: page 120’s Tofu-Stuffed Peppers With Feta could be converted by swapping out the 14-ounce package of extra firm tofu with, say, a pound of ground chicken or turkey. The two peppers are cut in half and laid on the side, used to hold the filling. Mix and bake as you would for the tofu, 25 minutes.

On page 84 is a Mushroom-Tofu Lettuce Wrap with Peanut Sauce, which might also be good with ground turkey or chicken in place of the tofu. The peanut sauce with soy/tamari, rice wine vinegar, sriracha, fresh ginger, and peanut butter sounds interesting. Wrapped in lettuce with some grilled chicken strips might be a nice summer lunch, too.

Think about it: in the same way one would use tofu in place of meat in a dish, the opposite is also true. So there’s no saying I won’t try a tofu-based recipe by swapping out the tofu. I just won’t make them when BF is home.

About Organic

Also found when buying ingredients for the Chocolate Macadamia Clusters were two items not normally found in Walmart:

Organic peanut butter and almond butter

Can you believe it?

The peanut butter is organic, but the almond butter isn’t. And the almond butter has no salt or sugar, which is unusual for anything you find at Walmart.

When you think “organic,” chances are the first thing you think of is “Whole Foods.” You’d be right–both Whole Foods and Trader Joe’s have a variety of organic foods, as does HEB and its upscale Central Market. In fact, on our last trip to TJ’s in December, we found some organic hot chocolate (in packets) for BF to enjoy. Whole Foods also has some organic hot chocolate in a can, with 22 grams of sugar in every serving. So understand that “organic” doesn’t always equate to healthy.

What It Means

Calling a product “organic” is more than just a name. The USDA has specific guidelines for the production of organic food, so it’s not just a term like “natural” or “healthy.” There is also a certification process that food producers must follow in order to have the seal on their labels.

I prefer to buy organic whenever I can, but I don’t do it all the time. For one thing, organic is more expensive because of the more intensive farming and processing practices involved, including the certification. Another is that not everything organic is necessarily better. Strawberries, yes, but bananas, not so much since you peel them to eat them (unless they’re marked down to sell fast–then you buy them and make banana bread!)

The FDA has a series of blogs called Organic 101:

Of course, no matter what, reading labels is essential for eating as healthy as you can.

Good Food No Matter Your Persuasion

Despite the “hippie” or “millennial” image that many people have of vegetarians, people from many walks of live became vegetarians for whatever reason. Miss Alice’s reason was practical and not as much of a choice as a decision, if that makes any sense. (As of late, she’s fallen back on the carnivore wagon, but she’s healing from injuries, too.)  Others make a conscious choice to avoid animal products, or just find avoiding meat less expensive. Again, everyone has a unique reason for going vegetarian.

For those of us who stay on the carnivore bandwagon, Emilie’s vegetarian keto book offers a range of recipes we might not think of otherwise. I see it as a supplement to her last two great keto books. It’s also an expansion of delicious keto recipes that I can enjoy and have in my pocket if someone drops by and says, “oh, I’m a vegetarian.” Mind you, the likelihood of that happening here in the middle of rural Louisiana is a bit low, but I like to be somewhat prepared for the remote possibility.

Another good reason to have this book: you’re out of meat, or you’re tired of the same old thing. Isn’t that reason enough?

Many thanks to Emilie and her publisher for sending me a copy and letting me preview the book, too.

Until Next Time

If you’re going keto, thinking about going vegetarian, or just want some new and different tasty dishes, Vegetarian Keto In 30 Minutes has 90 recipes that will keep you in tasty, healthy food that’s fast and easy to prepare all year long.

In the next blog, I have a non-keto, non-vegetarian recipe that involves one of Emilie’s occasional sponsors. However delicious, mine will not be a sponsored post.

Happy Dining!


Floor fan in Rouses
Follow-Up From Hurricane Ida

Hurricane Ida is over, but the work is ongoing.

Follow me on Bloglovin’

Hi, again, Dear Readers:

I realized it’s been a month since my last post, and thought I should give an update. Hurricane Ida is a 2021 memory, but she left a trail of destruction from Grand Isle all the way up through the New York State area. Places like La Place, which are closer to the coast, had considerable damage and are still trying to recover. La Place is still without power, last I heard.

Let’s procrastinate a little with an afternoon cuppa and I’ll fill you in on everything. BTW, BF knows this to be true:

ImageOfGremlinsNoCoffee

Stolen from a Facebook group called COFFEE!! COFFEE!! COFFEE!!

That’s why he taught me how to use the camping stove.

The Return Of Electricity

Funny how you don’t think about it until you don’t have it. That’s true of most things, right?

Our power went down at 8:30 pm Sunday, August 29th, and returned on Tuesday, September 14th about 2:30 pm. And we were the lucky ones.

BF had an older generator already, and we were gifted a new one–no kidding. It’s a long story, but it’s a smaller model that uses less fuel than the bigger one, which now needs a new carburetor. BF plans to fix that in the near future, preferably before the next winter storm.

Others didn’t get their power back until after we did, depending on where they are located. St. Tammany Parish doesn’t have Entergy, but their power company is smaller, so they were back a week later. But nearby Albany, where two of our Buddhist friends live, have something else called DEMCO, and I don’t know if they have power back yet or not. I’m guessing they do, but I forgot to ask.

Ida left flooding nearly everywhere, although we didn’t have that problem. We ventured out to Hammond once or twice and visited the Rouses, which we knew was open.

Floor fan in Rouses

This was in the frozen food area.

Either the frozen food thawed without power and the floor was wet, or the store took on water–we didn’t ask, and we were happy Rouse’s was OPEN. Then we saw more keto foods:

I haven’t tried that yet, nor this:

Plantain pasta. What will they think of next?

Getting Generator Fuel

We were fortunate that we had the money to keep that generator filled–and even more fortunate for the new and more efficient generator. BF had a tangle of electrical cords everywhere, and I was afraid to touch it. However, he had nearly everything running except the HVAC, which is a central unit. What we did have running was: 

  • Kitchen refrigerator
  • Big chest freezer
  • TV (as needed)
  • Fans of all types
  • Portable air conditioner unit
  • Internet router and my work laptop (on a surge protector, of course)
  • Lamps
  • Other small things as needed–microwave, toaster oven, etc.


But being out of power for two weeks was. . .expensive. BF had some help with that at work, for which we are also thankful, and other than the cold showers, it was almost normal.  He was also working overtime, which helped. In addition to the extra money, I reminded him that his customers needed him and were counting on him. They were very glad to see him after the storm.

We drove once more north to Mississippi to get more fuel and took neighbor TT with us for a supply run. He doesn’t have a generator, but he does have a stove that runs on natural gas, so he can cook food and boil water for coffee. We only went to McComb this time, and there were no lines. But that Walmart had a lot of empty shelves around. The employees said that they were meeting plenty of people from “south of the border” like us.

Trees And Other Damage

Ida downed trees that are still everywhere, and people who want it are getting free firewood. But there are also contracted arborists coming through cutting and trimming as well. Translation: these are guys in bucket trucks, just like the utility folks, but they have chainsaws and things.

I forgot that I’d let the pit bull out when I approached the crew asking about their work. He came tearing out into the street and ran up to one guy who just looked down and stared at him. The man had no fear. I’m guessing he’s a “dog whisperer” like BF is. Of course, after sniffing the man, the pit bull was upset that he just walked off without playing with him.

They were very nice despite the pit bull puppy and cut down one large hanging branch for us. It broke off and fell only a few feet before catching on another branch. It was quickly cut and fell to the ground and won’t be touching power lines anymore. That guy was swinging the chainsaw like a sword!

House Damage

We know multiple people who have had various degrees of damage to their property, from a few shingles to full-blown destruction. BF is a big fan of the metal roof on the house.

“Car Guy” friend JJ also had a tree fall on her garage, but her place is otherwise livable if I understand her social media posts.

BF has started to cut some of the wood that Ida knocked over in front of the property but hasn’t finished. There’s one uprooted tree across the street that we need to borrow a tractor to drag over so he can cut it, eventually. He wants to put a wood stove in the living room in anticipation of winter. As so soon as he can get to cutting all that wood and making a place for it behind the house, we’ll have firewood.

How We Stayed Cool

BF’s Dad’s house, until last year, had one window air conditioner unit downstairs until his sister and brother-in-law added a second on the first floor. No AC in the upstairs bedrooms, but they had one of these window fans:

Holmes Dual 8" Blade Twin Window Fan with LED One Touch Thermostat Control

Electric window fan from Holmes. You can use one fan for intake and one for exhaust.

I remembered it a few days after the storm. We went over and borrowed it and put it in the bedroom–ahhhhh. It’s not “air conditioner cool,” but we could sleep a little. We also hit Target and got the last one available. One sat in the living room window with a box fan for the dogs. The other sat in the bedroom window. Both ran as long as the generator did. Ours will also be deployed occasionally as an exhaust fan for the kitchen.

I’d never seen one of these before until I saw it at their Dad’s place upstairs when we were taking care of the cat. Highly recommended to keep around for such emergencies, and kitchens without exhausts.

We were also loaned a Hisense 6500 BTU standing portable air conditioner and dehumidifier, but BF didn’t want to put it in the bedroom. So it stayed by my desk and cooled me and the dogs during the day. (This is the closest I can find to it on Amazon.) I returned it to the owner a week later. We do plan to purchase a window unit AC sometime between now and next spring.

An Organized Home (I Wish)

If you’ve never heard of Marie Kondo, she’s a Japanese “organizing consultant,” according to Wikipedia. She has a strong following worldwide. Kondo’s “thing” is to embrace minimalism, or getting rid of most of your things. One of her catchphrases is something about “only keep things that spark joy.” Her website also sells pricey things designed to “spark joy,” like this linen robe for $195 or this $45 bamboo silk sleep mask.

Obviously, this lady hasn’t been around the US much. A generator doesn’t “spark joy” for me, but the power it makes certainly does. Generator’s a keeper, thanks. That other rubbish, not so much.

I’m still trying to catch up on the house stuff. I haven’t been able to get back to the usual dance with the mop on Saturday. No sewing in over a month, either–not so much as a repair. We didn’t open the box of “rations,” and will likely store that for another day. They are made to last forever.

Getting Back To Normal After Ida

Or, well, whatever passes for normal, right? The mail re-started about 10 days or so after they’d stopped delivering. Very glad I signed up for the Post Office’s Informed Delivery service, where you can see greyscale images of your stuff in an email before it arrives, as well as track packages. I paid the water bill long before I got the physical card in the mail by going into my online bank account and requesting a “courtesy check.” Many banks offer that service now–they print the check and mail it for you, and you can forget about it.

I mentioned in the last post that I needed to review the new vegetarian keto cookbook by Emilie Bailey. Well, there’s a story to tell on that.

Because I agreed to be a reviewer, I received a digital copy first, and then the publisher sent a paperback copy. Well. . .that was the Friday before Ida landed. I looked over the digital copy before my last post, which is how I can tell you about it. I was also asked to provide an editorial review for Amazon–no kidding.

Screenshot of Amazon editorial review

That’s me!!

Emilie asked, and I was happy to do that for her.

Where’s The Book?

For a week, I kept seeing a note from UPS about trying to deliver a package to me, and it was from some company with the name “transportation” in the name, from Memphis. The original delivery date was the Tuesday after the storm hit–when trucks of all kinds were having difficulty getting supplies into these areas. What the heck is it?

I asked BF if he ordered any car parts to be shipped here. He does that sometimes, and I have UPS My Choice set up to tell me when to expect something to our address. His response: “No, those packages are your thing.” That’s no help.

I emailed the lady at Callisto, and she said she did send it UPS. Mystery solved, I know what it is. Finally, a week after it the originally scheduled delivery, UPS finally made it here and dropped it off.

I’ve made three recipes so far and have *not* been disappointed. I want to make more of them and try them out on BF. We’re not going vegetarian, but if it’s tasty, there’s nothing wrong with having it with meat or something. The first thing I made was the dairy-free “Frozen Hot Chocolate” recipe from the book and cornered BF to try a sip. Well, I like it, and I’ll tell you more about it in the blog for review.

Keto Ingredients

We did find some new keto-friendly ingredients in Rouses:

Riced Cauliflower in Rouse's

Found this, on the shelf, not frozen.

And this product, which I’ve only seen in Emilie’s books:

Hearts of Palm pasta

Can’t wait to try it–keto and vegetarian

Make no mistake–BF will not be trying this, ever. It’s one of those things I make for myself when he’s working late. If he’s home, I’ll make the regular spaghetti that he’s used to having.

Hoping everyone is well and getting back to life after Hurricane Ida came here and Hurricane Nicholas visited Galveston, Houston, and the GER’s home in Texas.

Happy Dining!

Ultimate Simple Keto Cookbook
Review: The Ultimate Simple Keto Cookbook

As I mentioned in my last post, Emilie Bailey, aka, The Texas Granola Girl, has a new cookbook. This time, it’s all about the simple keto.

Follow me on Bloglovin’

Hello, again, Dear Readers:

Ready for more keto recipes? Emilie Bailey has you covered with her newest. I know, I only reviewed her first cookbook just two months ago, but. . .I get around to it. Now, she’s got another cookbook with delicious food for you to enjoy.

We’ve had rain almost daily since April, and everything is growing like wildfire. I’m back to paint-bucket gardening this year, and BF finally mowed over the overgrown parsley from last year’s garden spot. I’ve started more parsley in a bucket, so we should have more soon. Basil is doing well, and I hope to get a few peppers. We’ll see.

Let’s get started.

Watermelon Update

So after I published the last blog, the car-guy growing watermelons stopped by later in the evening. No, he was not notified of the roasted watermelon. Here’s a pic of the original three he gave us:

Three watermelons on the stove

Aren’t they gorgeous?

I first showed him the two books by Emilie Bailey because he, too, eats “keto, mostly.” Then, I asked him why the stickers on the watermelons. It took him 15 minutes to explain, but it’s because:

  • The soil in both upper Tangipahoa and Washington Parishes is ideal for growing these melons
  • The melons grown in this area are highly prized for that reason
  • Older and native local residents are aware of the reputation of “Washington Parish watermelons” and will seek them out
  • Melons grown in Texas and Lucedale, MS, are frequently what you get in our local grocery stores, rather than locally grown
  • Some melons are shipped in from as far away as Florida
  • Those out-of-state melons are usually grown on land that is used continuously for melons, requiring the addition of heavy chemicals to continue growing them in the same fields repeatedly
  • These chemicals are in addition to the pesticides used in the out-of-state crops
  • Even local produce vendors (“fruit stands,” as they’re called here) sell out-of-state melons and pass them off as “locally grown”

He went into great detail about why his melons are better, but I guess that’s to be expected. From his description, I don’t believe his have heavy chemicals in them. (I hope not,  anyway.) Admittedly, they are tasty, and I’d highly recommend one if you find them. But if you’re in Texas, of course, you’d need to find one grown in the Rio Grande Valley, or maybe at Froberg Farms in Alvin. 

The Pantry

Our little pantry needs a re-org,  and it’s not the first time I’ve tidied it up. But a lack of additional shelving and no interest from BF means that I’m totally on my own here.

When I moved in, there was almost nothing in it. After emptying out all the boxes from my kitchen in Houston (thank you, Miss Alice and Neighbor E), the pantry was overflowing. And the beginning of the pandemic last year also saw BF doing some panic-buying, which is in boxes under the counter as well.

I was looking for an ingredient last week and had to pull out several things to get to whatever it was I needed. I removed this from the pantry, which wasn’t mine:

Cornstarch can

Is this any good?

I always buy the stuff in the yellow box, and we have one that I purchased long after the move. So using my amateur detective skills, I decided to investigate further:

Bottom of cornstarch can with 2009 date

Wait–what?

Yup, that’s the bottom of the can. BF says he has no idea where it came from, but I’m pretty sure I know. From his last marriage, that’s where. (The divorce was final in 2008.) I’ve found (and disposed of) his junk mail that was even older. Hopefully, we’ve gotten rid of all that stuff he tossed in a box and took with him. Obviously, this can went out in the trash.

So at some point, one of these days, I need to take everything out, check for the expired and bad stuff, and toss it. If I can talk him into it, some wonderful shelving will make its way into the pantry, and hopefully a coat or two of some nice paint. White is fine, but wouldn’t white shelves with a nice cheery color be even better? Because it’ll be harder to “lose” anything in the back like that.

This isn’t the first time I’ve come across older foodstuffs. I try not to have anything too old in the pantry, but it happens occasionally. The GER’s pantry also got a good cleaning when I moved into his house (almost 20 years ago now), and I tossed out a bag full of very outdated stuff that had just sat unused for many years.

The New Book: The Ultimate Simple Keto Cookbook

Author Emilie Bailey, aka, The Texas Granola Girl, spent part of her pandemic energies on writing two new cookbooks. The first of these books is being released tomorrow and is her second book of delicious recipes.

When I got the email from her list, I immediately signed up to review it. After all, it’s a free book! Well, it’s a good one, too, and I knew it would be. Emilie has been posting regularly on Instagram and sending out emails with new and delicious recipes.

Ultimate Simple Keto Cookbook

The latest!

Yes, there are three recipes with turnips. If you like them, the Classic Fauxtato Salad on page 61 is right up your alley. It’s made with everything you’d use for a regular potato salad, but with turnips. Let me know how it goes.

There are nine chapters, including an intro to keto, desserts (of course), and a chapter on keto staples, such as Easy Alfredo Sauce, Creamy Feta Dressing, Ranch Dressing, Quick Marinara Sauce, and Three-Minute Mayo, using avocado oil. There’s even a Basic Sandwich Bread on page 188.

We tried four recipes when I got this book, and they’re all two thumbs up. So let me tell you about the simple keto recipes I made.

One-Pan Chicken Parmesean, Page 122

We had one chicken breast in the freezer and only needed some mozzarella cheese. I gave BF his instructions and shopping list for this and the next recipe, made for dinner one night. Unfortunately, I didn’t take a full set of pictures, and none for the broccoli recipe. But I got a few.

First, preheat your oven to 400F. Slice two chicken breasts in half horizontally to make four cutlets, then pound them to a quarter-inch thick.

Mix up some parm cheese, Italian seasoning garlic, and a half-teaspoon of freshly ground pepper. Brush both sides of the chicken with some keto-friendly mayo, which you can make on page 178 or buy (read the labels of course.) Then drop the chicken in the seasoning mixture to coat, and fry in a large oven-safe skillet:

Chicken frying in pan

Just like this

Cook about five minutes on each side and remove from the heat (I turned it off.) Pour some sugar-free marinara sauce over the chicken. I used Classico Tomato & Basil, but she has a recipe on page 183.

Pouring sauce over chicken

1.5 cups of it

Spread it around:

Spreading marinara sauce over the chicken

All over the chicken

Now sprinkle one an one-half cups of shredded mozzarella (or provolone) cheese over the top:

Mozzarella cheese over top of chicken

Yum!

Into the oven for 10 to 15 minutes, until the cheese is melted and the chicken is completely cooked.

While that was going on, I did the broccoli at the same time.

Sheet Pan Broccoli, Page 80

The second part of this simple keto dinner has no pictures, but it was a perfect accompaniment to the chicken.

I used the countertop oven, which is preheated to 450 degrees. Chop the broccoli into florets, wash, and set aside. Line a baking sheet with parchment paper.

In a bowl, mix:

  • 1.5 tablespoons avocado oil (I used olive because I had it)
  • 2 cloves garlic, finely chopped
  • 2.5 teaspoons sesame oil
  • 1 tablespoon soy sauce or tamari (tamari is wheat-free, and so is La Choy soy sauce)
  • 2 teaspoons sriracha
  • 1.5 teaspoons granulated 1:1 sweetener (I’ll explain next section)

Mix this up, and then add the drained broccoli. Toss it around well, then drop it on the baking sheet. Roast for 15 to 18 minutes, until the broccoli is tender. Toss halfway through the cooking time. Serve hot.

This recipe calls for 2 heads of broccoli, but I halved the recipe for me and BF, as I did with the chicken. Oddly, though, it’s a good thing I forgot to halve the seasoning and other ingredients for the chicken because it needed all of it.

Simple keto Dinner on red plate with chicien and broccoli

This was a fantastic and simple keto dinner

I did forget to sprinkle sesame seeds over the broccoli. Next time. Amazingly, he loved both and declared them “winners.” One more in our dinner rotation.

Classic Fudgy Brownies, Page 173

This was actually the first recipe I made. Does anyone want dessert? Once again, I had everything I needed to make these brownies, except butter. BF was instructed to get some on the way home from work because this recipe takes 1.5 sticks of butter. Oh, YEAH.

Now, one difference is that Emilie calls for 1:1 sweetener here and in the broccoli seasoning. What this means is that it’s a blend of sweeteners, frequently erythritol and monk fruit, to taste just like sugar. I wanted to try this one and had good success with it here: 

Sugar in the raw blended sweetener

One of many natural sweeteners available now

This is the ingredient list: 

Back of the package

See, at the top, it says 1:1, because it measures like sugar.

This is what’s in it:

Ingredients list

And if you’re diabetic–there you go!

Making Brownies

These come together in a snap and bake up nicely.

Ingredients for Classic Brownies

The Setup

With eight ingredients, you can have delicious keto brownies. I know, I know–you can buy a boxed mix too. Read the ingredients on that box, that’s all I’m saying.

So you’ll preheat the oven to 350F, and line the bottom of an 8×8 pan with a bit of parchment paper.

Parchment square in pan

You have to weight it, otherwise, the parchment goes sailing to the floor.

Chop up the butter and chocolate:

Chocolate and butter chopped in bowl

And melt together in the microwave, slowly and carefully, in 30-second intervals. Watch it so it doesn’t boil over or make a mess. What comes out is this:

Butter and melted chocolate

Stir them together:

Melted chocolate and butter stirred together

Ta-dah!

And set aside to cool for a bit.

Get Mixing–Wet Ingredients

So now you blend together the sweetener and chocolate mixture together, then the eggs, which must be room temp or it’ll make a big mess at this stage:

Mixing Chocolate And Sweetener

Like so

Now the eggs, one at a time.

Blending eggs and chocolate

Now add vanilla. If you’re lucky, you have some of this:

Pouring vanilla into brownie mix

Right in there, a teaspoon

Blend it well:

Blending vanilla into the mixture with a hand mixer

Almost there

Mix until the batter is smooth, and proceed to the next stage.

Dry Ingredients

Into another bowl, mix up a cup of almond flour, a teaspoon of baking powder, and a quarter-teaspoon of kosher salt:

Mixture eof almon flour, baking powedere and kosher salt

Just whisk to combine. (Obviously, I mixed while the chocolate was cooling a little.)

Now add into the wet ingredients. I prefer to do this a cup or so at a time so I don’t have it all over the kitchen.

Mixing dry ingreients into the wet

Like so.

Once it’s all incorporated, mix well, but don’t over-mix it.

Mixed brownie batter

Yum!

Time to spread it into the pan. Now, remember that you have one and a half sticks of butter here, so greasing isn’t necessary. My guess is the parchment paper is there as an assistant to make sure they all come out.

Spreading brownie batter into pan

This batter is quite thick, so it needs help

Into the oven at 350F degrees for 20 to 25 minutes, “until the center is just set but still jiggles”:

Brownies going into countertop oven for 25 minutes

Here we go!

This is what it looks like coming out of the oven:

Freshly baked hot brownies

Don’t cut into them just yet

You must let them cool for about 15 minutes on a rack, then refrigerate them for 35 minutes or longer before you cut them:

Brownies cut into 16

Now you can have one

I would say maybe 45 minutes because they were still warm and crumbled apart when I removed one from the pan. One of BF’s car-guy friends, this one a millennial, happened to be visiting and tried one. His father is doing keto, so he knows what that is. BF tried one in the next day or two and said it was “good, but dry.” There’s a reason for that.

Remember that when you refrigerate them for a longer time, the butter in the brownies will harden up, so they’ll be a bit on the dry side. However, they will stick together quite nicely, and taste just as delicious.

Of course, I loved them. Can’t wait to make more!

Cheeseburger Casserole, Page 137

Ok, I know, I said I “don’t do casserole,” but this is too tasty to pass up. Ground beef, onions, cream, and cheddar cheese–what’s not to like? Even he couldn’t say no to this one. Last week, we made it. But I didn’t take as many pictures as I intended.

First, brown a pound of 80% lean ground beef on the stove with onion and garlic for ten minutes:

Browning beef with onion and garlic

When it looks like this:

Cooked and browned beef in a cast iron skillet

Like this.

If there is any grease, drain it, then add the browned ground beef mixture to the bottom of a 9-inch pie pan or 9-inch square baking dish. Like the blackberry cobbler, I used 8-inch because that’s what I had.

Mix in a medium bowl 4 eggs, 5 tablespoons of tomato paste, a half-cup of heavy whipping cream, a half-teaspoon of kosher salt, and a quarter teaspoon of freshly ground pepper:

Adding salt to bowl

Mix this up really well, since this is the sauce

Add in a cup of shredded or grated cheddar cheese:

Adding grated cheddar cheese

Cheese makes nearly everything better, doesn’t it?

Mix well:

Cheese in sauce

Stir again

Baking

Now add to the pan:

Pouring cheese sauce into pan

Here we go!

Spread it over the top:

Spread sauce around

it will sink down a little, so mix it around if any beef is uncovered.

Add the remaining half-cup of cheddar cheese:

Cheese topping

SO good!

Make sure it’s covered:

Covered with cheese

Bake in the oven for 30 to 35 minutes, or until it’s set and looks like this:

Baked cheeseburger casserole

Delicious!!

Cutting cheeseburger casserole

An easy, one-pan dinner

This recipe makes four generous servings, and we had dinner one night and lunch the next day.

Dinnere is served!

Dinner is served!

BF really enjoyed this one, and I’ll be making this more often, too.

After All That Cooking

Did I have a mess to clean up:

Dishes in sink

The dishes never stop

But the mighty dishwasher of the HeatCageKitchen took care of it:

Countertop dishwasher full

Still working like a champ

And it was a good night.

Until Next Time

Many thanks to Emilie Bailey for the gifted book, which will not collect dust. The next recipe I want to try is Creamy Parmesean Pork Chops on 151. Maybe I’ll wait until we have a dinner guest to try it with either the broccoli or another side from the book.

I emailed her to thank her for the book, and to let her know what we made. She responded that her favorites are the Creamy Cabbage Alfredo on page 96, and the Osso Bucco on page 140. Cabbage? Oh, he’s not going to like that. Move that to the “Drag Week Menu.”

If you’re looking for some delicious and easy keto food, this is your book. And if you don’t eat keto but want some easy, delicious food that simple, this is also your book. Or if you want to impress friends and family while sticking to simple keto recipes, Emilie’s book has got you covered there, too.

The new book is available on Amazon and other book outlets (yes, that’s my affiliate link) tomorrow (July 13th) and is currently available as a Kindle book. I’ll be posting my review there shortly.

Enjoy!!


Skip to toolbar
Verified by MonsterInsights