

Another wedding! BF and I made it to the wedding of one of BF’s friends, one year after Rafael & Carmen’s lovely affair.
Hi, Again, Dear Readers:
Have you tried one of the new foodie trends yet? No? Me either. BF is glad that I haven’t cajoled him into a Boba Tea shop yet—the local PJ’s Coffee shops and Starbucks in Hammond are enough for him any day.
He likes that PJ’s offers veterans discounts, and some of the tasty things they have, too. Especially in that PJ’s next to the military recruiting stations in Hammond. We did try one of the recent Aldi Finds, Priano tomato and mozzarella gnocchi from Italy. Not bad, but he didn’t care for it. It’s OK, though, we at least tried some.
An Invitation
Once again, we were invited to a wedding. Traveling was about an hour round-trip, and it was a great time. And guess who forgot to get pictures of the food? Yup, your intrepid blogger. But I got pictures of everything else, including me and BF, and the gorgeous wedding cake, too. Note that I was using an iPhone 11, so not all of the pictures are top-quality.
BF has known Ray, usually called “Ray-Ray,” for many years. He’s been to the Casa de Rurale several times, sometimes with his brother Gerald. We’ve not met his wife Angela yet. We only saw her at the wedding and didn’t get a chance to chat.
Then one day BF sent me a text message with a picture of an invitation:

This came by text
Who? What? Upon asking, he confirmed that it was, in fact, Ray-Ray. I was surprised because I didn’t know he was getting married, nor that we would be invited. We made our plans to attend.
Wedding Venue
This wedding was held in The Knights of Columbus Hall in Ponchatoula, a nice-sized venue. I didn’t get to ask who did the décor, and everything was elegantly done. (Even if I didn’t get pictures of the food tables.)
We weren’t told this ahead of time, but it looked like the theme was black and white:


Isn’t it lovely?

Closeup of the place setting in the area reserved for the family.

Each table had a similar arrangement
I think this was the groom’s cake–but I confess, I don’t remember, and I think I forgot to ask, too.


And there was a table and chairs for the couple following the wedding:

We were far across the room for this so I didn’t get any pictures of them here.

A beautiful backdrop for the ceremony:

Lots of pictures were posed here too

Most of the family members wore black and white in keeping with the apparent theme, although there were some exceptions. I was the only one wearing Navy Blue. Later I was told that the far side of the room was reserved for family members, but nobody minded me taking a few pictures before the wedding started.
More venue pictures
This was the card box:

Another part of the family-reserved area:

On the other side of the room, the settings were slightly different but equally elegant:

This was our table

Closeup of the place setting
The bell had a message:

And we did!
The Ceremony
It was short but meaningful, led by the groom’s brother, who is a minister. The bride wore a lovely light grey gown with a corset back and a sparkly tiara.

Isn’t she gorgeous?
The walk took a few minutes:

There wasn’t an actual “aisle” as in a church
Once the bride made it to the wedding arch, they started:

The ceremony begins
I zoomed in for a closer look:

From here, everything starts
Following the ceremony, Mr. and Mrs. Ray Dantzler:

Married!
There were lots more pictures, and BF and I even posed with them for their photographer. I didn’t get a picture of that, though.
The Wedding Cake!
Ok, just get an eyeful of this beauty:

Beautiful
And that detail:

Check out that detail!
I thought I took a picture of the slices passed to us, but I can’t find it now. We both enjoyed that delicious confection. Oh, the smooth, creamy icing. . .it was just everything you expect in such a rich confection.
The “Wedding Cake” Flavor
Local bakeries have something called “wedding cake flavor.” Anyone who grew up in the New Orleans area knows that it’s the traditional flavor of local wedding cakes. Out-of-towners have no idea.
That distinctive element of wedding cakes of New Orleans—and this one—is the presence of almond flavoring. It’s a local tradition. While the cake at Rafael & Carmen’s wedding was indeed delicious, it did not have almond, or the“wedding cake flavor” you find in and around New Orleans. A Texas baker isn’t likely to know about it, nor would the couple, and probably wouldn’t ask to include it—unless they knew.
I’d forgotten about that until I took a bite of this one and remembered it well. It’s been a while, and you don’t forget that taste. A quick search turned up this article from the local newspaper about that very thing. A small amount of almond extract is added to both the cake and the icing. Not too much, because almond extract is very strong.
At Justin & Bronte’s wedding in 2020, we had a slice of the groom’s cake, not the actual wedding cake. So, I don’t know if the cake was “wedding cake flavored”—we’ll just guess that it did.
Now that I think about it, I want to make some kind of keto cake and icing with almond extract for that taste. Who’s with me?
Champagne, Cocktails and The Dinner Menu
Right after the wedding concluded, champagne servers were walking around and pouring at every table. I had one and was hoping for a second sip but couldn’t find anyone serving anymore. The bar area was making strictly mixed drinks, wine, and beer. I could have had a cocktail, but didn’t, even though BF was doing all the driving that night.
Dinner was. . .barbecue! No kidding, along with mac and cheese, green beans, and a couple of other things (that I don’t remember.) Everything was delicious. (And of course, no pictures of it unless I can cajole them from the groom.)
The man who did the catering was seated at our table and told us he was the one who made everything. No complaints! Everyone enjoyed dinner and the company that came with it at our table.
Dancing After Dinner
The one thing I heard the most was, “The music’s too loud.” Admittedly, it was kind of on the loud side, but all the DJs do that now, right?
Gerald was sitting at our table with a nice elderly lady, who pointed out one song sung by the sister of R&B musician R. Kelly. (Yes, that guy.) I thought the lady said her name was “Sheila,” but I can’t find it now. It was a pretty good song, but I was completely unfamiliar with the music myself. A lot was going on that night.
After dinner, folks were getting up and dancing. I should say some folks were getting up and dancing. BF was not one of them, nor were most where we were seated. I hate to say it this way, but the white folks were kind of boring, and everyone else was having fun.
After a few of BF’s odd looks, I got up and danced with some of the ladies and tried my best to learn their dance moves on the fly. They were friendly and gave me some help. If I’d had a bit more time I would have gotten the moves down.
And then the music changed, and everyone danced a different step.
Gerald showed his amusement when he saw me get up and attempt dancing with the ladies on the floor. Guess I should have danced with him once. They’ve been to the Casa de Rurale since the wedding. They haven’t forgotten and let me know about that.
Should have started dancing with the ladies long before I did.
My Outfit
Ever the fashionista, I wore the same Badgley Mischka cocktail dress from Rafael & Carmen’s wedding—because why not?

Isn’t it fabulous? (It is now out of print.)
I finally got around to hand-sewing a bunch of snaps onto the drape and the fringe so I could remove the fringe later. I don’t even want to know how many snaps I sewed by hand, and it took me a while to get them all on so that the drape looked right.
Three years after Justin and Bronte’s wedding, I finally finished the Navy blue birdcage headpiece I originally planned to wear to their wedding, and also planned to wear to Rafael and Carmen’s. I made it from this out-of-print Simplicity pattern of accessories.

Mine is at the top right, View D
Amy’s cheat: I bought the white flowers already made from Hobby Lobby and cut the stems short instead of making the flowers. The Russian veiling I ordered from Etsy, where you can get things like that in nearly any color. One day maybe I’ll attempt that fascinator, View E, in a deep red.
I thought it would look good with the Badgley Mischka dress during the ceremony. Then, I would remove it for the reception, carefully tucking it into a bag and in my purse. And I would have, but BF put up a big fuss about it, insisting that it would look “funny.”

He said this looked “funny.”
So, I didn’t wear it inside the venue. It stayed in a bag in our vehicle.

Not a good picture of us, but here we are. The DJ is directly behind us in the corner.
Honestly, I should have worn it anyway. I’m not taking fashion advice from a mechanic again.
A second opinion
Later, I posted those pictures of the pattern and veil on Facebook, both on my page and in McCall’s sewing group. Carmen said on FB that she wanted a birdcage but couldn’t find one she liked. She might have gotten me to make one had she known I could. Wouldn’t that have been fun if we were both wearing the same headpiece in different colors?
Responses were mostly positive in both places, except for one troll in the Facebook group who wasn’t paying attention and felt the need to remind me that “only the bride wears white.” Not only did I not wear white, but neither did the bride, her beautiful dress was very light silver gray. DUH, lady.
BF, of course, wore khaki trousers and a white/blue checked Izod dress shirt like this one.

Source: Amazon
Can’t tell you how old it is, only that I’m tasked with occasionally ironing it for him.
Another lovely wedding
Each wedding is unique and reflects the personalities of the couple getting married. As nice as each one we attended was, the only thing they all had in common was a man and a woman getting married, and a big cake. The details were all completely different and made each occasion special for everyone who attended. Each had its own vibe. There is no comparison of one to the other.
Like the previous two we’ve attended, everything went perfectly. Everyone had a great time and were all happy to see them get married. Ray and Angela’s elegant affair was just a half-hour drive home for us this time with no toll roads. Eventually, I’ll have our pictures printed up in a little Shutterfly book. As soon as I am finished with the book for the last one we attended.
We wish them a long and happy life together and thank them for their gracious invitation to a lovely evening.
Congratulations to Ray and Angela!

Caulipower has upgraded its signature pizza line with three new upgraded flavors. In this blog, I try the one with mushrooms.
Hi, again, Dear Readers:
Ok, after my last post, I decided to write up the local wedding we went to last year, and it’s about halfway done. So that’s coming soon.
I also found a selfie I sent to BF during the holidays when I went to meet up with a little old lady at Starbucks in Hammond:

Went to visit someone over the holiday season
Or as I call it on Facebook, a “proof of life” selfie. Sometimes, amazingly, I still look a little like I used to before life got the upper hand. That’s OK, I’ve got BF now, and that’s good too.
Pizza and Valentine’s Day
Longtime readers know I’m a fan of Caulipower’s delicious pizzas. And because BF won’t touch it, not even a bite, they’re all mine. They’re thin crust and not big, so I can enjoy the whole thing by myself. I don’t care what he says, they are that good.
For multiple reasons this week, we decided to get frozen pizzas for dinner, including Valentine’s Day. It’s been a tough week for us and doing the whole Valentine’s thing was too much to think about. Maybe next week. We’re here, we’ve got each other, we love getting on each other’s nerves, and that’s all we need. Plus a little chocolate occasionally.
On Tuesday we made a supply run. That’s when I accidentally discovered a new artisan flavor of Caulipower pizza in the back of Walmart’s freezer case.
It’s in a black box, rather than white. I bought one of those and an Uncured Pepperoni for the first non-cooking dinner. BF had his usual thick-crust Red Baron, which he enjoyed over two nights.
Caulipower’s Three New Flavors
The company is always pushing the envelope on healthier offerings using cauliflower, so there’s always a new flavor or new thing around, like their Cauliflower Pasta. Recently, they’ve debuted a new artisan-style Over The Top pizzas with stone-fired crusts:
- The Dream Supreme, with pepperoni, sausage, and bell peppers
- Spicy Chicken Sausage with chicken sausage and fire roasted bell peppers
- Truffilicious Mushroom, with a mushroom blend, white sauce, cheese, and truffle oil
Admittedly I have not tried them all, and doing so would require BF to be working late more often. This is to avoid the retching noises and other negative reactions when I tell him what I’m trying out and avoid reactions like the one for Overnight Oatmeal.
Then I found something new.
The Trufflicious Mushroom Pizza
Remember in my post about 2024 foodie trends I said that one prediction was mushrooms everywhere for vegans and vegetarians as a meat substitute?

What’s this?
Caulipower has joined the trend with this version of its newest pizza line.
Mushrooms on pizza is nothing new, whether vegetarian or not. The sauce is not tomato but a “white sauce,” which is occasionally used on pizza like it is on pasta.

Here’s the important stuff
So, being curious (and having an extra $8) I bought one to try.
Bake It Up
The instructions are the same for every type of Caulipower I’ve ever tried: bake at 425 degrees for 13 to 16 minutes, until done. (Unwrap it first, of course.)

Looks like any ordinary mushroom pizza.
Don’t forget about it, either, especially in a small countertop oven.

Just like that.
In what seems like seconds later, you have pizza:

Ready?
Even though it’s a bit “Cajunized” on one side, the other side needed a few more minutes. But I wasn’t about to wait. I took it out and sliced it up.

I was hungry, too. BF had no interest.
The Taste
Let me start by telling you the positive parts of this pizza:
- Stone-fired pizza crust
- Gluten-free
- No artificial flavors, preservatives, or colors
- Good source of protein
Caulipower makes all kinds of good-for-you foods based on cauliflower that offer fast, convenient, and healthy eating at any time. I haven’t tried all of them because they’re not all available here.
But I’m just not wild about this pizza, y’all.
I’m glad I tried it once, but I don’t want it anymore. It’s not bad, it’s just not appealing. Maybe it’s the truffle oil in the sauce, or the cheese, or the mushroom blend, I don’t know. This pizza is just not for me. I can’t answer for anyone else.
Will you like it? I don’t know—you must find out for yourself, honestly. If this blog doesn’t make you curious, well. . .get the uncured pepperoni version, or pick up a box of crusts and create your own Caulipower. Their “regular” pizzas are very tasty. I just can’t vouch for this one, despite their other tasty flavors.
The Other Two
Since I only found the Truffilicious Mushroom version of the Over The Top line in Walmart, I don’t know if I can get the other two here. As always, I’ll check out Winn-Dixie or Rouses later and see if they have them in stock.
I’ve had Caulipower’s Buffa-Whoa buffalo chicken pizza and found it to be a little too warm for my taste. This makes me cautious about the Spicy Chicken Sausage version because I don’t like anything that’s overly hot. I haven’t found their “white pizza” either but will try it if I ever find one. The rest I like, including the crust that you can add your own ingredients on top and bake.
Good Food Frozen
As more people embrace healthier eating, better quality things are available in the freezer case. I’m sure there will always be regular frozen pizzas, lasagna, and other freezer staples available. But healthier food is making its way into American grocery stores, and that’s always a good thing.
Enjoy!

He liked the leather wallets, but that’s not me standing next to him.
Expert Trends
As with every New Year, “experts” of all descriptions predict what we’ll be doing after January 1. How many of those predictions become trends is anybody’s guess because a “disruptor” comes along that changes things, like Instagram and TikTok (which I’ll talk about later.) Or life changes in some way, like the three-year thing, and we adapt accordingly. So I decided to see what they’re saying about the newest foodie trends that may be coming to us in the New Year.Trends And Predictions For 2024
I thought about doing this after my last blog post. What are the trends we can look forward to seeing in 2024 on the foodie front? Every year, there’s always something new to discover, even if it’s something old that’s just repackaged. TikTok, the short-video social media, seems to be the primary trend influencer. This blogger does not have TikTok on her phone and only knows what she reads about and sees that flows from TikTok onto Instagram. But because TikTok is the thing now, it’s a driver for these “new” food trends, along with the food industry. Remember how high eggs were a year ago? Record inflation for the past three years has also cut into food budgets from teenagers to families with children, so not everyone is on board with, say, the caviar-on-Doritos trend. Trader Joe’s has announced their Customer Choice Awards 2024, and one of my favorites is on it: The Brazil Nut Body Butter. It’s inedible, but one sniff of that incredible fragrance and you’re hooked. Even BF likes it, but only when I’m wearing some. Predicting trends is not an exact science. Frequently, making predictions can be all over the place, as I discovered researching for this blog. So here are some of the anticipated trends predicted for this year.Tamarind
McCormick is betting on its new “Mexican Inspired” Tamarind blend as the preeminent flavor for all things culinary in 2024.
McCormick makes this

Not straight Tamarind, but a blend, with two types of sugar.
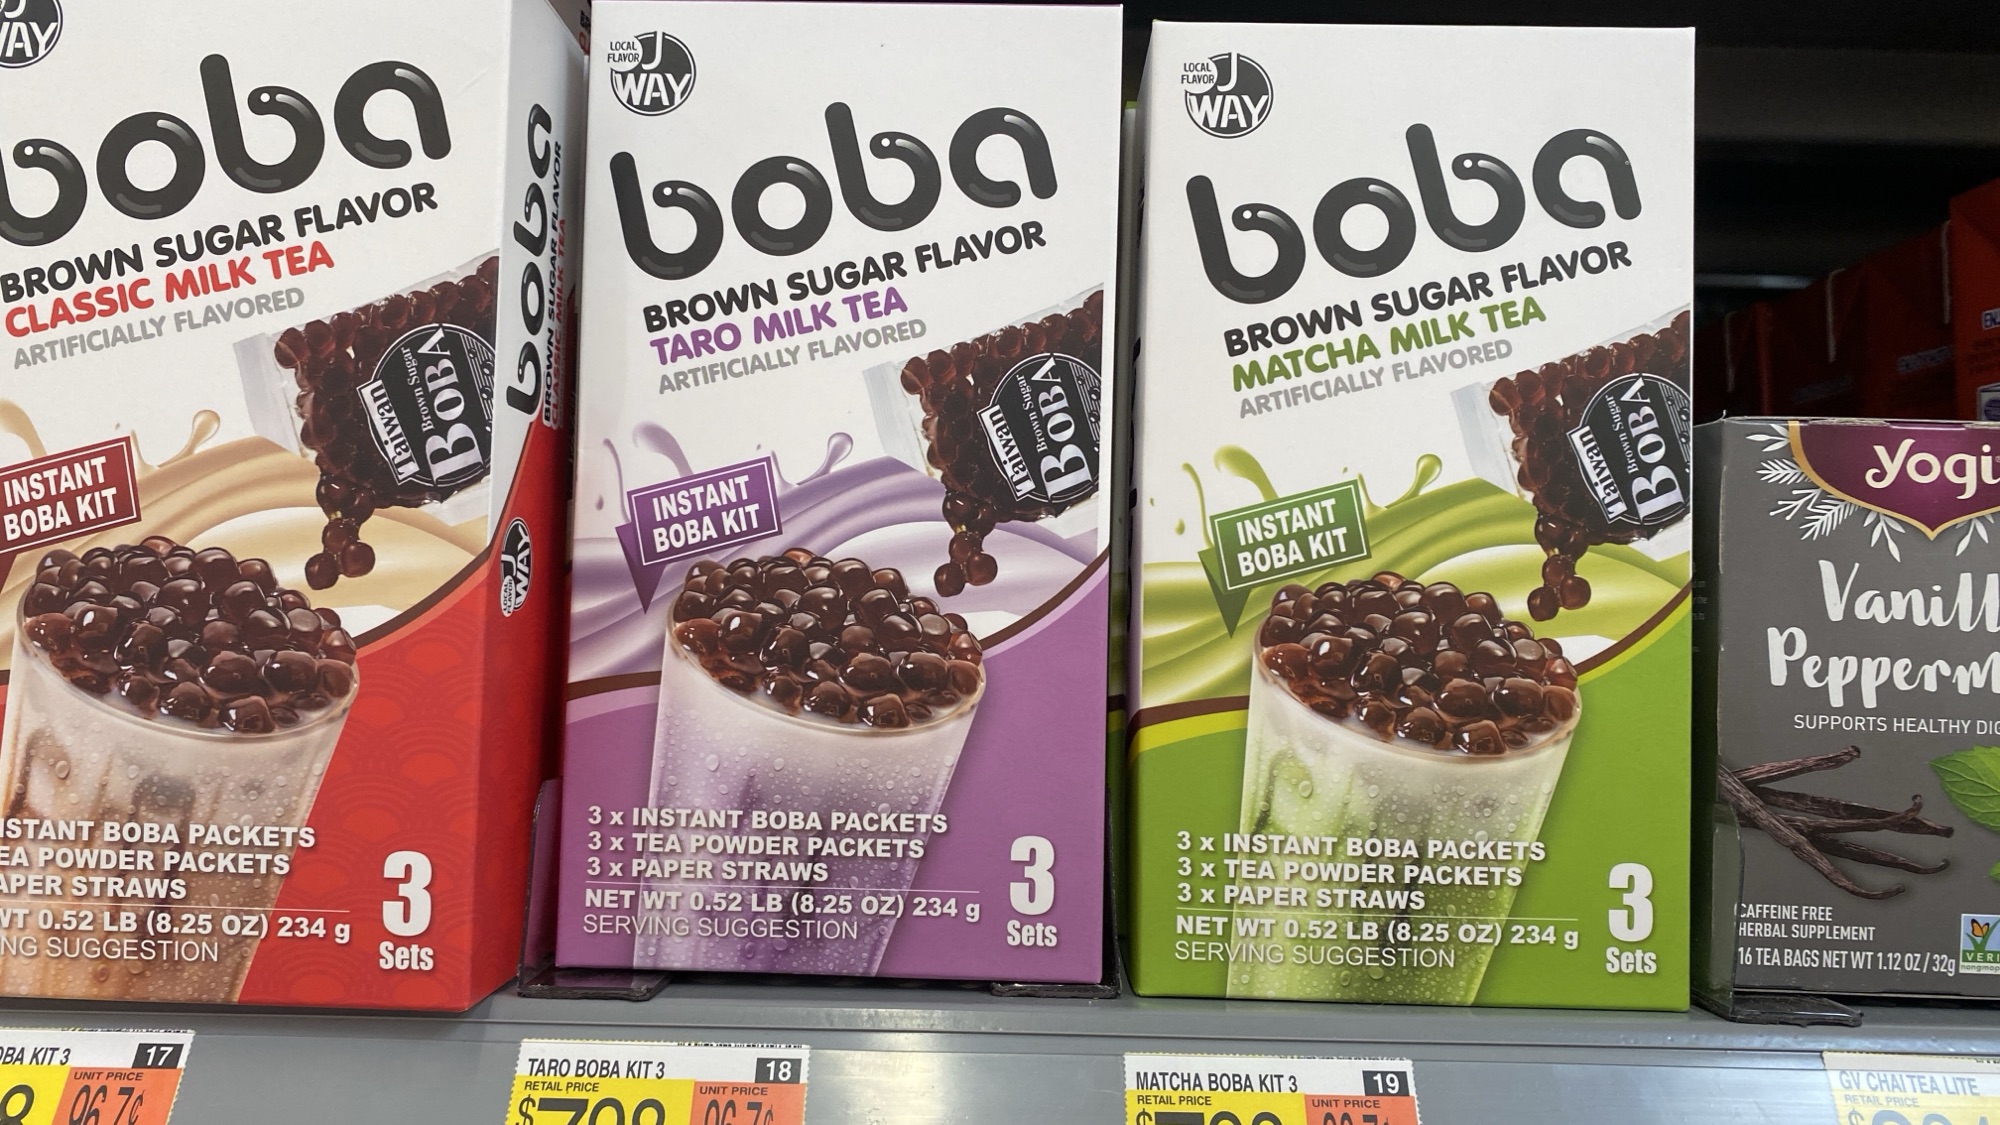
“Boba Tea,” aka “Bubble Tea”
Back in the day, the Frappuccino was the trendy new thing to drink. Then chai came along. Then the famous (or infamous) Pumpkin Spice Latte sparked all manner of fall-based trends. Today, we have Bubble Tea, also called Boba Tea, and it’s being called a new trend for 2024.
This is a generic picture of what Bubble Tea, or Boba Tea, looks like.
 Because I don’t get out much, apparently there is Boba ParTea and TeaTery Tea & Tapioca in Baton Rouge. Boba ParTea is near one of our favorite places there, The City Café on O’Neal Lane. (I’ve never done a review on it, go figure, but we like it.) A quick search indicates that bubble tea places are popping up all over Houston. (Get it?) My Boba Tea is out on the west side, on Dairy Ashford, and there might be one in Clear Lake, too. (I couldn’t tell from a search.) Like anything in Houston, toss a quarter in any direction, you’ll probably find at least one. If you can get beignets in Houston, you’ll find a place selling bubble tea, too, but probably not in the same place.
Neighbor E is reading this and holding onto his chai latte real tight.
Because I don’t get out much, apparently there is Boba ParTea and TeaTery Tea & Tapioca in Baton Rouge. Boba ParTea is near one of our favorite places there, The City Café on O’Neal Lane. (I’ve never done a review on it, go figure, but we like it.) A quick search indicates that bubble tea places are popping up all over Houston. (Get it?) My Boba Tea is out on the west side, on Dairy Ashford, and there might be one in Clear Lake, too. (I couldn’t tell from a search.) Like anything in Houston, toss a quarter in any direction, you’ll probably find at least one. If you can get beignets in Houston, you’ll find a place selling bubble tea, too, but probably not in the same place.
Neighbor E is reading this and holding onto his chai latte real tight.

Neighbor E’s favorite
What It Is
So, what is this wacky new stuff that the kids all like? I did find some in our local Walmart this past weekend:
Yup, there it is.

If I were getting some, I’d go with that Vanilla Latte flavor.

That’s how it’s made, and that’s a lot of sugar.
Retro Anything Trend
For some bizarre reason, there is a 90’s nostalgia food trend happening now. It may have something to do with the release of a movie called Mean Girls, a reboot of the 2004 film. This trend sees retro food reimagined for folks who want to return to their youth or something. Also called “newstalgia,” this kind of thing appears during or right after difficult times. Maybe I should find new copies of some old cookbooks and see where that takes me. On the other hand, I have no plans to source and purchase Pop Rocks to add into something. But it might be a fun joke to play on BF one day if he gets on my last nerve.Increased Plant-Based Foods
Even though I stocked up on unsweetened chocolate almond milk during the most recent freeze, I’m not following this trend. However, an increase in demand for plant-based everything is expected to continue into 2024. Especially considering the increased prices of all types of meat. However, the plant-based meat industry has faced obstacles, forcing many to cut back operations. And it’s not cheap, either. Some providers have closed for business entirely. There just isn’t the demand they anticipated, and the problems of the last three years haven’t helped. Furthermore, the ingredients in some of these offerings aren’t always as healthy as touted.
Because it’s impossible to get normal people to eat this stuff. (Source: Google Images)

Source: Google Images

Source: Google Images/Getty Images
Vegan Pepperoni?
I haven’t been to Trader Joe’s in many months, and the last time I visited Aldi was between Christmas and New Year. TJ’s does offer a fair amount of vegan and vegetarian foods for those who like them. They are a California company, after all, up on all the latest food trends. Well, Natasha from Trader Joe’s List posted this new Trader Joe’s product on Instagram the other day:
Source: Trader Joe’s List Instagram page

Source: Trader Joe’s List Instagram page.
Trend: Artificial intelligence (AI)
AI has been rumbling around for years, but in 2022, ChatGPT brought AI into mainstream consciousness. While this blogger does use ChatGPT—like a bookkeeper would use a calculator—I wrote this blog without ChatGPT’s assistance. (And I’m sure it shows too.) Automation has been in the food industry for decades. In recent years AI has become increasingly sophisticated wherever it’s used. The infusion of technology probably won’t be obvious to consumers and restaurant patrons. Most of it will work in the background, not in full view.
How It Works
For instance, I saw an article recently (but I can’t find it now) about how companies keep their ice cream flavors in stock. It works like this: the ice cream vendor owns the freezer that’s in your local store or a component thereof. The freezer or component is equipped with a sensor device that sends information to the company remotely, letting them know what to restock automatically. In other words, HEB, or our local Walmart, or Winn-Dixie doesn’t have to tell the vendor they are out of a specific type of ice cream, gelato, or novelty frozen dessert. The vendor already knows the minute the freezer space is low or emptied. Sensors inside the freezer send them a notification automatically, and the supply chain that brings it is (mostly) seamless. The vendor is already working to get that freezer refilled with Cherry Mocha Chocolate Chunk Hazelnut Crème Gelato before someone starts asking questions.
In restaurants, automation and technology are expected to help pick up the load, saving labor and time. Again, customers won’t see this AI automation. McDonald’s has already opened a test of the automated concept in Fort Worth, but there are also humans working there. Increasing automation with AI is expected to help increase efficiency and cut costs in all types of eateries.
In other words, HEB, or our local Walmart, or Winn-Dixie doesn’t have to tell the vendor they are out of a specific type of ice cream, gelato, or novelty frozen dessert. The vendor already knows the minute the freezer space is low or emptied. Sensors inside the freezer send them a notification automatically, and the supply chain that brings it is (mostly) seamless. The vendor is already working to get that freezer refilled with Cherry Mocha Chocolate Chunk Hazelnut Crème Gelato before someone starts asking questions.
In restaurants, automation and technology are expected to help pick up the load, saving labor and time. Again, customers won’t see this AI automation. McDonald’s has already opened a test of the automated concept in Fort Worth, but there are also humans working there. Increasing automation with AI is expected to help increase efficiency and cut costs in all types of eateries.
AI Trends In Popular Culture
Fans of The X-Files will remember a semi-comedic episode in the eleventh season (2018) with little dialog and revolved around an automated sushi restaurant. There are no humans in the place, and when Mulder’s order is wrong, there is no one to complain to and no way to get the sushi he ordered. Things escalate quickly, and the duo breaks out of the place. Headed home, Scully’s autonomous (and driverless) taxi speeds out of control, and her house is overtaken by electronics. Eventually, the pair is cornered by several robots that hand Mulder his phone, showing that he has not left a tip or a review. He leaves a 10% tip with his phone, the robots back off and go away, and then everything is all over. We’re a long way from that scenario, but don’t be surprised if the automated restaurant trend becomes more common, even in a limited capacity.Speaking of Ice Cream
This article discusses new trends in our favorite frozen dessert. From calorie (and carb) conscious to more sophisticated flavor profiles, ice cream continues to evolve. I still prefer making my own, but it’s nice to know keto and sugar-free ice creams are available. One of those trends is new flavor combinations. Well, I’ve got one I just saw in Walmart the other night:
Little Debbie is “the other woman” in our relationship.
Hot, Sweet & Sour Trends
If you’re one of those people who think the hotter, the better, you’re about to get your sensibilities whacked. By that, I mean that one new trend is to combine hot with sweet or other flavors to temper the heat and bring new layers of flavor. Gen Z has discovered extremely hot condiments like Sriracha and enjoys adding them to different dishes. Fermented food and drinks like kombucha also continue to be a force in food. Admittedly, this blogger does not go near the stuff. I do like pickles on occasion, especially the milder ones like kosher dill. BF, on the other hand, hates anything remotely “pickle-y,” and will let you know about it–loudly.Rethinking The Drink
People like BF, Aunt Ruth, and Aunt Kathy are just not going to be fazed by the trend of Dry January right after the holidays. (Yup, a bit late for that too, but hear me out.) I don’t drink that often, and I can tell you the last occasions where I had alcohol: A wedding last November, (BF drove us) plus Thanksgiving and this past New Year’s Eve at home. But some folks drink a little more regularly and observe Dry January as a month of “reset.” Actress and foodie Valerie Bertinelli takes it seriously and frequently posts videos about her Dry January on Instagram. If you can’t give up the cocktails, there are ways to enjoy a sophisticated libation without the alcohol in January or any other month.Fancy Sodas and Soft Drinks
For BF, Cherry Coke is about as fancy as he gets. I quit drinking soft drinks back in 1997 and have had only one since then. Now, I don’t have a taste for them. But over the years, soft drinks, aka “sodas,” have evolved into nonstandard versions that appeal to more discriminating tastes. The first one I remember seeing was Izze’s, a “fizzy” juice blend with no sugar or artificial flavorings.
This is just one of many flavors
Zevia
Another one I’ve seen is Zevia Zero Sugar Sodas, but I haven’t tried them myself. They offer soda, energy drinks, teas, and drinks for kids.
One of several varieties
The Dry Cocktail Trends
Non-alcoholic wines and other spirits are also an evolving market, especially for Dry January. Something new that has crossed my path is called Ritual Zero Proof, spirits for people who love to drink. No kidding, it’s a series of taste-alike alternatives to tequila, rum, whiskey, aperitif, and gin. The bottles are sold individually as well as in bundles. (NOTE: I have not personally tried these libations.)
Cocktail ready with no alcohol.
Rethinking Your Drink
Do you want a drink? They’re easy to find. There are always recipes for dry cocktails, or “mocktails,” available online at the touch of a button. I have several cocktail recipes in books, too, like Suzanne Somers Cocktails book, one of my favorites. You can make many of these drinks without alcohol, including my favorites:- The Somersize Mojito on page 17
- The Watermelon Mojito on page 21
- The Ruby Red Greyhound on page 27
Our NYE Drinks
For New Year’s Eve, I found a recipe on Natasha Fisher’s Instagram feed (TraderJoesList) that called for fresh cranberries frozen in tangerine juice with a sprig of rosemary in larger-size ice cube trays. (I had to use orange juice since I wasn’t going to Baton Rouge before then.) When you’re ready to drink, pour your Prosecco or Champagne over the cubes. Delicious. For BF, I bought some fizzy apple juice for his “mocktail.” Mine, of course, had that small bottle of Prosecco that’s been in the fridge for some time and forgotten. We both enjoyed a nice “adult” beverage on New Year’s Eve with sliced cheeses and gluten-free cracker nibbles on the way to midnight. This charcuterie for two included slices of delicious Cranberry Cinnamon Goat Cheese from Aldi’s, and we even had some leftover cubes in the freezer for another time.The art and science of new trends
Remember that anyone can now have a social media presence and call themselves an “influencer.” That’s their job, to promote products and hopefully start a trend that sells products. I get that, and sometimes they are good products. This article on Mr. Porter better explains how a trend comes to be and the process by which it ceases to be a trend and then becomes mainstream. Sometimes, I’m an “early adopter,” and other times, I’m an “early majority.” Occasionally, I’m a “late majority” or even a “laggard,” depending on the trend. I say that because if I have a problem to solve, I seek a solution. Sometimes that solution shows up on Instagram, no kidding, or on Amazon. Later, that “trend” became mainstream, and I found it at our local Walmart. One example is this battery organizer I bought two years ago that’s similar to one now available in Walmart. I guess being classified as a “Baby Boomer” makes me wary of going near some of the trends. I’ll take “laggard” in those cases. Gluten-free isn’t a trend—it came about because so many people discovered they had wheat sensitivities and allergies, like Elena Amsterdam of Elena’s Pantry. Reading Wheat Belly by Dr. William Davis made me believe in the gluten-free lifestyle. Cauliflower and cauliflower rice became a foodie trend with the low-carb and keto crowd because people looking for new things discovered its versatility. (Since that blog, I’ve found bags of frozen cauliflower rice at Walmart.) Trends develop from what people want, see, and need, and take all kinds of forms.What trends come next?
As I said, predictions aren’t hard science, so these predictions and others may not become the thing. And what happens tomorrow is anybody’s guess. The Kansas City Chiefs (and of course, Taylor Swift’s boyfriend) won the Super Bowl, so at least one blogger on Instagram this morning had a recipe for KC brisket. As if I would make anything but a Texas brisket—DUH! Trends form around what people want and see on TV and social media. Taking a cue from that famous ball game, Taylor Swift wore a black corset top that’s been an on-and-off thing for many years. On YouTube, there’s a clip of the late Tina Turner doing a preshow performance at the 2000 Super Bowl, and her backup dancers are wearing the same style of corset tops, 24 years before TS wore one. That top is already a trend now. But since SHE wore one yesterday from an Australian designer, the Army of Swifties will probably be swift in getting their own. Not me—I’m not a Swiftian, nor will I be buying or making one just yet. Foodie trends are the same way, like charcuterie boards. Trends of all types are influenced by everything from current events, politics, technology, popular culture, social media (of course), and just in general the way things change over time. Look how fast society adapted to working from home when they had to, and nearly everything changed overnight. Trends are also driven by changes in style and taste and become established by shared opinions and eventual widespread appeal.Until Next Time. . . .
No, I’m not looking to start any trends, but if I do, GREAT! I just hope that trend comes with a highly acceptable payout, but not holding my breath on that one. But if you find something new to enjoy, have at it, and of course. . . . Happy Dining!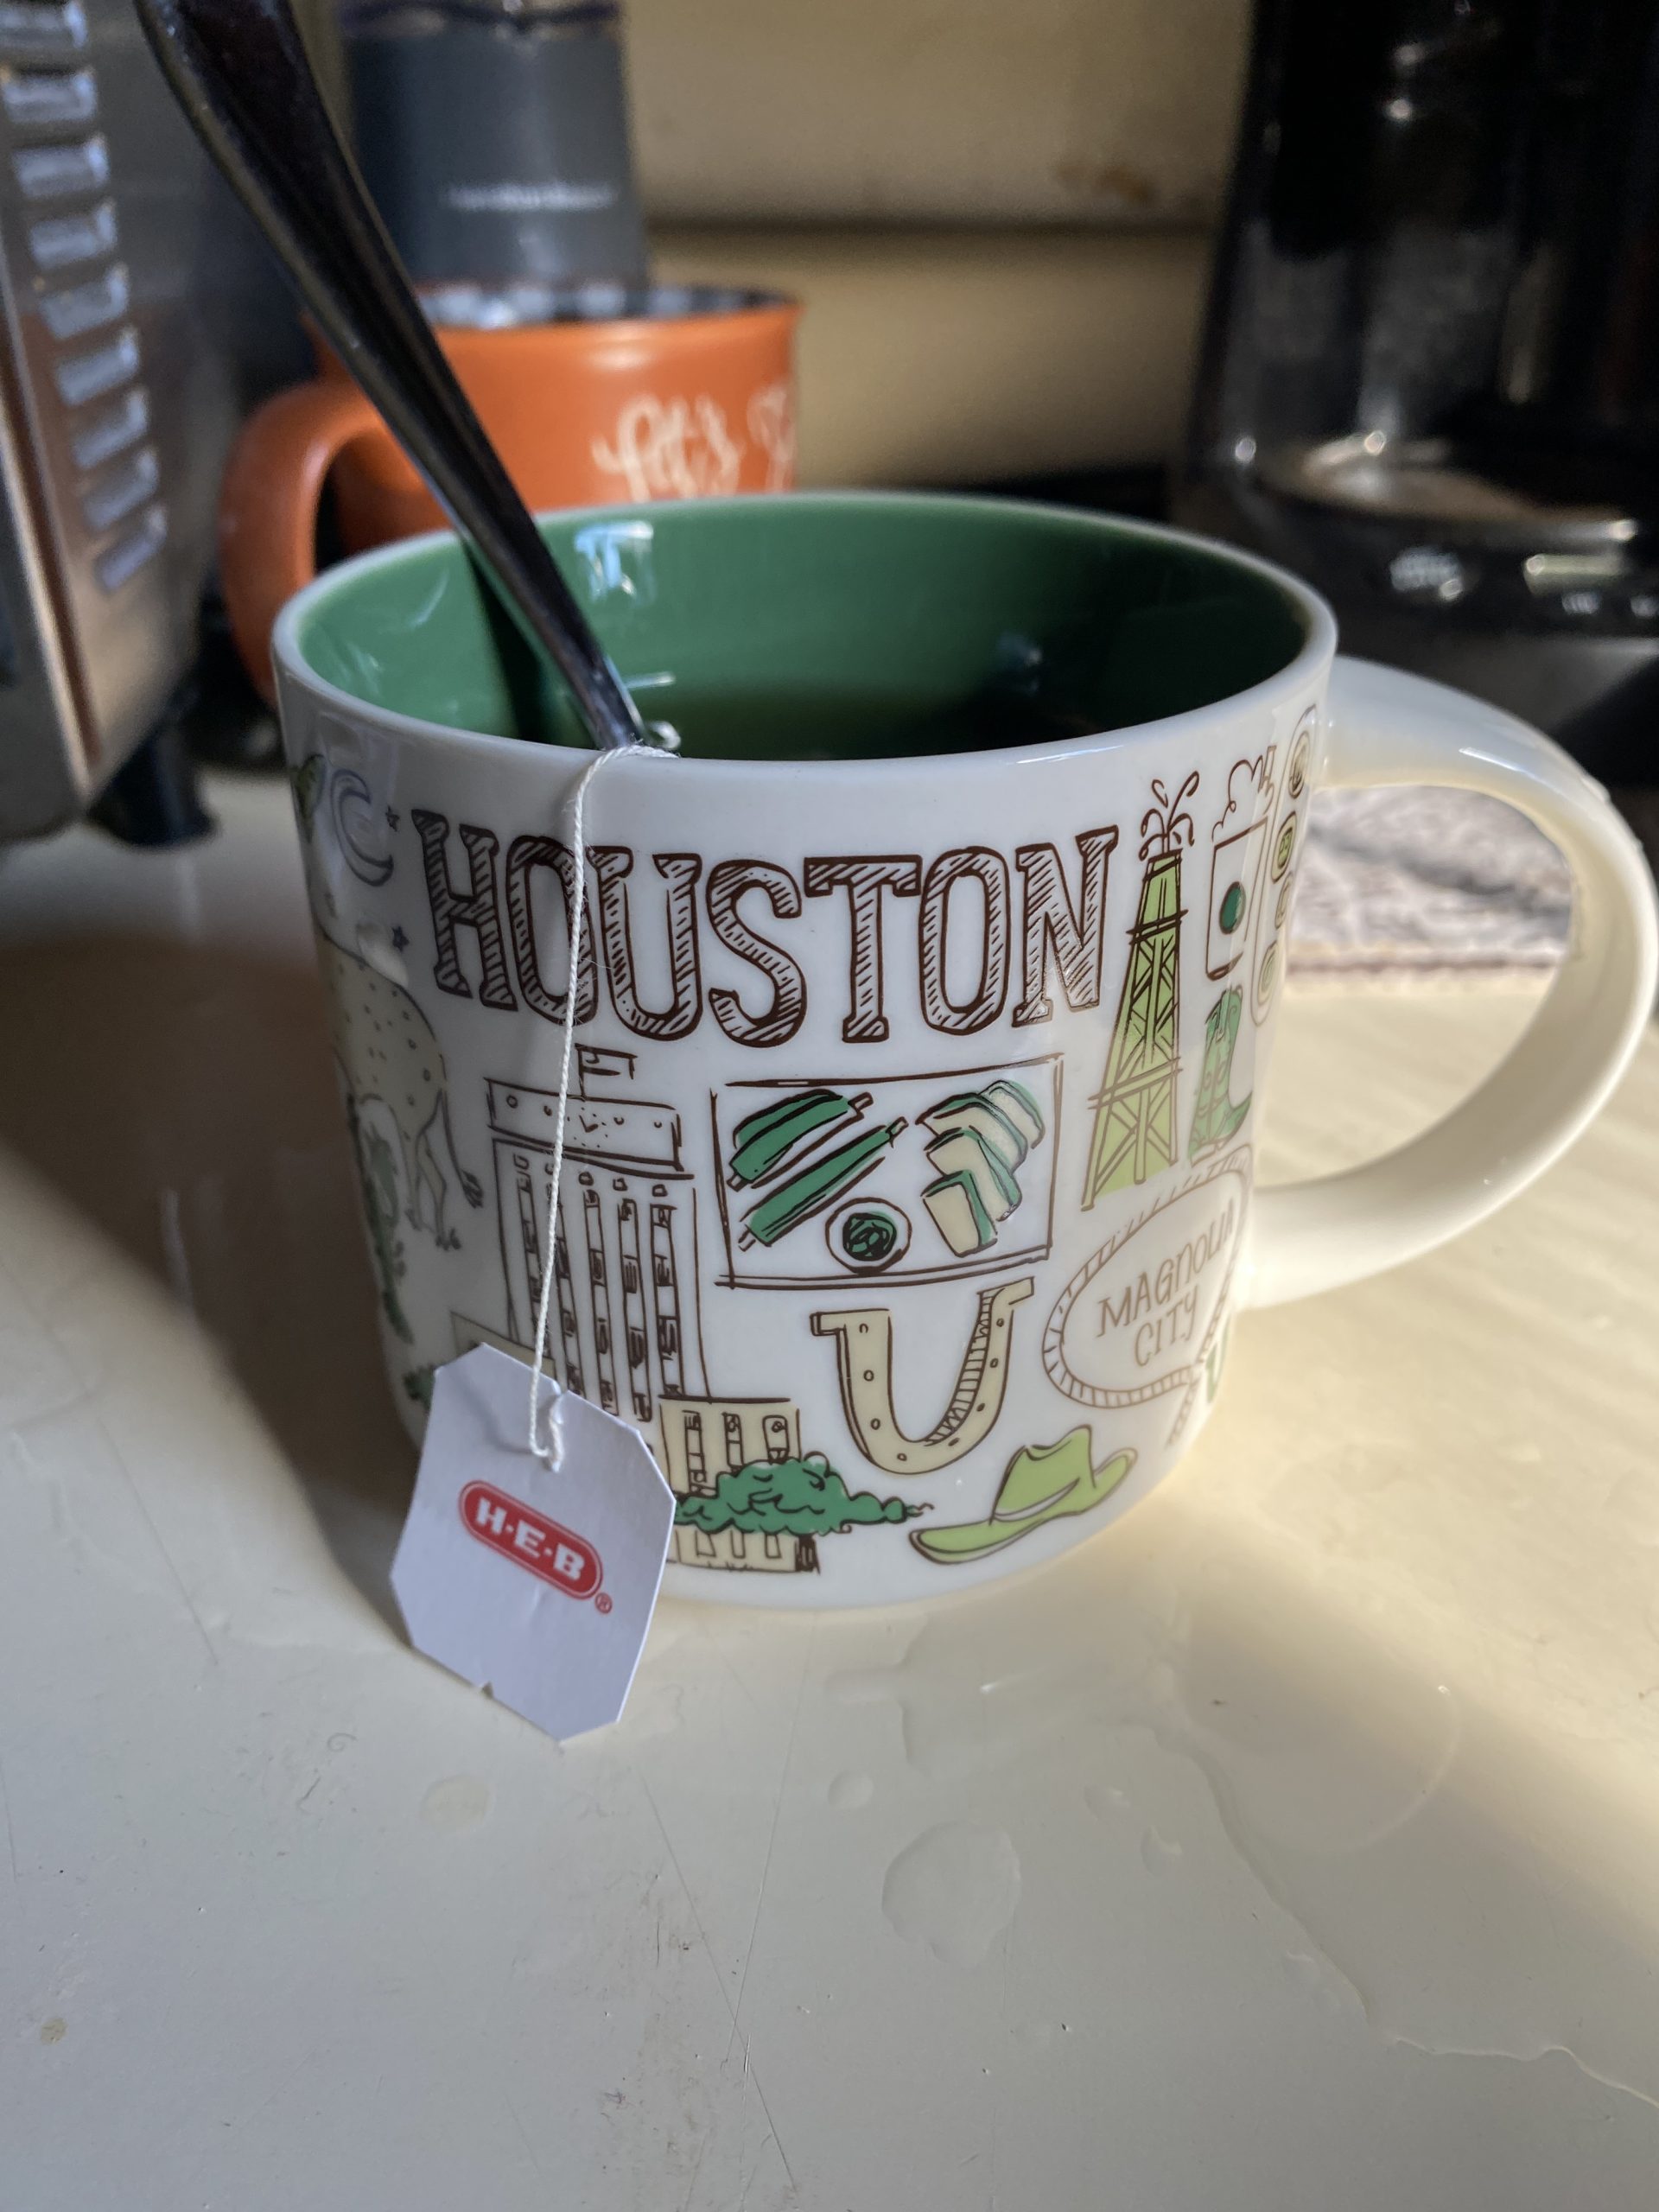
What happened after the wedding? We went visiting with a little shopping and dining in Houston. Come with us to my old stomping ground in Clear Lake. (I never thought I’d call it that.) Warning: this is a long blog, so settle in with a cuppa first. There’s lots to tell.
Hello, again, Dear Readers:
Welcome to our three days of winter in the south. It’s COLD! And it will be for three days or so. Wrap your pipes, make sure you have everything you need in case the worst happens, and stay warm.
I’ve had some nice feedback on the blog post about Rafael and Carmen’s beautiful wedding. I greatly appreciate the comments, and glad everyone enjoyed it—especially Rafael and Carmen!
Raf was a little nervous about what I was planning to write. I mean, the only complaint is there was no complaint, am I right? I told him that it was not going to be a “hit piece.” That wasn’t my intention. Then I had to explain the term “hit piece” so Raf understood what I meant.
So let me tell you about the rest of our trip, finally.
Confession: Our Earlier Trip
In 2019, we took a one-day trip to Willis, TX, north of Conroe. We didn’t mention it because we weren’t able to visit anyone. It was a Saturday, and of course, traffic was typical for Houston any day of the week.
To keep this blog on point, I may describe it more in a separate blog post on its own. There were stops in The Woodlands, and a missed opportunity or two. But that quick trip influenced this five-day trip, including the planning.
So let’s go back to The Bayou City in The Lone Star State.
Friday, November 4, 2022
After a few hours’ drive and a couple of stops for fuel and coffee, we got to Beaumont and stopped in a Stuckey’s.

BF particularly enjoyed this one.
I’ll describe the snafu over lunch later, but one thing we did get was some delicious Tex-Mex in the Katy location of Chuy’s. First up, hot chips and salsa:

It tastes like home.
And an eyeful of the incredible colorful décor:

Isn’t that amazing?
And this:

More amazing decor, even though it’s brown
Because you don’t get this kind of décor in Louisiana. Seriously, nobody knows how to use color, and everything is so BROWN. Everything was a feast for the eyes, including this brown pattern:

Love this for the kitchen
This too would make a nice kitchen floor:

Or maybe in the back of the house
This is also incredible:

This amazing tile would also be great as a backsplash
I wanted to take it all home with me, seriously. There was some lovely artwork around, although I don’t remember exactly where they were hanging in the restaurant: 


Oh, what did we have? Me, a salad, BF, fajitas, which is a frequent order when we’re in anywhere Mexican.

But there was plenty for later in the evening, so no need to leave the comfortable hotel room.
Now to convince BF that just a little bit of this kind of color would go a long way in the Casa’s Cocina (kitchen) or anywhere in the house. I’m thinking of a nice backsplash.
Sunday, November 6, 2022
As I mentioned in the last blog post, we had breakfast the next day with one of the groomsmen from Austin. He and BF continued their conversation about the Texas Military before we said our goodbyes. The Katy Hampton Inn had wonderful amenities, and the staff was very helpful.

Lovely lobby seating
However, all we had time for was the free Wi-Fi and the wonderful breakfast spread downstairs:

The Breakfast Suite
It was available from early morning until about 10:00 am or 11:00 am with all kinds of tasty choices:


And delicious coffee and tea:


BF liked the idea of some freshly made hot waffles, but the seasonal Pumpkin Spice flavor didn’t appeal to him. As much as he enjoys cooking breakfast for us at home, he was happy that someone cooked breakfast for him this time. Well, except for his waffles, which he made himself in a minute at the breakfast bar.

He was really glad I booked us at The Hampton Inn.
Once we packed up everything, gathered up our luggage, and checked out of the lovely Katy Hampton Inn, it was time to hop back on the I-10/Katy Freeway and move on to Clear Lake, 50 miles away. On the trek down the Katy Freeway to the Gulf Freeway (I-45 South), BF began to understand why I booked the hotels as I did.
Heading South
Although we did get to see Neighbor E on this trip, it wasn’t on Sunday. I knew where our next hotel was, the Extended Stay on NASA 1. It is literally right across the street from NASA, where we planned to be tourists. (More on that later.) We were interested in lunch, and E suggested Rudy’s Real Texas BBQ in the area.

Simple and rustic
Well, it’s been seven years since I lived in Clear Lake, and so much has changed. This lovely place is in what used to be Pappadeux Seafood Kitchen, a “New Orleans-style” restaurant that was there until Hurricane Harvey took it out. Took a few harried calls with E, but he kindly and patiently told us how to get there. We were not disappointed.

Chicken!

Brisket! (Stairway to heaven, or enlightenment)

More chicken
It’s a friendly place with some really tasty barbecue.


Our Clear Lake hotel check-in wasn’t until later in the day, so we took our time at Rudy’s. After making another phone call, we headed towards Manvel, TX.
Visiting Aunt Ruth
Aunt Ruth lives in a little old-fashioned house with a big garage. She has a lovely outdoor garden area with lots of plants.


I so want to have a little seating area at the Casa de Rurale like this!


And a cute little kitty!

After reading and hearing about him for seven years, I finally got to introduce Aunt Ruth to BF in person when we visited her.

Finally!!
I haven’t seen her since leaving Boeing, I think, or maybe shortly thereafter. We’ve kept in touch, of course, but it’s just not the same thing.

Finally!
During our visit, Aunt Ruth gave me a piece of her Hummingbird plant, which I put in a water bottle for the rest of the trip.

The Hummingbird Plant
She said, “you can’t hurt it.” So far, so good, and it stayed in that water bottle for months. I put it in the kitchen window until I planted it in a paint bucket last fall.
After a nice visit, we made our way back to NASA Road 1, or NASA One as it’s now called, and checked into our room. It wasn’t like the Hampton Inn. There was a Hampton Inn down the road, and we could have booked it there, but BF didn’t care where we stayed. Wish I’d booked there, but, well, next time.
And I finally told her why I call her “Aunt Ruth.” Because she was always like the “aunt” in the office as was Aunt Kathy (who we also visited, keep reading.) So, they became “aunts” to me over time, along with one or two others at Boeing, even though we aren’t actually related. It’s nothing more than that.
Monday, November 7, 2022
We slept pretty well in the new hotel. We’d hoped to make a couple of other visits on Monday, but they weren’t available due to another commitment that week. Breakfast was, well, markedly different than our prior hotel:

Not like the first hotel, that’s for sure.
There was oatmeal, muffins, coffee, hot chocolate, and tea. Not much else. There was a Starbucks right next door, so I headed there for some egg bites. BF was OK with a muffin, and I got him some hot chocolate packets, too.
This was the day after the Houston Astros won the 2022 World Series. Lots of people had the day off from work and school, but we didn’t realize that at the time. With no other plan, we headed to the Houston headquarters of Swedishness, IKEA. It was about an hour’s drive from Clear Lake, just like I remembered.
BF’s Inner Swede
I wanted to take BF on a trip to IKEA as a “fact-finding mission.” In other words, to see what was there, what kind of thing is available, get some ideas for later, and of course, pick up a few small house things for the Casa de Rurale. It wasn’t a busy day, plenty of parking, and there were about as many employees as customers. If you’ve ever been to an IKEA store, you know how big the place is, and why it wasn’t crowded on a Monday afternoon. The best time to go is on a weekday, middle of the day.

I was so happy to see these again!
But first, we went straight upstairs for lunch in the café. We had our blue shopping bags with us, but still got the yellow bags and a cart. It was here that BF began his journey into getting in touch with his inner Swede:

He’s got *that* look
That look is everything, isn’t it? And we were greeted by this nice man:

Meet Keith
Saw all the wonderful things for lunch:

Everything on the menu

Closeup

Hot and fresh!
And the refrigerated case:


Doesn’t that croissant look delicious?
And desserts:

Delicious Swedish-style desserts
Ultimately, BF enjoyed some of IKEA’s famous Swedish meatballs:

While I went with the slightly safer salmon lunch and a salad:

And we might have accidentally picked up some chocolate desserts, too:

But we were on vacation, so that doesn’t count, right? Especially with all the walking we did that day.
The Zoo At the Casa De Rurale
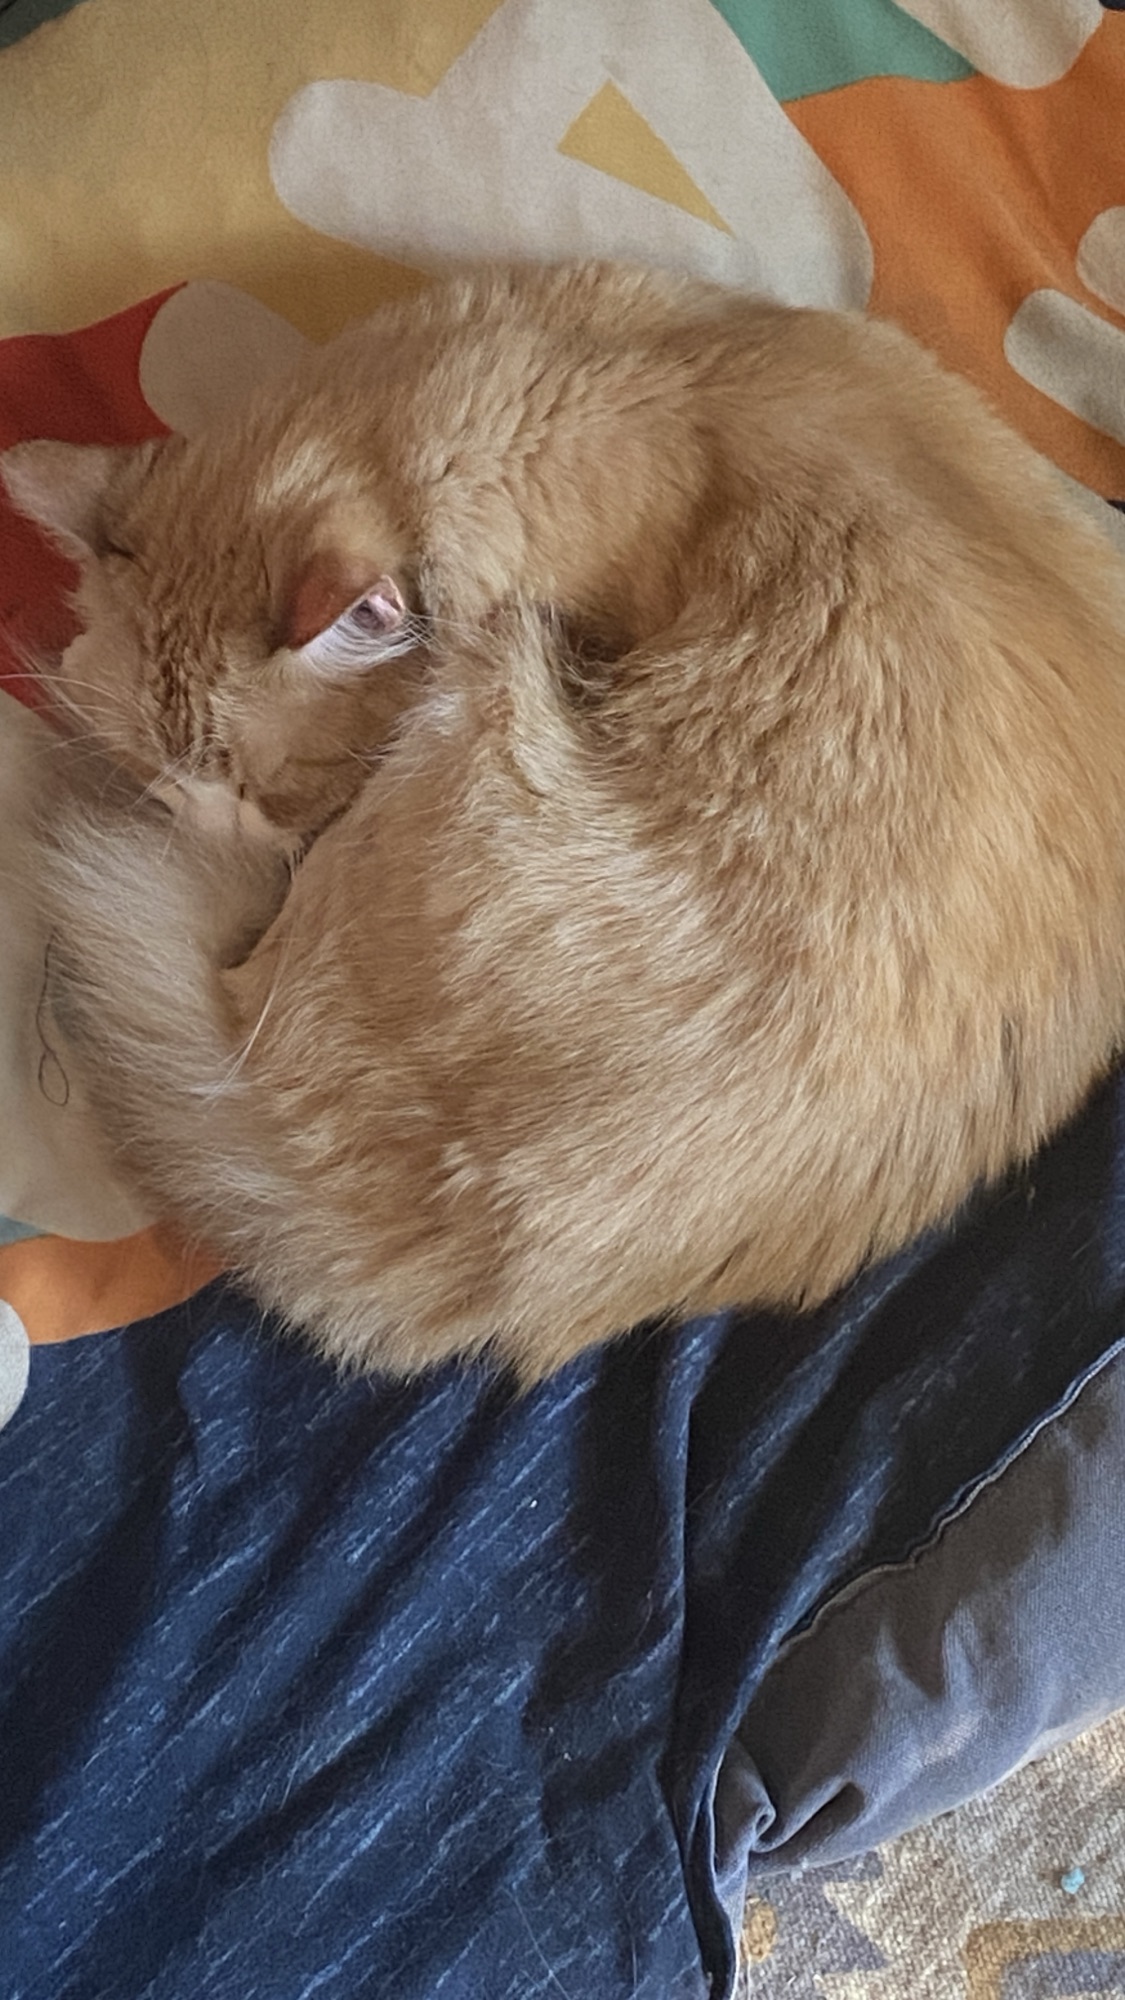
The whole time, our hired pet sitter sent us pictures every day of our zoo animals, like this one:

He’s still this weird.
Thankfully, the only thing that happened was that the power did go out on one occasion. She texted us and asked, and yes, it happens. The power was back on in an hour or two, and everything was fine.
Highlights From Our IKEA Shopping
One thing I wanted to look at was the china cabinets to house the stuff I’ve had since the 80s and 90s that’s packed and rarely been used. We didn’t buy one, but we could have, and we will later.

This one in white is the ideal. But I wish it came in that burnished red color.
The one I wanted isn’t big enough, and the one that’s big enough doesn’t come in the color I wanted. (The ones I see locally in stores and on FB Marketplace are, shall we say, not to my style.) We’ll get it eventually, right?
I bought my own Tarno patio set about 2006 or 2007, and used it frequently on the back patio at El Dorado Trace:

I miss sitting out on the back patio, but we’ll be using this set again one day.
Nice to know this is still around, and I still have my set, too. When I bought mine, it was $40 for the table and two chairs. No kidding. It’s in the living room, folded up. One day, when the patio is cleared off and it doesn’t look like an outdoor auto shop, we might be able to have breakfast or dinner out there when the weather’s good. I did buy a new set of cushions for it during our visit.
A few years later, I bought an extra chair one day when one of the original chairs lost a bolt. BF says he’ll fix that for us one day.

I want one!
This had a sign nearby that the dresser you see had been painted–customized, I think it said–and did not come with the Texas design already painted on. But why not?
I did purchase these for the kitchen, although they are no longer available at IKEA. They are a wrapped pair of canvas wall hangings, and I just love them:


They were a pair for an inexpensive price. Like many things in IKEA, they’re there and gone, so you need to get it while you’re there or you’ll miss out. I only found one pair on eBay, and they are much more expensive, especially since the seller is outside the US.
There were room settings and displays like this throughout the huge store:

BF particularly liked that style of table and chair.

So enviously neat
But there were some utility things I bought, too, like a few more of these small bowls and one of the medium-sized:

These steel bowls are awesome.
The smaller ones are great for storing little things in the fridge and for mis en place. Finally I have a few more.

I’ve had one of these small Koncis roasting pans for years, and finally, I have a second one:

The perfect size for a countertop oven or anytime.
We also found a small steel roasting rack for the barbecue so we can roast vegetables too.
I really, REALLY thought about getting yet another French press:

They’re lovely, but I didn’t need or buy any. This time.
But I didn’t. Nor did I get one of these, much as I wanted it and knew I’d never use it:

Isn’t it fab?
With rows and racks of wonderful Swedish kitchen and home things, it’s easy to pick up lots of wonderful things on your way out:

Nevermind how much we spent.
More Lovely Things
My eyes just couldn’t get enough, as I did before when I could go to IKEA regularly.

This wouldn’t last long at the Casa de Rurale with two prowling cats and a huge, rambunctious dog:
 Nor would this, lovely as it is:

This is actually a wall hanging, part of a set of five, I think. Much as I loved it, I passed, because I don’t think we’ll ever have a place for all that.

Isn’t it fabulous? I only wanted this one.
Still, I keep hoping that the neat, organized appearance of IKEA’s many rooms and room settings would inspire BF to become more of a neatnik. It hasn’t worked yet, but we keep trying.

The living room area could benefit from a credenza like this, maybe even two of them:

The dresser would look great anywhere:

Finally, BF embraces his inner Swedishness:

Fully in touch with his inner Swede now.
In all seriousness, it was indeed a long visit to this place, but he now understands why I think IKEA is a big deal. BF’s sister and her husband live in the vicinity of Atlanta’s IKEA and brought back many things for their father’s house, including furniture and supplies to do a modern renovation to the kitchen several years ago. Now, having visited and seen an IKEA store for himself, he gets it.
Guess what? I can go by myself one day, to either Houston or Memphis, no kidding. From the Casa de Rurale, I can drive five hours in either direction, right to IKEA, buy whatever I want, and drive back when I’m done. I can, but I just prefer not to go alone. It’s an all-day affair and involves driving ten hours if I don’t book a hotel. But knowing I can do that is great, even though it’s for another day. I’ve never been to the Memphis IKEA, but The E-Man has.
After 3.5 or more hours in the Houston IKEA, our purchases in tow, (just some small house things, no furniture) we walked out and back into the parking lot. Everything we bought fit in this bag, which they no longer sell.

Everything we need!
Stashing our purchases under the back seat, we considered our next move.
Top Brass Military
After that long visit to IKEA, BF decided it was time for him to do some manly shopping. A quick Google search told him that we were just a few miles from a military surplus store, which is his ideal shopping trip. So off we went.
You can imagine how much of a 180-turn this was, but I didn’t mind. BF likes to remind me that he took me to see both Downton Abbey films in the theater, watched one or two other movies he wasn’t interested in, and took me to other places like:
- Sur la Table (in Baton Rouge, once)
- Trader Joe’s (multiple times to Baton Rouge, once in The Woodlands, TX)
- Whole Foods
- Joann Fabrics
- HEB
- Five Below
- The Container Store (in Clear Lake, we went there, too, keep reading)
As well as other places unrelated to automotive parts and services, hunting and fishing, military surplus, high-end restaurants, and Walmart. Therefore, I owed it to him to take him somewhere he wanted to go. After departing IKEA, I agreed to this condition. Somehow, he knew it was there. A little while later, we pulled into the parking lot at Top Brass Military on the I-45 North Freeway, soothing his yearning for some manly shopping.
It was a bit of a ride from I-10 to I-610 North then I-45 North to get there, but we made it safely. I had to drive, because, well, it’s still “my turf.” Not only was it a different kind of treat, but it was also most interesting from the moment I put the truck into “park.” Top Brass is a place that is, shall we say, eclectic.

It’s that kind of place.
The Parking Lot
This is what they have hanging around outside:

And this:

And this:

I don’t know what this is.
Inside was an eye-popping display of all kinds of wonderful things, like this:

And this:

And this:

I brought home the top one, and it hangs on the door of the back room/office.
Mind you, these wonderful wall hangings were a bit out of our range this time around. I know BF wants to go back and get at least one of them. For now, we settled for a cloth Texas flag, which hangs on my office door, and a cloth Gadsen flag, which is currently without a place. But we almost bought a couple of these, too:

We found some great Navy Seabee things, too, which made BF as happy as I was in IKEA.
But if we’re going to Top Brass again in the future, there will also be a trip to IKEA. No getting around that, I don’t care if we do go to Top Brass first. That will be the day we go in a U-Haul, or rent one of their lockable trailers.
The Container Store
After leaving Top Brass, we headed south to our hotel. Back in Clear Lake, I asked for a trip to The Container Store in Baybrook Mall for a few things we needed. Yes, we did.
Clear Lake never used to have one, and I ended up going to the one in town or The Woodlands. The Baybrook Mall location opened two months after I moved away. I keep asking them on social media to open a store in Baton Rouge; nothing yet. (The Sur la Table store in Baybrook closed during the pandemic, along with Baton Rouge and others.)

BF walked around a couple of other places while I visited CS and met me when he was finished. Next door to CS is REI, the outdoor store, and Duluth Trading is at the end of the building, so you know where he went. (I didn’t make it into Duluth Trading but have bought from them online.)

BF’s only experience with CS was seeing Jay Leno talk about it one day on TV. Leno’s routine went something like this:
“My wife took me to the Container Store the other day. Have you ever been to one of these places? They sell empty boxes. No kidding, they sell empty boxes. I saw one woman opening different boxes. I said to her, ‘Ma’am, I’m pretty sure that one’s empty too.’”
This is what BF had in mind when I told him I wanted to go. He had no exposure other than that routine and some things I ordered online three years ago for the house.


While BF was elsewhere, I looked and soaked in all the storage and organization solutions, picking up a few small things and sending him pictures of the storage solutions. But there was one item we needed and I’d planned to get from Amazon: a container for spaghetti with a built-in portion measure. I asked for it, and they showed it to me.

The answer to your pantry prayers!
Really, it was a “shut up and take my money” moment. BF had a huge round container in the pantry since long before I got here. It took up way too much room, was not airtight, and he cooked too much spaghetti at once, usually the whole box. Then he wondered why he was out of spaghetti again. THIS fixed that problem.

Much better.
It’s easy to measure and make one, two, or three servings, you see what you have, and the top gives you exactly what you need.

Really–cook just the right amount with no guesswork.
This one also holds a few boxes of spaghetti neatly with a small footprint in the pantry. Immediately, I washed it, let it air dry completely, and filled it with his spaghetti. Now, BF cooks just enough for one serving, or two if he’s making some for lunch the next day.
Of course, my honey did not initially see this as a necessary purchase. But since I brought it home and deployed it, he understands why I bought one and agrees that it’s a good thing.
I also got this Angry Mama microwave steam cleaner (which CS no longer carries.)

I know, it should have red hair.
And, honestly, it works great. I thought I picked up the one with red hair, but got the blonde model by mistake.
Lucky me, the cashier in CS was a very nice lady, and after talking about my accounts (I had two), it turned out that I had a $10 coupon available to use. Nice! When you’re signed up for their loyalty program, both online and in-store purchases are recorded in one place.
Back to the Hotel
Once we made it to base camp, I contacted Aunt Kathy, and we arranged to meet up for dinner at. . .Denny’s. No kidding, Denny’s on Bay Area Boulevard, near the Boeing building. I thought of Denny’s because it was close, and we could probably hang out there for a while and nobody would care. I was right, they didn’t care, and we had plenty of time to catch up. There were only a few folks out that night, and the place closed at midnight, so we stayed and chatted for quite a while.

Finally got to see Aunt Kathy again. (Not the best picture, I know.)
I haven’t seen Aunt Kathy in many moons, and I was so glad to see her. And, Aunt Kathy also got to finally meet BF, who was his usual jovial self. We talked about everything, just like we did before. Very glad we got to meet up, even if it was Denny’s. Never discount places like Denny’s, you know?
Before we returned to the hotel, we ducked into Kroger on El Dorado, a couple of miles from Denny’s to grab some frozen breakfast for the next morning. Oatmeal packets weren’t going to cut it this time.
Incidentally, I still have an active Kroger account, and I can order goods to be shipped here. There is even a record of that grocery trip on their website, including everything we bought that night.
Tuesday, November 8, 2022
We decided to go across the street and be NASA tourists. I’ve been to Space Center Houston a couple of times myself, but BF hasn’t had the opportunity.

We were ready! It was right across the street from our hotel, too.

Well, it will have to be next time. There was a power outage in the area, which included NASA and our hotel. So, we had to pass up being space tourists. But we took a few pictures:

That’s actually a mock-up of a shuttle.

It was warm that November day.


We had already arranged to meet with Neighbor E later in the day, so we had some time on our hands. Lost for ideas, I took BF to my favorite Half Price Books store off NASA Road 1.

One of my favorite places, and favorite websites, too. (DARNIT!)
Oh, the hours I’ve spent in that store, and in its previous location on Egret Bay Boulevard, where they had a resident cat. We prowled through the shelves of books, DVDs, and music, picking up a few things to take home. That included one of their branded reusable shopping bags.
Since moving here, I’ve bought some books from the website, including recently. But it was great to be there in person and spend a little time looking for new and interesting things. Not much has changed except the people and the stock.
We also stopped in the shiny new HEB located on Eastfield near I-45 in Webster, just a couple of miles from El Dorado Trace. We made two trips here during our stay.

It’s everything an HEB needs!!!
Darn it! I always wished they would put one closer to us in the twelve years I lived there. When I moved there in 2004, that tract of land was grass. Now it has high-end apartments, a Costco, lots more stores, and of course, this new HEB, along with a large increase in traffic. I wanted to see the place and do some shopping for the Casa de Rurale.
This store is smaller than the one up the road on Clear Lake City Boulevard, but just as fantastic. Oh, the lovely things they had this day:

They still make incredibly beautiful cakes.
More cakes:

Chocolate!
And one for the Astros:

Baseball, anyone?
All manner of tasty things:


Some of the produce section
TAMALES!

Everything screams, “Take me home!”

You never have to cook again!


All the coffee and tea you could ever want:

Coffee anyone?
Have you ever seen a six-pound round of queso fresco?

This very nearly made it into the basket!
The most I can get here is a three-pound round if you’re lucky.

One of my favorite cheeses. It would have lasted me a while. Maybe.
You have no idea how close I came to buying $36 worth of cheese in one piece. And I’m sure Aunt Kathy is laughing at me as she’s reading this.
We have new baskets at Winn-Dixie but they’re definitely not like this:

Get a load of this baby
I know, I know. . .it’s getting better here, slowly. But I really would do a grocery run at least to Orange or Beaumont to shop at HEB more often.
Texas Decor
HEB also has wonderful Texas décor:

It’s made by a company called Timber Image, and I now follow them on Instagram.


I can’t tell you how much I wanted to load it ALL up in the truck, along with these lovely things:


I’m not sure who makes the rest of these, but I would definitely make room for them:

One day I’ll have the Texas star on the front of the house. I don’t care what BF says.


Because Texas. Of course, I couldn’t leave without this very fashionable item:

Isn’t it fab??
To wear every Christmas until either it falls apart or I’m gone. (Yes, I wore it this past Christmas, too.) The picture doesn’t show the true color, it’s a bit off. In front of you, the color is absolutely beautiful.
Of course, being in an Extended Stay, we also had a small but complete kitchen. We bought some of HEB’s ready-to-heat meals, including breakfast. This way we could have meals at the hotel instead of heading out to Starbucks or somewhere. It was perfect. Hampton Inn also has a fridge and microwave, but not a full kitchen like Extended Stay.
Lunch with Neighbor E
We finally got to visit Neighbor E today after seven years of being away. Since (reluctantly) moving here in 2016, E and I have talked on the phone, even had a Zoom call once, emailed, texted, and messaged on Instagram. We can do that anytime and do that too. But after seven years, BF and I were very glad to visit with him in person.
When I called him, Neighbor E suggested meeting at La Madeleine, which, thankfully, is still in the same place on Bay Area Boulevard, right off I-45.

Still there, even though so many other spots in that strip mall have changed.
BF has never been to La Madeleine, but he acclimated just fine. But the best part was getting to hang out with Neighbor E for a little while.

We had lots to talk about. Didn’t get pictures of what the guys had, but I had this wonderful cool salad:

E’s retired now, sort of, and he goes out to different Houston eateries with his sister D. I’m thinking about a blog post on their travels.

I hugged him before we left, hoping we’ll get to see each other again one day.
Before heading back to the hotel, I took BF on a short tour of a few places in my old stomping ground, like the Freeman Library I loved to visit:

Another one of my favorite haunts. We didn’t go in, though.
And a quick trip by the Boeing building, which I’m told is quite less populated than it was when we worked there:


We also stopped at Dunkin’ Donuts on Bay Area Boulevard, where used to enjoy visiting for free and discounted iced coffee after they opened. I even rode there on my bike occasionally, putting the cup in the attached cupholder. But as E said, they aren’t a great place to visit anymore. The kid at the counter said they didn’t do decaf iced coffee. Even the ones here make it, but. . .I guess he was busy with something else. We left and never returned. I’ll stick with the one in Covington, if I ever go down there again.
I was disappointed to discover that Café Express was gone from Clear Lake, and only the in-town locations remain. They had curbside delivery back when I worked at Boeing. I’d occasionally order online and pick up on my way home when I was just too tired. You just ordered on the website, paid for it online, drove there, called them from your car, and they brought it out to you. They had the best sweet potato fries and a Ceasar salad that was just awesome with grilled shrimp.
Starbucks on El Dorado and Gatebrook
Then there was another Starbucks visit, this time in my old neighborhood. It’s fairly new, and opened in the last year or so I was there.
Long before I moved here, I wanted to get the Houston version of Starbucks’s “YOU ARE HERE” cups. A stop at the Starbucks on El Dorado at Gatebrook, a couple blocks from El Dorado Trace, took care of that wish.

Finally!
They only had the “Texas” mugs on display, and the nice barista dug into the cabinet to find a “Houston” mug for me. Greatly appreciated, and I got exactly what I wanted. That location was great for the occasion that I wanted to get out of the condo but not really go anywhere. Free refills on coffee, and I could camp out at a table all afternoon.
I’ve used the cup only once but kept it in the box out of reach for safekeeping. Many thanks to the nice barista who went and found it for me.
Wednesday, November 9, 2022
BF and I began packing everything up Tuesday night, leaving out just what we needed for the next day. Before heading back to the hotel that night, we got some dinner and frozen breakfasts from HEB. We made our plans, and after breakfast and checking out, stopped to see my friends Dave and Holly, about three miles from the hotel. I sent Dave a picture of us and told him we would see him in the morning. This was unplanned but necessary.
Tuesday night I got a message on Facebook Messenger from Dave. He liked to occasionally send me messages just to say Hi. I met him in about 2008 or 2009, and then after he married the very nice Holly, I visited them occasionally. Dave had cancer a couple of times, and this time, it wasn’t letting go. He had been ill for a while, and made repeated trips to MD Anderson Cancer Center.
Somehow, I’d forgotten to get in touch with Dave and Holly beforehand to see when we could visit. Well, he must have known to text me, and I’m forever glad he did.
So, I told BF Tuesday evening that before leaving Houston, we had to go see Dave. “Dave who?” I explained briefly, and that he would understand when we got there. Their house was on the way, and we would see them before heading to HEB, Buc-ee’s, and eastward on I-10.
Visiting Dave & Holly
After texting Dave that we were en route, we rang the doorbell and he answered. BF understood immediately. He had an oxygen tube, which I knew about. We were also greeted by their three Dachshunds (aka “wiener dogs”) and they took over BF’s lap. We stayed a couple of hours with Dave and Holly, who gave us some old dog toys for Broccoli Stirfry to destroy. (He did, one at a time, we didn’t give them to him all at once.)
Dave didn’t get many visitors anymore, and he couldn’t go anywhere. Except the hospital of course. In December he went back to the hospital for a couple of weeks and was released right before Christmas.
On our way out, we chatted with Holly on the front porch for a few minutes, then saddled up for the trip home. Holly thanked us for stopping by to see him and said Dave was glad to see both of us. I wanted to bring something to everyone, but I didn’t know what. Especially for Dave. What’s he going to do with a package of jambalaya mix?
On January 6th Dave posted on Facebook that he would be going into hospice. Three days later, Dave passed away on January 9th. Holly posted the announcement on Facebook. It’s been a year since Dave passed.
I’m really glad we made that visit.
Leaving Houston: The HEB Stop
The main purpose of stopping at the new HEB near El Dorado on the way out was to get some pantry staples and two delicious dinners for when we got home. That is, some of their wonderful chef-prepared Meal Simple dishes to heat and eat after driving for 6 hours.

I think this was BF’s

Or maybe this was his, I don’t remember.
Both were equally good, and there were no complaints. Besides, it’s less or equal to what we would have spent in a restaurant, and we could eat at home in less than half an hour. We don’t get this kind of thing in rural Louisiana, that’s for sure.
Because we like tamales, I also picked up a package of their Mi Tienda brand beef tamales, which we enjoyed later.

These are so good, and are not hot at all.
There are a couple of cold bags in the truck to keep things like that from spoiling, and they worked perfectly for the trip.
But being in HEB, I could not resist walking around and looking at everything–again. It’s a much smaller store than the big Clear Lake Marketplace. We had some delicious samplings, talked to the in-store sommelier (no Red Truck Wine anywhere), and bought mostly dry goods. I finally got more decaf espresso to make cappuccino, too. (It’s in the freezer.)
We talked to so many nice people in HEB and saw all kinds of lovely things. Many of those were also available on my recent trip to Orange in August. But I couldn’t take the whole store home, just enough to get us to the next visit.
Buc-ee’s on the BEAST
That’s the Baytown East Freeway if you’re not familiar with the area. It’s also known as I-10 east towards Beaumont. Houston’s freeways all have alternate names, and you must know them to get around the city. If you ask directions, someone’s going to mention the Katy Freeway, (I-10) the North Freeway, or the Gulf Freeway. (I-45 north and south, respectively.) Don’t forget the Sam Houston Tollway, aka Beltway 8, one of three concentric circles around the city.
Of course, no trip to Texas would be complete without a stop at the world’s most expensive rest stop: Buc-ee’s.

“If you know, you know,” or as they say on social media, #IYKYK. It’s right there on I-10 in Baytown, and there was no way I would pass it up, anyway. Well, we needed petrol anyway, and, well, maybe one or two other things, too, plus some lunch, and I needed coffee for the drive.

Keto and good!
These are not available here, but their Super Coffee product is. I haven’t pursued finding any since we returned. It is made in Austin, is keto, and contains MCT oil. It was great, but I couldn’t get any to take home. Next time.
If you’ve never been in Buc-ee’s, well, it’s big:

We needed some food for the road, and there was plenty:


Yeah, well, we actually did have real food before we started looking at this stuff, honest. We got some delicious Texas brisket.
There was more Texas décor:

Nobody understands the “Farm Road” outside of Texas.

If you want to learn more about the FM Roads in Texas, a/k/a the “Farm To Market” secondary highway system, there is a short explanation on Galveston County’s website.

Many incredible paintings:

Never seen such a regal-looking rooster, have you?


All kinds of Texas things that you know you need:

I should have bought that backpack!

BF would never wear this, no matter how cold he was.
Souvenirs from El Arroyo, Austin’s last queso stop before a bunch of yoga studios:


I see their funny signs posted on Instagram, and was thrilled to get a coffee cup and fridge magnets:

These lovelies grace our fridge.

Naturally, I drink tea out of this one.
I’m still regretting not buying one of these blankets:


I’m sure there will be another time and another trip, right? Or we can just make a day trip to Baytown to shop at Buc-ee’s. Because there’s nothing like it, anywhere. Again, IYKYK.
Heading Home: Back to the Casa
Leaving Buc-ee’s, I said goodbye to my home of 18 years. It’s now home to so many others that I hope appreciate Texas as I do. We had an uneventful trip after that and stopped a couple of times for petrol. The rest stop on the Louisiana side of the Sabine River had some coffee for me and Coke for BF and included warnings about alligators. That’s OK, I stayed inside the building.
We pulled into the Casa de Rurale driveway at about 7:00 pm, and it was much chillier at home than Houston was that morning. I didn’t mind that part after a few days of summer heat in November. The dogs were happy to see us, and the cats were, as always, indifferent. The pet sitter left the key on the table by the door, and we gave her a good rating. We picked up several days of mail and looked around at the damage from Broccoli Stirfry, which was considerable. Other than that, everything was just fine.
I called my “aunties” and let them know we were home safely back at the Casa de Rurale, and texted Neighbor E as well. BF’s brother stopped by a little later, and they had a chat about everything. He looked in on the dogs in the evening, let them out and kept watch while we were gone, in addition to the sitter we hired. They talk and text all the time. But after we got everything out of the truck, well, then it was time for unpacking, laundry and cooking our delicious HEB dinners. I let them have their conversation while I took the laundry to the back room. That was when I took the fringe off my designer cocktail dress, set it aside, and tossed the dress into the wash.
The next day BF went back to work with plenty of stories to tell. I posted on Facebook the next day that we’d gone and that we made it home.
Downsides
A few things kind of went sideways, none of which had anything to do with Rafael and Carmen’s wedding. The weather was beautiful and cool for the wedding. But being Houston, it warmed up the next day, and I was a bit overheated. Especially in IKEA, where they didn’t seem to have the A/C running. I was in long pants and sleeves, but took some summer things too, thank heavens. I drank plenty of water, that’s for sure.
The intent to visit a few other folks didn’t happen, and we couldn’t visit everyone. Two intended visits had other engagements and were unavailable. Another is one of BF’s Navy buddies from his Iraq tours. For years, he’s told me that this man lives in Katy. So, we made plans to have lunch with him at a local restaurant on the first day. Unfortunately, over the roar of an engine at 75 mph on I-10 West, I didn’t hear the man say he lived in Baytown, which we could have made easily. BF didn’t speak up, either, until we got to Katy and landed at the restaurant there. Next time, we get an address beforehand.
We Still Had A Great Time
Our hired pet sitter kindly sent us pictures like this:

There he is!
It was overall a good trip, and I’m so glad we finally went. Thanks to everyone who agreed to meet up with us, and apologies to the ones we didn’t get to visit. We’re hoping for another Houston trip one day and to meet with folks we didn’t get to see the last time. Maybe we’ll even make a stop at Central Market. And if all goes well, we will visit Rafael and Carmen, too.
Still, there’s more to come on the blog, with a few posts in the draft folder now. Here’s to more informative food topics in the new year that shape our world and keep us fed.
Happy New Year!
Now that the holidays are finally done and dusted, turn on your favorite Spotify playlist, and let’s get back on track. Happy New Year!
Hi, Again, Dear Readers:
Mail carriers, UPS drivers, and others who deliver packages are glad that the holidays are over and we can all get back to our normal lives. I thought I’d drop in and do a quick blog post to say Happy New Year! Because the last year wasn’t all that great, and neither were a couple of others.
I’m almost finished with the second blog on the rest of our Houston trip. . .in 2022. Now it’s 2024, I just need to upload it and install the pictures, which are minimal in this blog.
In With The New. . . .
Don’t give me that “New Year, New You” stuff. It implies that there is something wrong with the current or old you. Unless there is something badly wrong, you don’t need to “fix” anything, just make some adjustments to get what you want. Admittedly, that comment sells a lot of products to the American public, doesn’t it?
Yes, it’s 2024, and there are all kinds of things to help you with your “New Year’s Resolutions!” That would not be me, of course. If you want to clean up your diet, which is always a good thing, I’m always going to try and find (and make) healthy food for us. Sometimes you’re out or on vacation and that goes by the wayside.
Most of us know that resolutions usually last from one to six weeks into the new year. Few people actually accomplish them as intended. But it’s not for lack of trying for a few days. Real life comes back with a vengeance and throws the proverbial bucket of cold water at you. Then, that new routine you’d planned just doesn’t fit. Or whatever goes wrong. Been there, done that, as we all have.
Reading And Exercise Are Fundamental
One of my actual real resolutions is to read more this year. I have a couple dozen books stacked on my coffee table that I want to get through. Included is Suzanne Somers’s last book, A New Way To Age. I bought it and several more recently after watching AWAI’s annual Copywriting Bootcamp. These were books either referenced or written by the speakers. I have others I’ve bought elsewhere, and they’re all mostly business books. I also want to go back and watch the replays of several of the sessions.
During a recent power outage, I managed to finish reading two books that I’d already started. They weren’t terribly long reads. The first was one for copywriters and their clients by Kim Krause Schwalm, and one was on ChatGPT, which I’m still learning. But I want to make sure these books don’t just collect dust, I need to know what’s inside all of them.
It’s also a good time to get back on my previous resolution, the Sunny Row & Ride #077, which happens to be under $100 at the moment.

It’s a great piece of equipment. . .when I use it. (Source: Sunny Health & Fitness website.)
I’m not saying you need a Row & Ride. (They actually have three versions of it now.) I wanted one for myself after seeing a commercial for something more expensive, and I’m glad I bought mine. Sunny Health & Fitness is a good company, too, and has its own YouTube Channel with free workouts that don’t all require equipment.
Getting Fit Isn’t Expensive
You do not need to join a gym or spend too much money. Remember:
- If you have a bike, you can ride it, even in the house with a bike trainer stand in front of your TV. Mine came from eBay several years ago.
- If you can move and have sidewalks or other available safe amenities in the area, you can walk.
- If you can’t walk, or have limited mobility, even light weights are good for strength training.
- An inexpensive bike pedal exerciser is also great for getting movement. Walmart has these too.
- YouTube has millions of exercise videos for every level of fitness, most for free, just find what works for you. From gentle yoga to the most difficult weight and kettlebell workouts, it’s available 24/7 at the touch of a button. Pick one and start. Don’t like it? Find another one and save it–the choices are endless.
- Your local public library likely has exercise videos you can borrow for free to see what you like, whether it’s yoga, Pilates, weightlifting, kettlebells, or anything else. This is especially true of the Freeman Library in Clear Lake, where they can get you seemingly endless things on VHS, DVD, and on-demand online. For many libraries, you can request them online and pick them up at the counter.
Amazon is the perfect place to research something you’re thinking about with info from both the manufacturer and people who bought it, even if you don’t buy it there. Furthermore, you may find something equal to the thing you’re considering but a less expensive model. That’s how I came across the Row & Ride. Heck, Five Below has plastic push-up stands for $5 right now, just like these from Amazon for $10.
Just make sure you don’t buy something with which to hurt yourself. Self-inflicted injuries are not a great way to start your new year.
Buy Sustainable, Buy Used
If you want a new exercise bike or other fitness equipment but don’t have a big budget, check out Facebook Marketplace, Craigslist, (exercise care with these, and don’t pay in advance) eBay, or local thrift stores run by nonprofits.
People buy things with the best of intentions, and after dusting them multiple times, eventually want them out of the house. Some have been used once or twice, just like sewing machines. Now’s a great time to score something for less than you’d pay retail for new, and help someone clear out their space or who needs a little post-holiday cash. Use Amazon as a research site and go from there.
Sitting too much and being sedentary just isn’t good, because one day moving might not happen anymore. I was told that a long time ago by a lady right after her knee replacement.
Motion Before Motivation
Sometimes you’ll hear someone say, “I’m trying to get motivated.” Or someone is just sitting and waiting for the motivation to come to them like this woman waiting forever for divine intervention. Well, you could be waiting for years for that or to get motivated to do something. I have a suggestion: just get started and the motivation will come to you.
How I know this is a self-help book I need to re-read myself: Motion Before Motivation by Michael Dolpies. Someone mentioned it one day in a Facebook group for copywriters, and I bought the book on February 2, 2016. (Thank you, Amazon for that bit of data.) Get started doing it, whatever it is, and the motivation will come. That’s the theme, although there’s a little more to it than that. Just pulled it from my bookshelf and will be adding it to the coffee table stacks.
If I had one of those fancy, expensive Peloton bikes with a book rack on it, I might be reading it on that. Truth to tell, you can find an exercise bike for much less—even Aldi has a foldable one for under $75.
Our Holiday Week
We’re still here and getting on each other’s nerves, as I like to tell people. For Christmas, I made BF some comfy pajamas out of a modal knit I found at Girl Charlee Fabrics called Unimpressed Bear:

They came out great, and he loves them.
They’re warm and comfortable, although I need to take the pants up a little for him. When I saw the fabric in July, I knew it would become pajamas for him, because he hates cold weather. It didn’t last long–right after I bought some, it sold out completely.
Otherwise, our holiday period wasn’t always joyous. Many things went sideways, and I ended up throwing in the towel Christmas Day on cooking after two finger cuts, a burn, and a hard nibble from TigerCat, aka, furry little terrorist.
TigerCat And Broccoli Stir-Fry

There she is, a little puddle of fluffy orange fur.
Twice, this orange beast walked outside on her own for a grand adventure.

Isn’t she so cute? She’s small and fast, too. I was hoping the open window would get her back inside.
The first time she stayed out all day, roaming the property like the Norwegian Forest cat that she is, with Broccoli Stirfry keeping a close eye.

BF was going to try and catch her when he got home. He texted me when he was leaving work, and asked me to bring the dog inside. When I did that, she walked back into the house with the dog like she was returning home from work.
Yesterday, she slipped out unnoticed while I was dealing with the dog. When she discovered it was cold, about 32 degrees, she loudly howled at BF to be allowed back inside. We think she was outside two or three hours before he found her on the patio.
Back To Cooking
Anyway, BF finished the Christmas Day cooking, and we ate that afternoon. I didn’t bake any cookies this year, either. Plans for a keto copycat version of Starbucks Cranberry Bliss Bars also didn’t happen. I may do that next week because I have everything I need, including the Sugar-Free Dried Cranberries that I made in the Dash dehydrator.

You can do this yourself, the recipe explains how, either in the oven or the dehydrator.
And I didn’t get a real CBB because three different Starbucks stores I visited said they sold out of them very quickly long before Christmas.

Blog post on this one of these days too.
Dash’s entire website is 20% off sitewide through the 7th if you’re interested in one of these or any of their other little appliances (code “NEWYEAR.”)
Our New Year’s Eve involved some cocktails (he had no alcohol), some delicious cheeses, and crackers in front of the TV. But that’s OK, too, we had some nice quality time on New Year’s Eve, and we both enjoyed our cocktails. Need to find more drinks like that.
Out With The Old. . . .
Everything changes, yes? Sometimes it happens in the new year, sometimes it just happens.
I mentioned that we had guests for Thanksgiving, following a visit in July. Both times it was someone from Houston I know for a long time. Well, they won’t be returning, like, ever, nor appearing in this blog again.
On New Year’s Day, I received a text message from Miss Alice, visiting relatives in Florida, telling me that she did not want to continue our friendship. Like she was canceling a Netflix subscription. I said, “OK, Good luck” and proceeded to ensure that she would not see me on social media or my phone number again. Didn’t think fast enough to say “Bye, Felicia.” She’s not on the blog email list, and I removed her email from the back end of the site. However, there’s no stopping anyone from locating and reading the website and blog on the open web. Not that I care, really, and I doubt that will happen. Good luck, God bless ya.
BF has been very supportive since we saw this stunning text. Conversations with The E Man and nearby friends J&B reminded me that I do have friends like them, plus Rafael, Aunt Ruth, Aunt Kathy, and so many others. YouTube videos by funnyman Jeff Dunham also helped.
One thing I’m thinking about in the new year is to either start a new blog or a podcast and call it, “What The Hell Is Wrong With You People?” BF and I read and hear so many stories about people who may not qualify for the Darwin Awards but show that they could indeed be in the running. Finding one person to highlight for a weekly podcast would not be difficult, just read the news. I’ve already downloaded podcasting software and tested it, so don’t tempt me.
It’s Coming, Honest
The pictures are what will take the longest to finish up the blog on our trip. I hope you’ll see it as worth the wait.
Meantime, we go forward in the new year because there’s no going back, not yet. If there was, I’d be heading back to my 16th birthday with some serious warnings to my younger self.
Happy New Year!!